
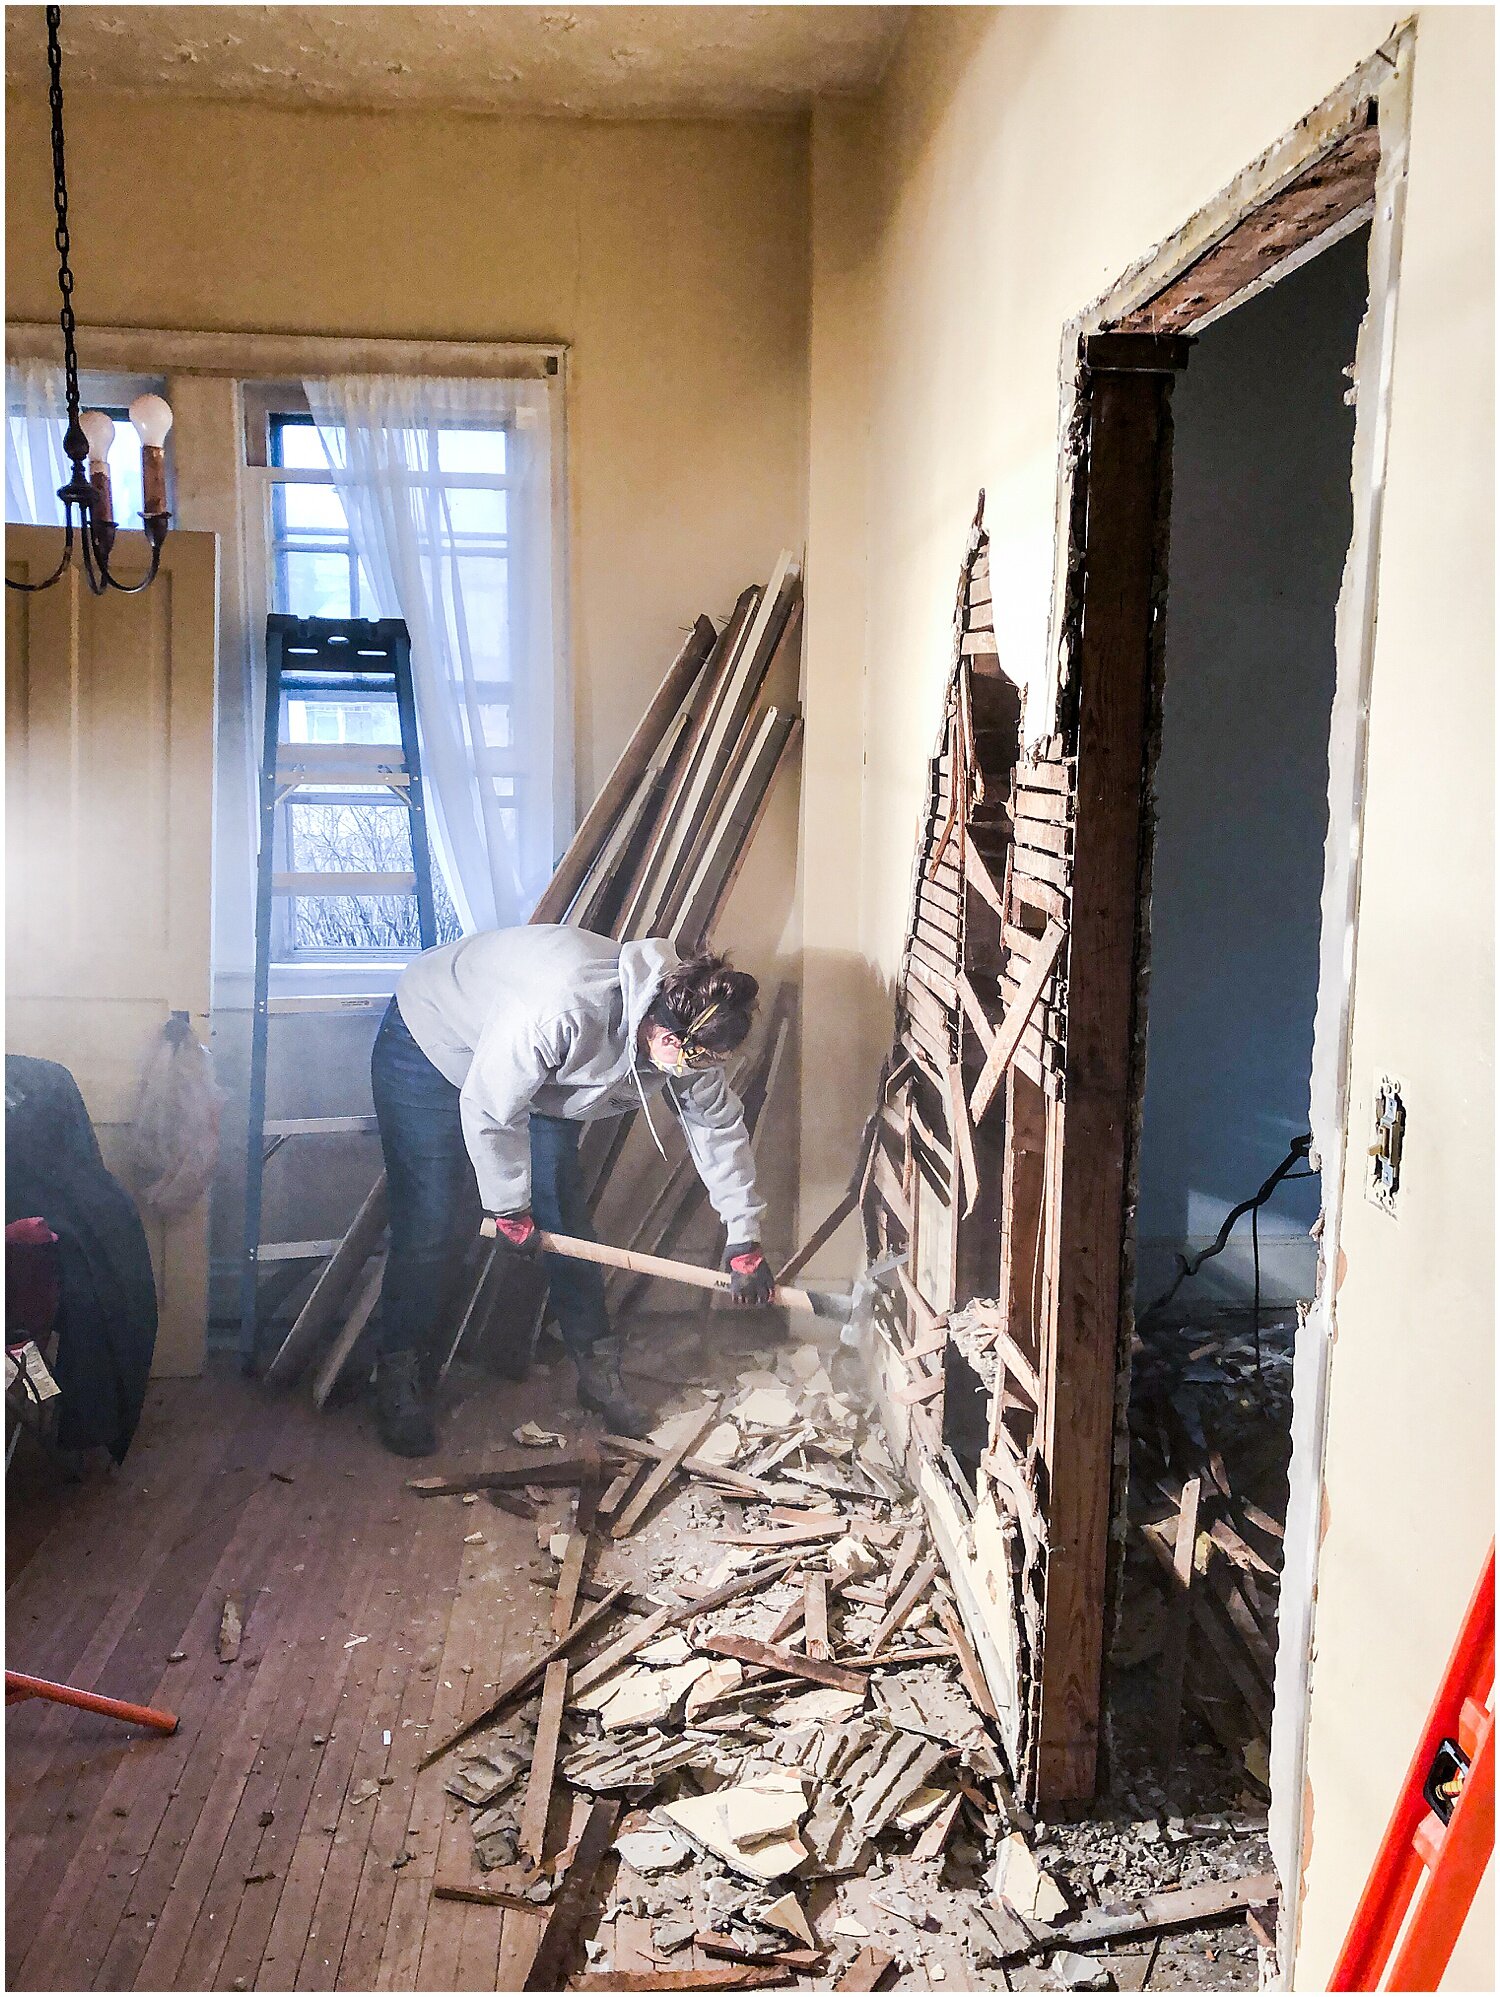
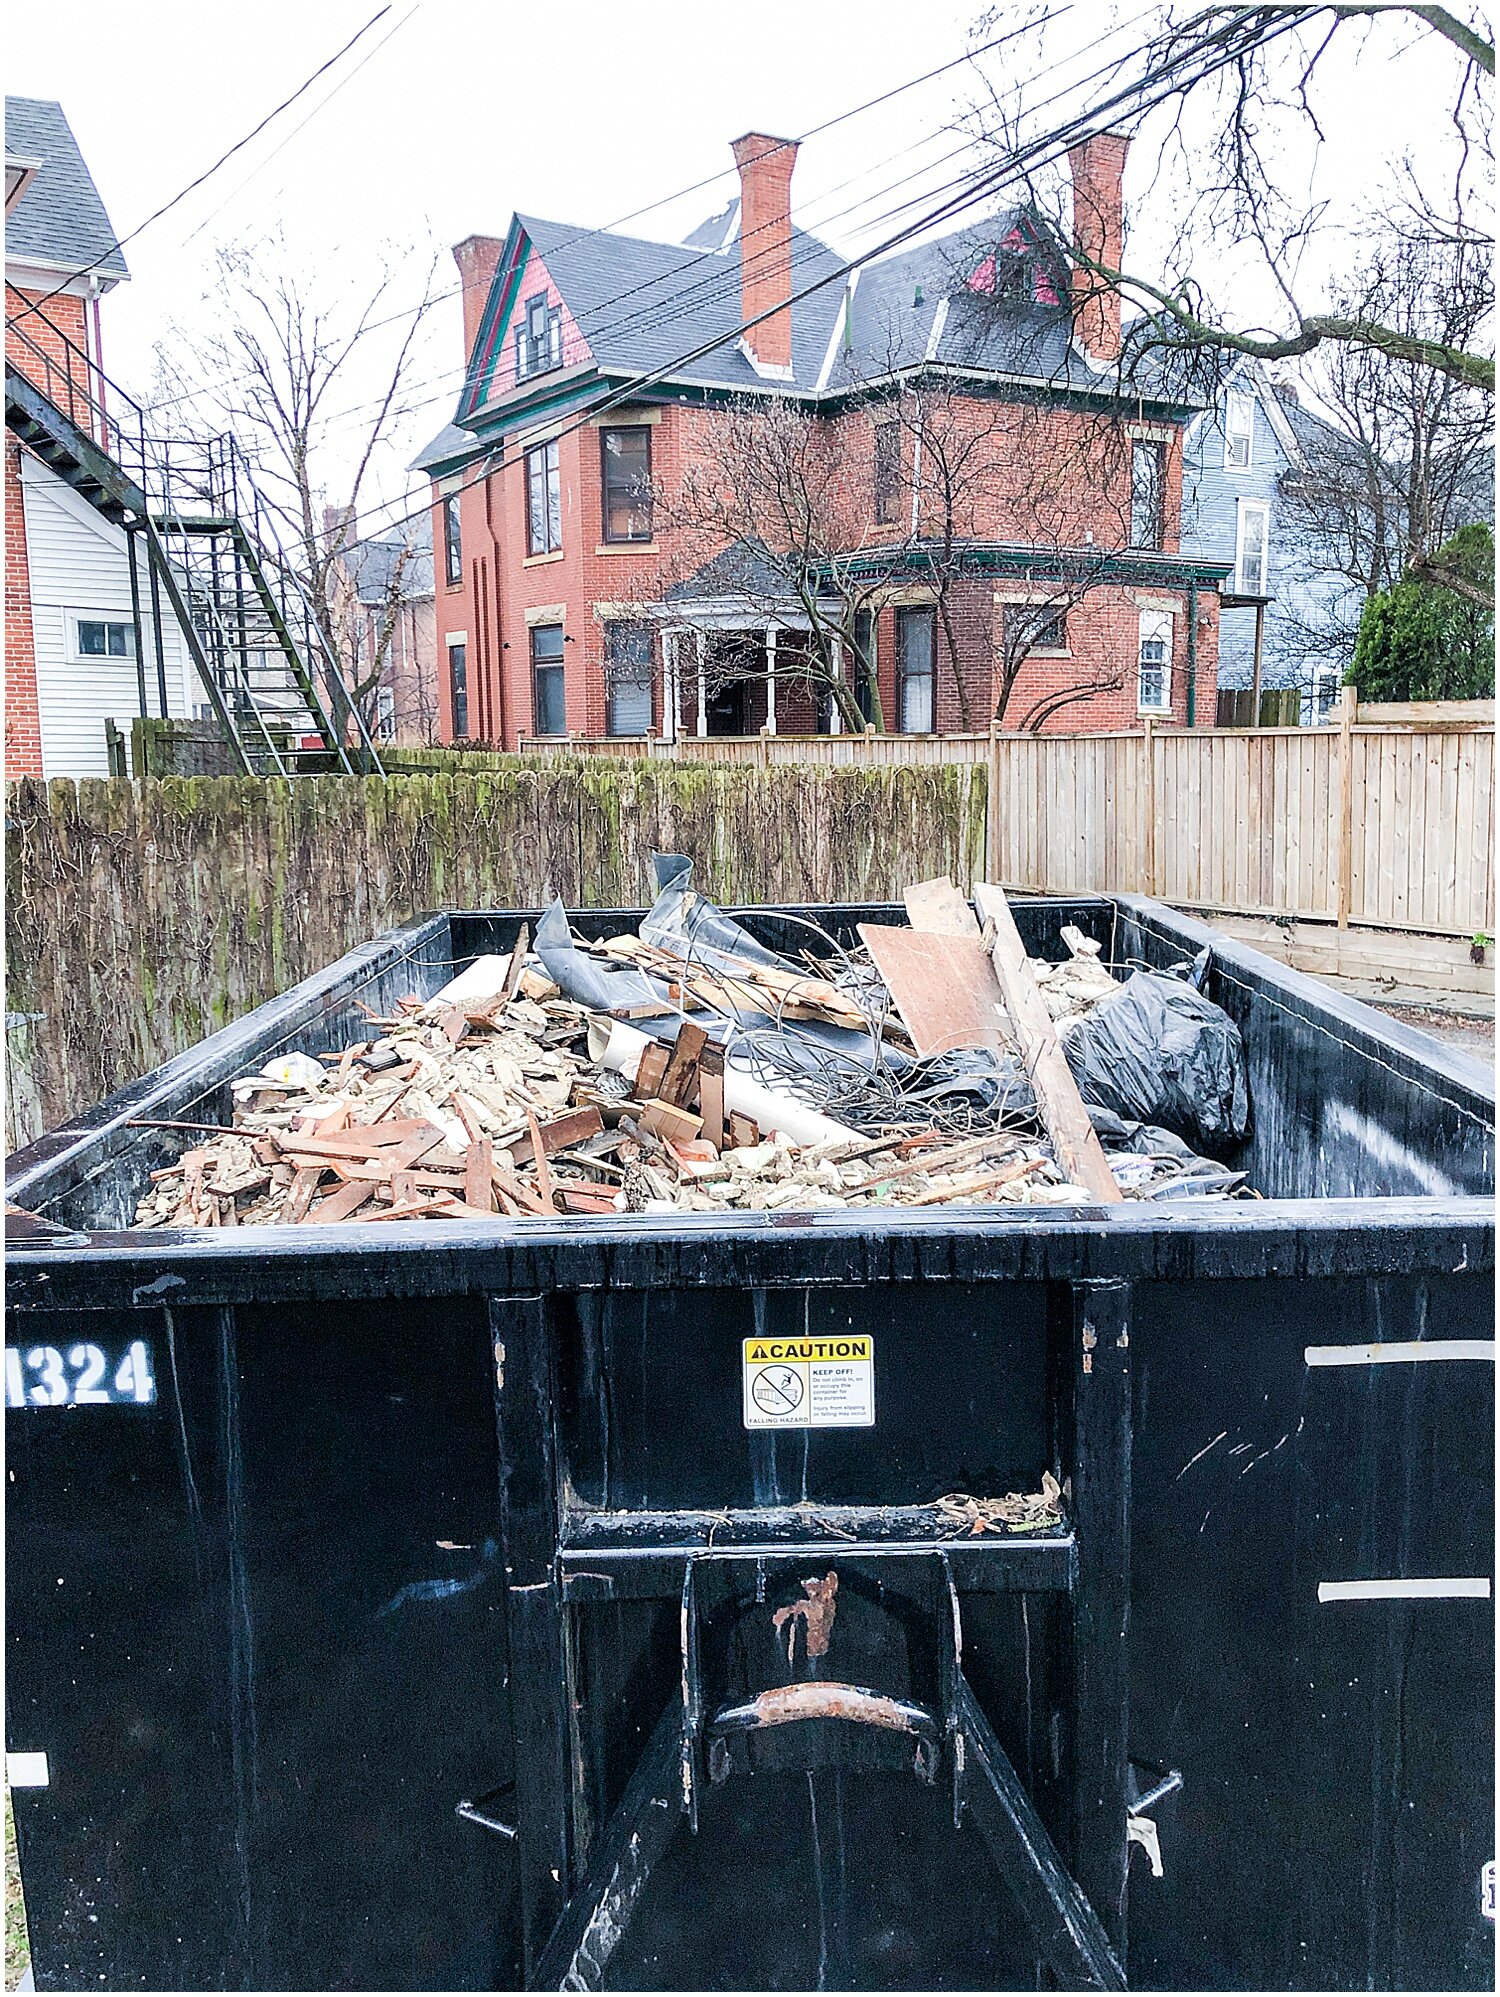
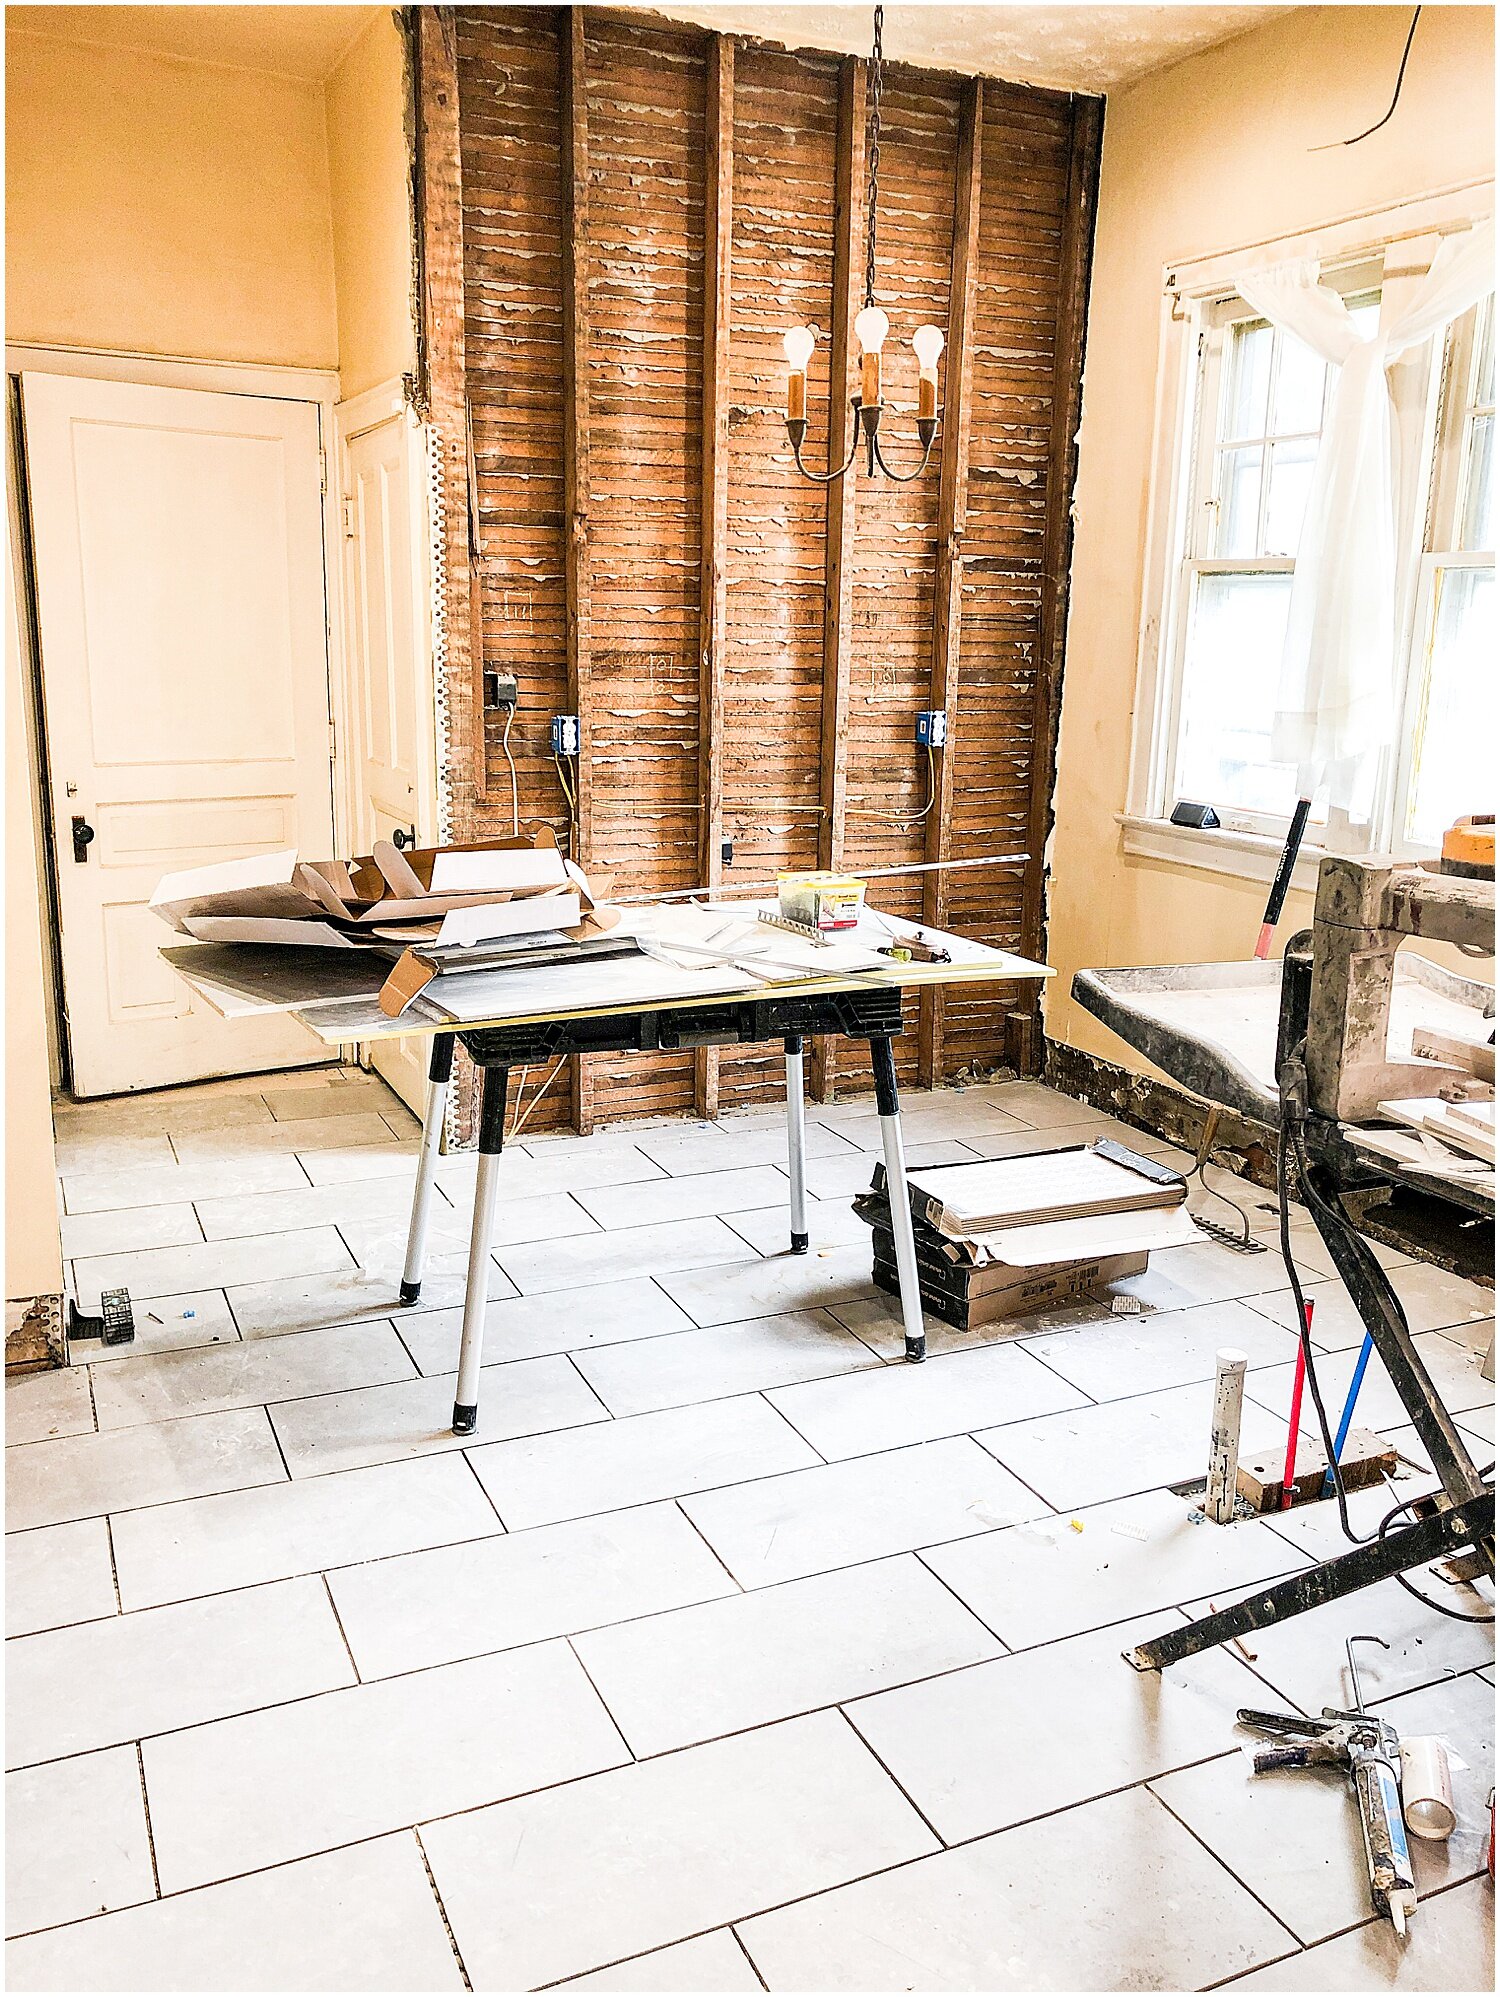
After filling our first (of many) dumpsters full of stuff we were able to quickly pull up and dispose of, we went to work on the start of real demo. While most of the unit would get a full “restore” renovation, the kitchen and bathroom needed to be completely gutted and built from the ground up. While Holley did a lot of research throughout this project, Matt loved getting started on the demo work. He was always ready to swing a sledgehammer and get to work. He even talked Holley into knocking down the wall between the small dining room area.
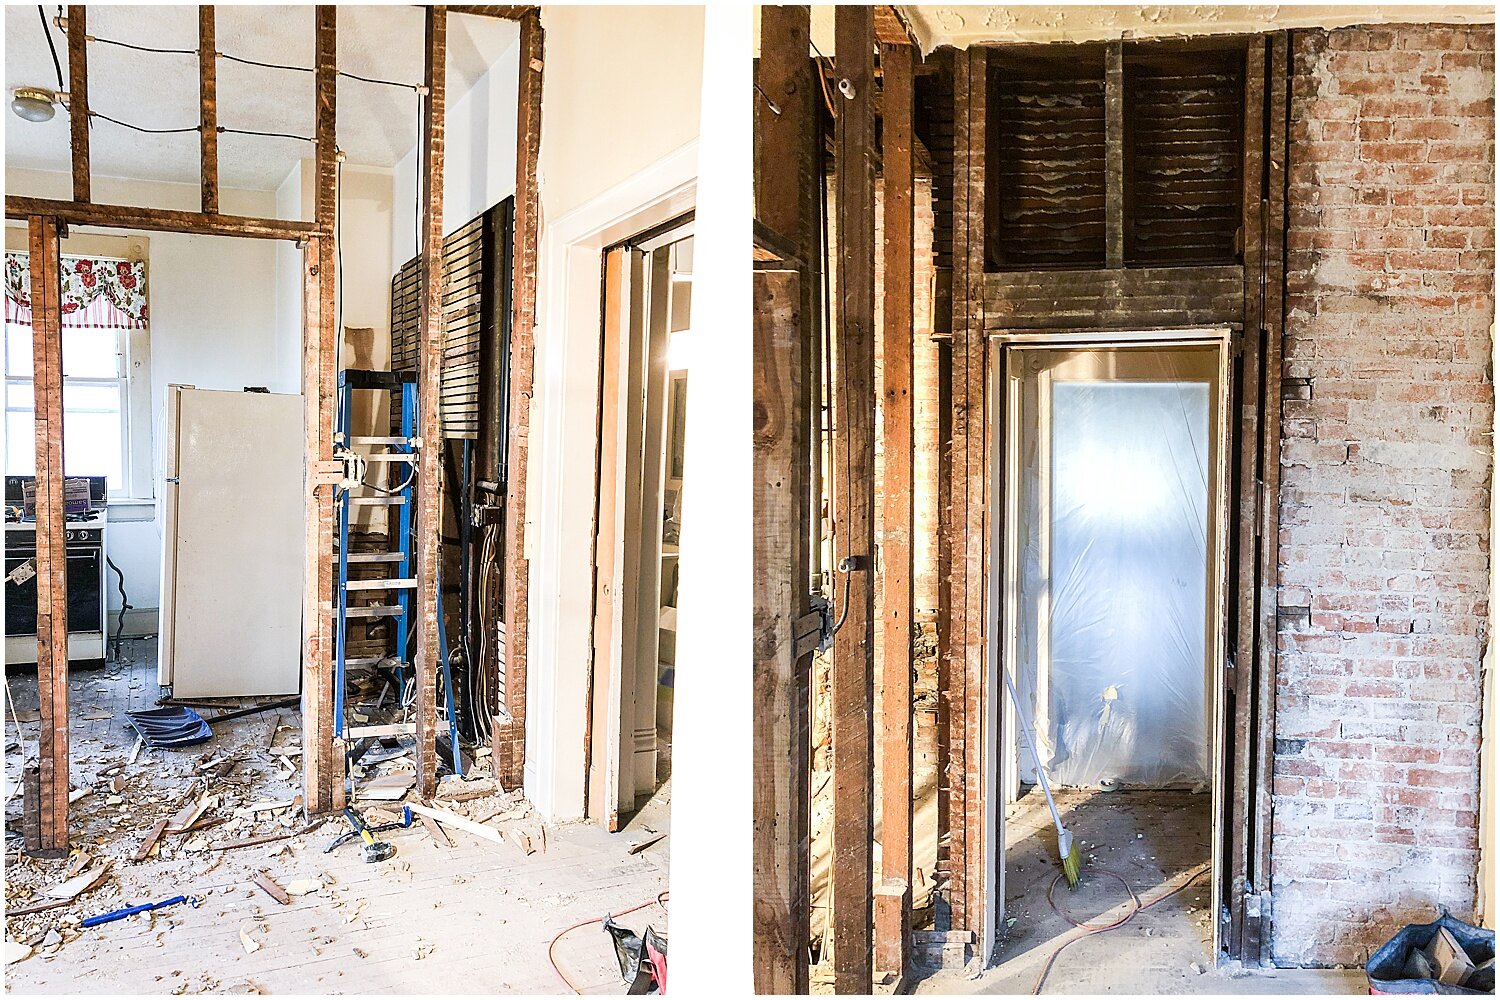
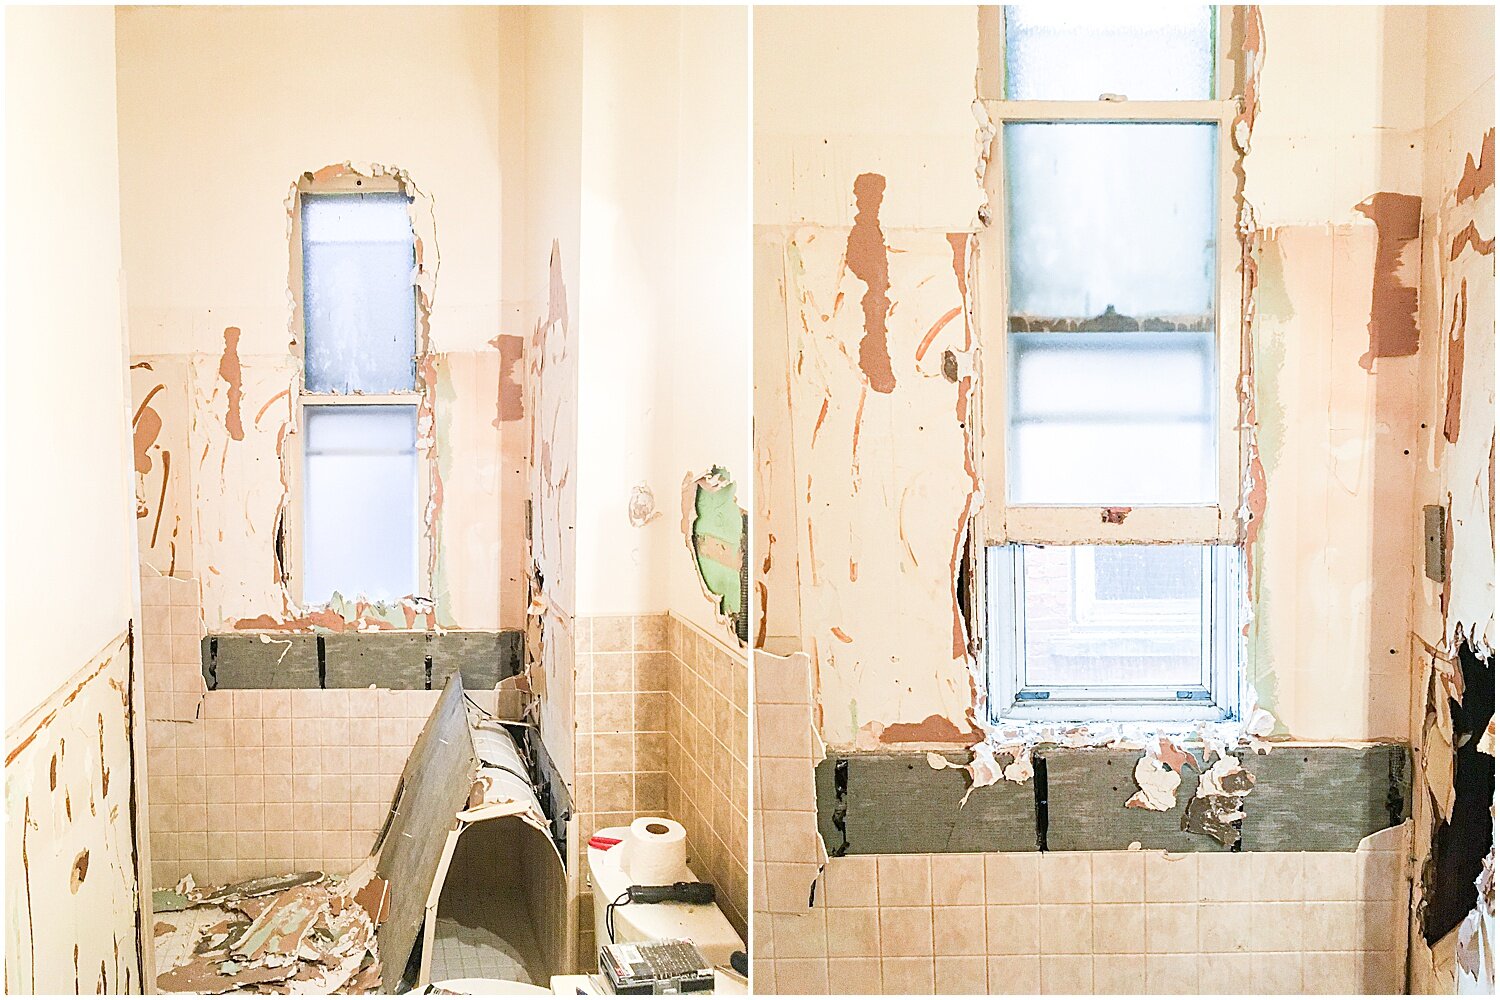
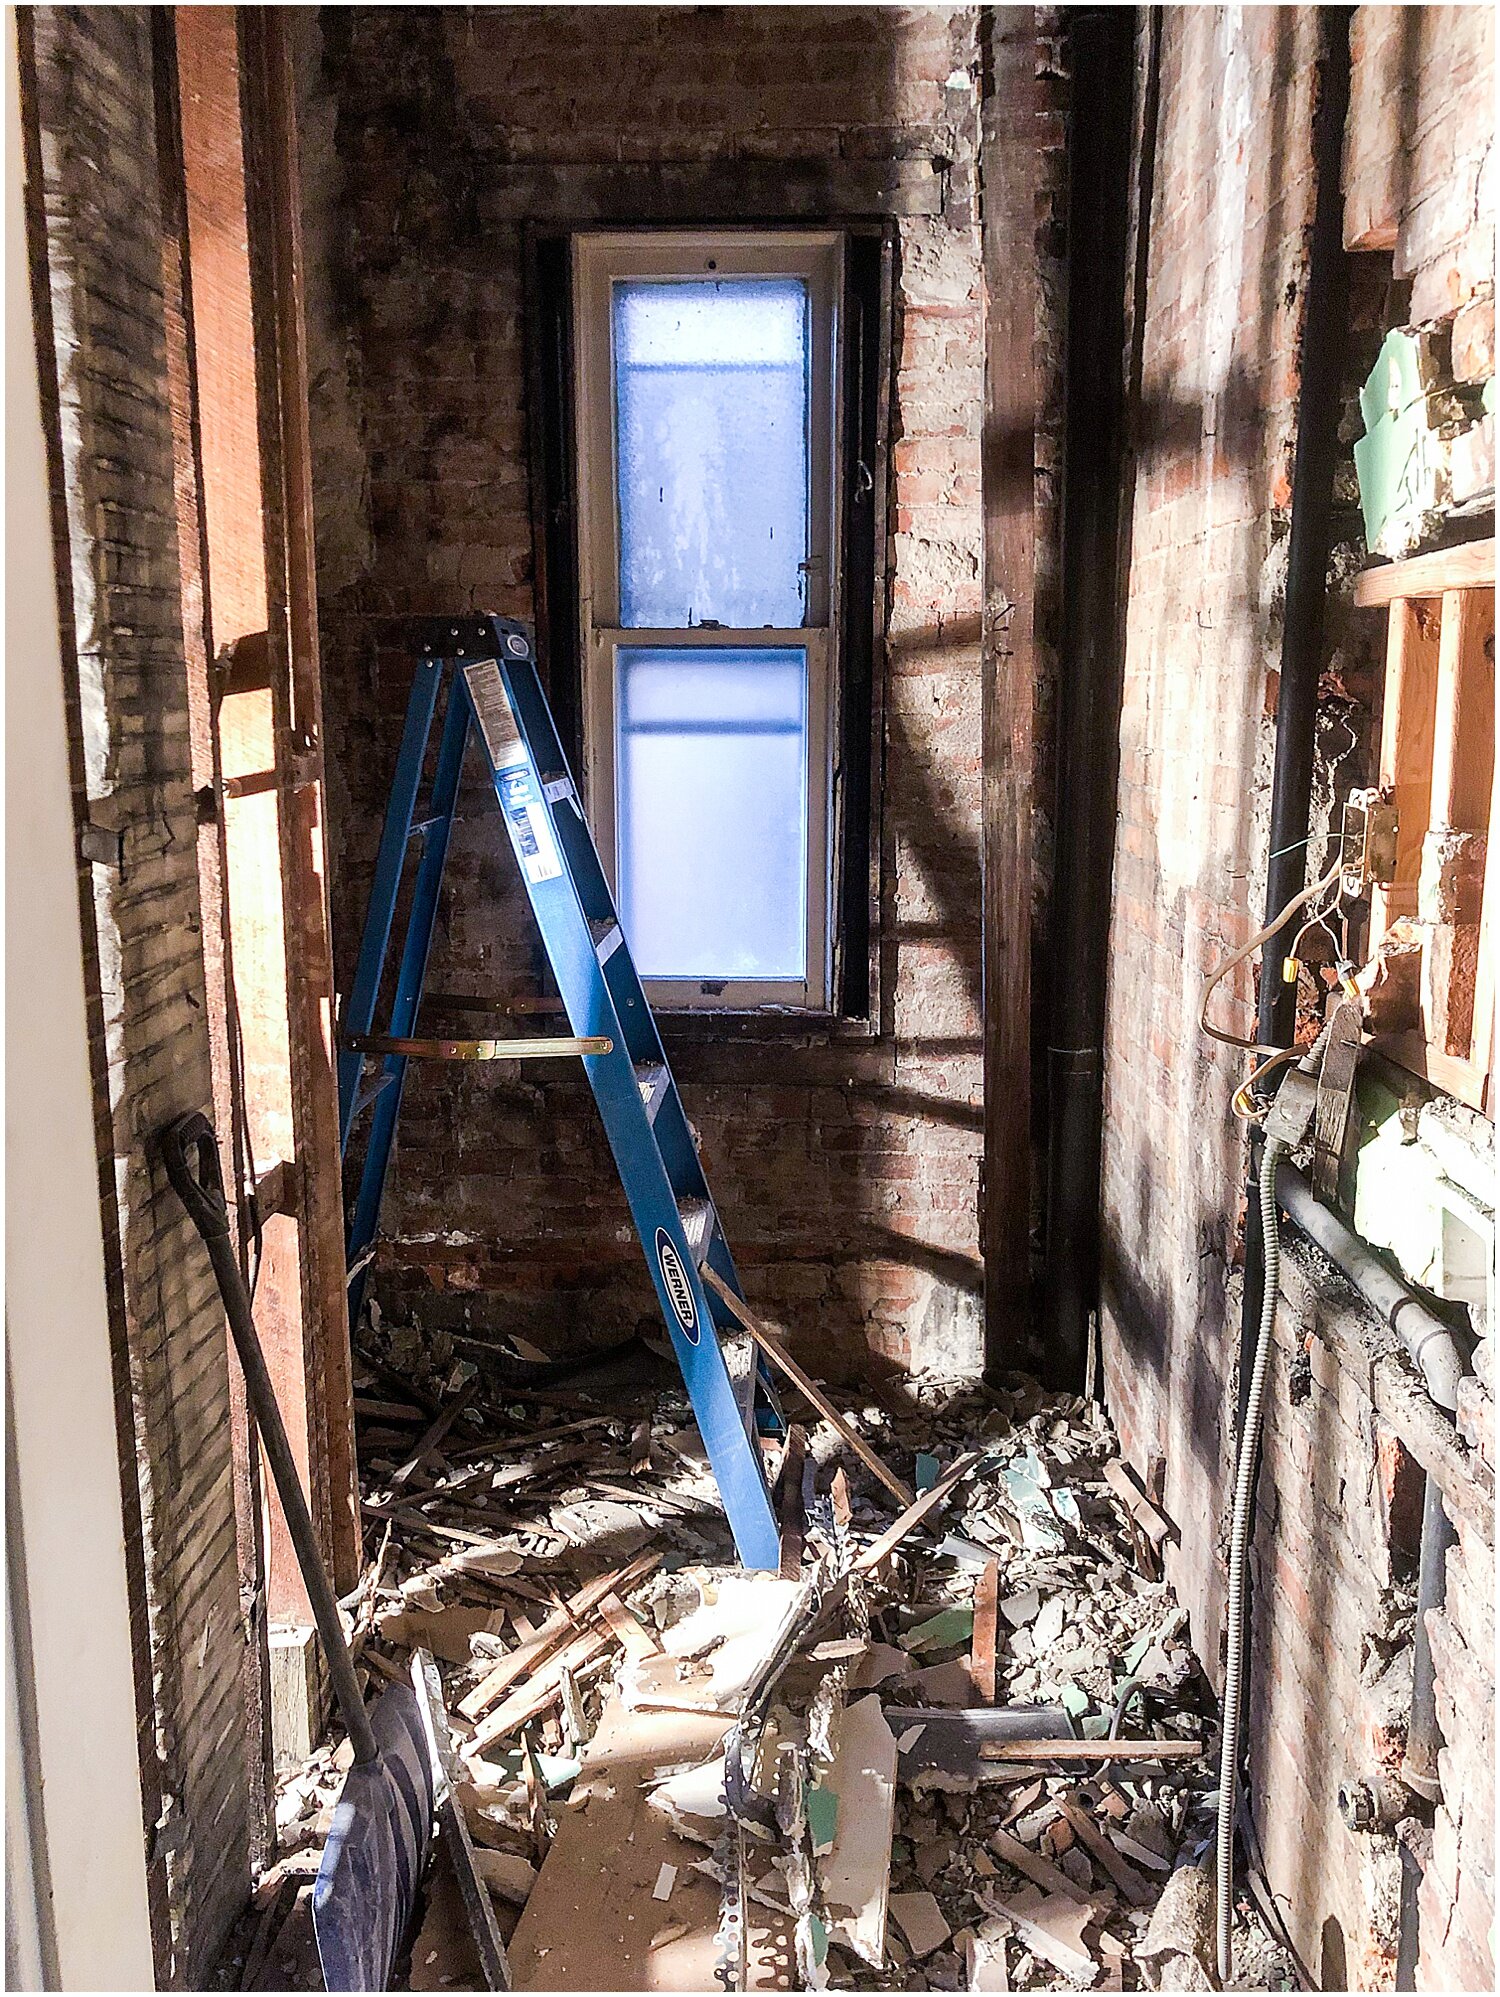
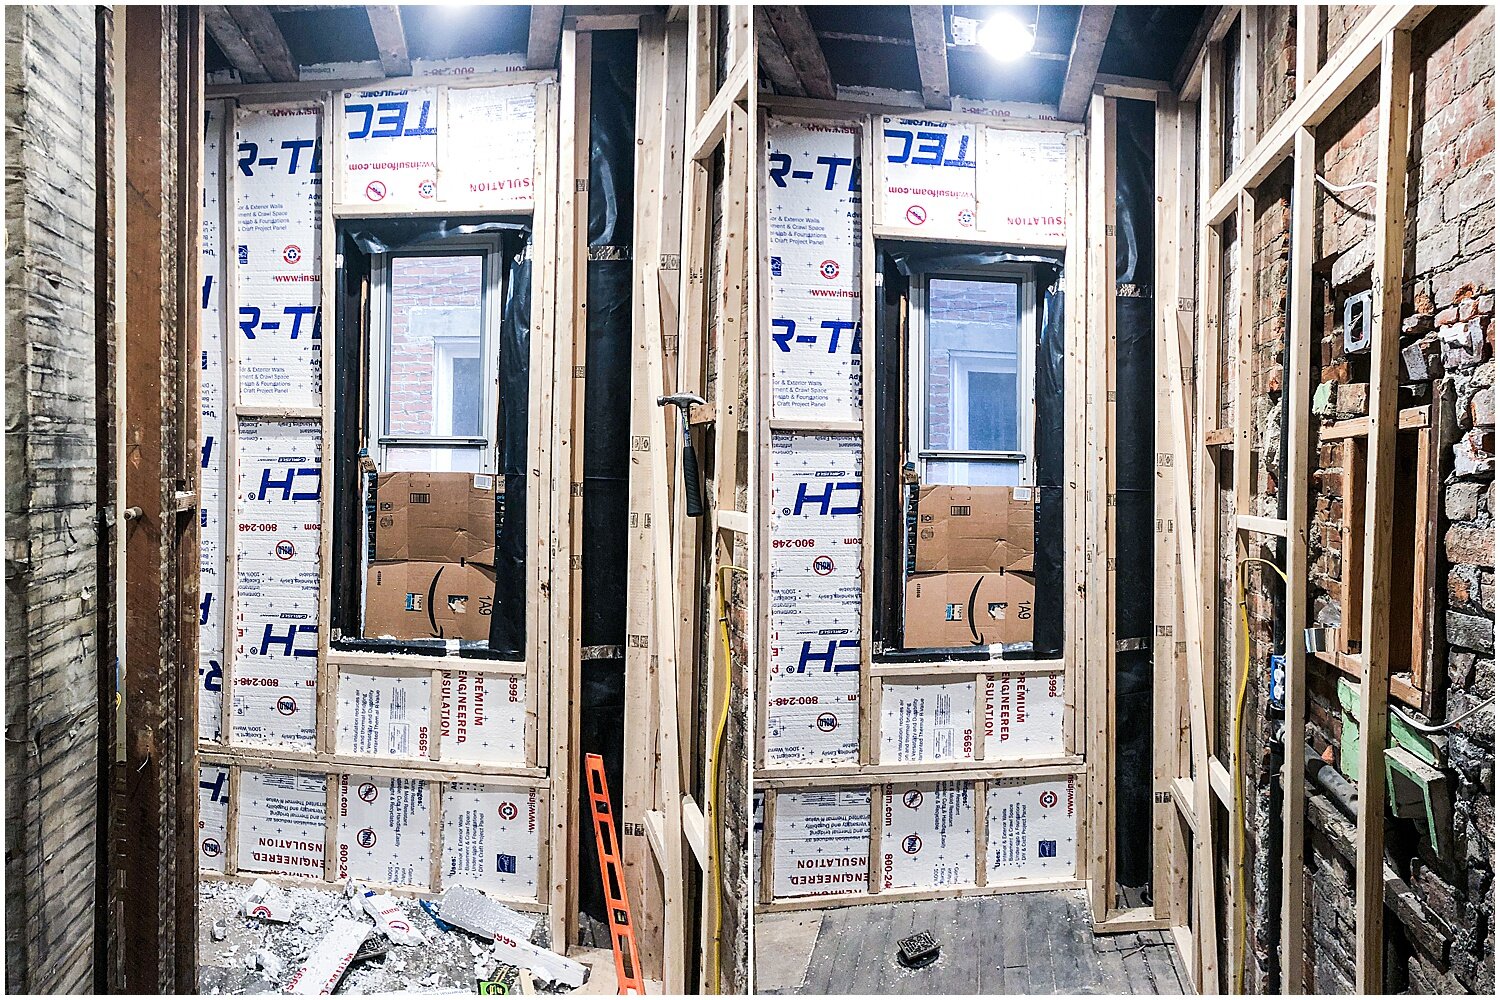
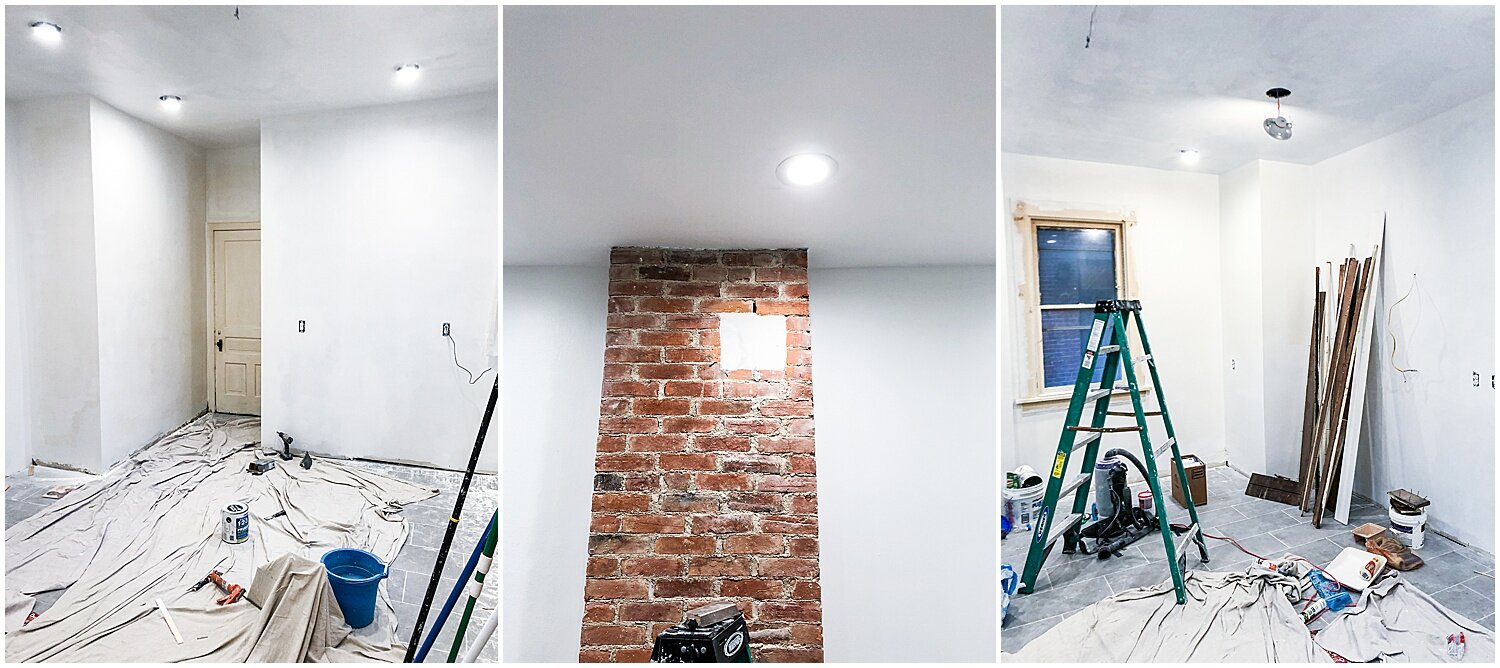
When we got to the bathroom, demo uncovered some interesting finds behind the years of construction work. We found a window that had been drywalled over and multiple original marble built-ins from the original house. We removed a broken pocket door jammed into the wall in the bathroom, which allowed us to gain some extra space for the remodel.
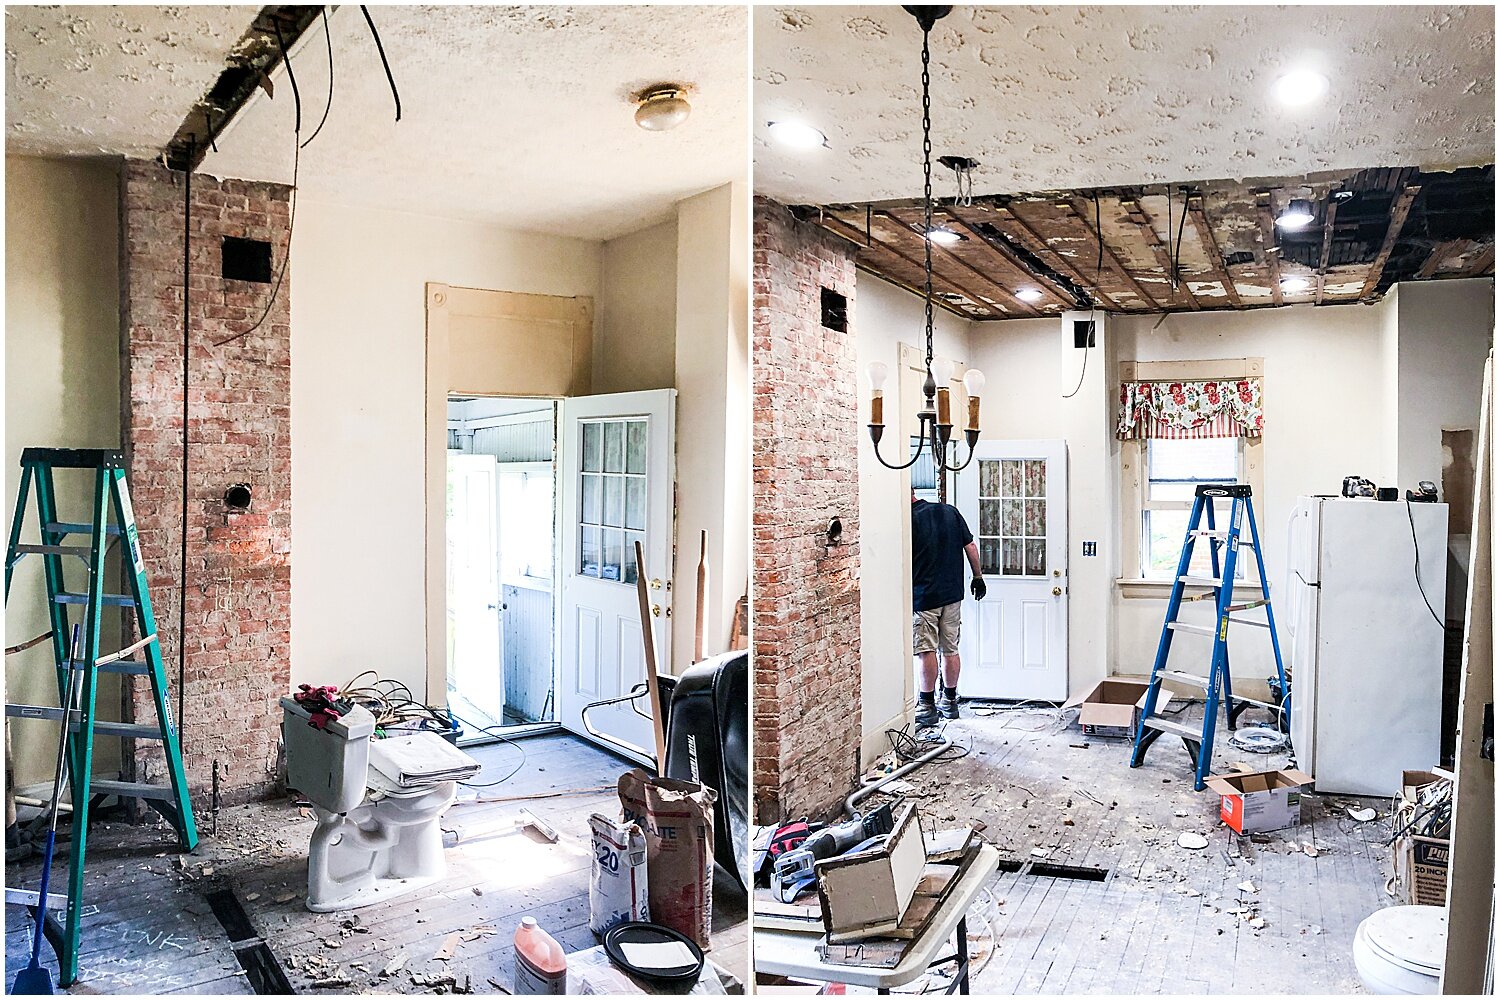
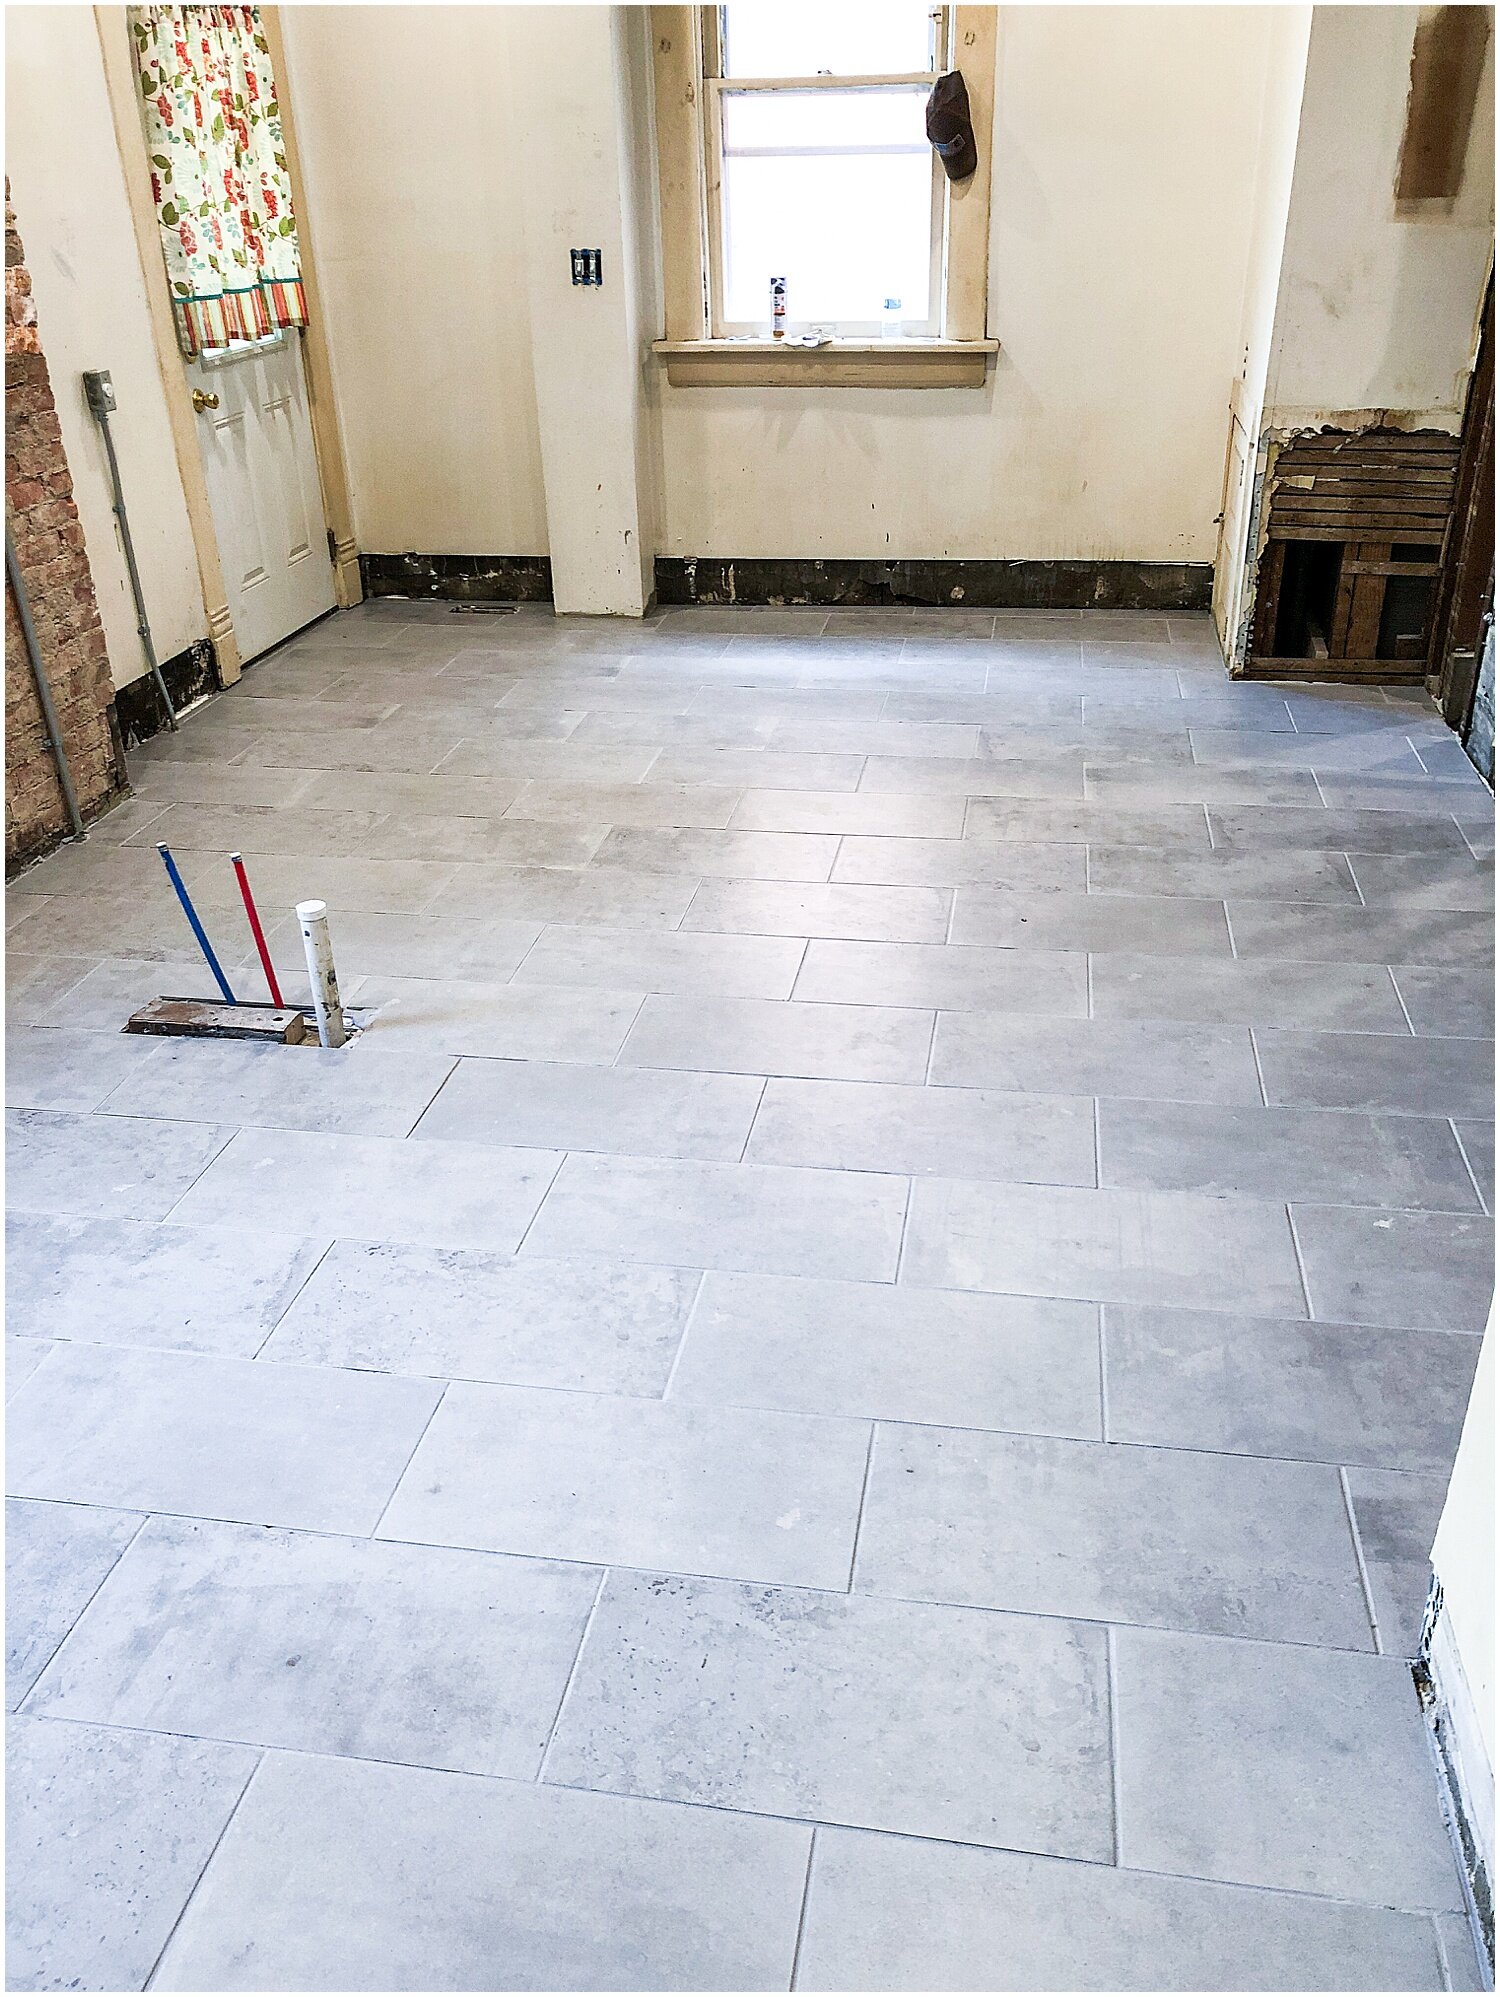
The original hardwood floors were completely ruined in this part of the home, so we prepped the area for tile next!

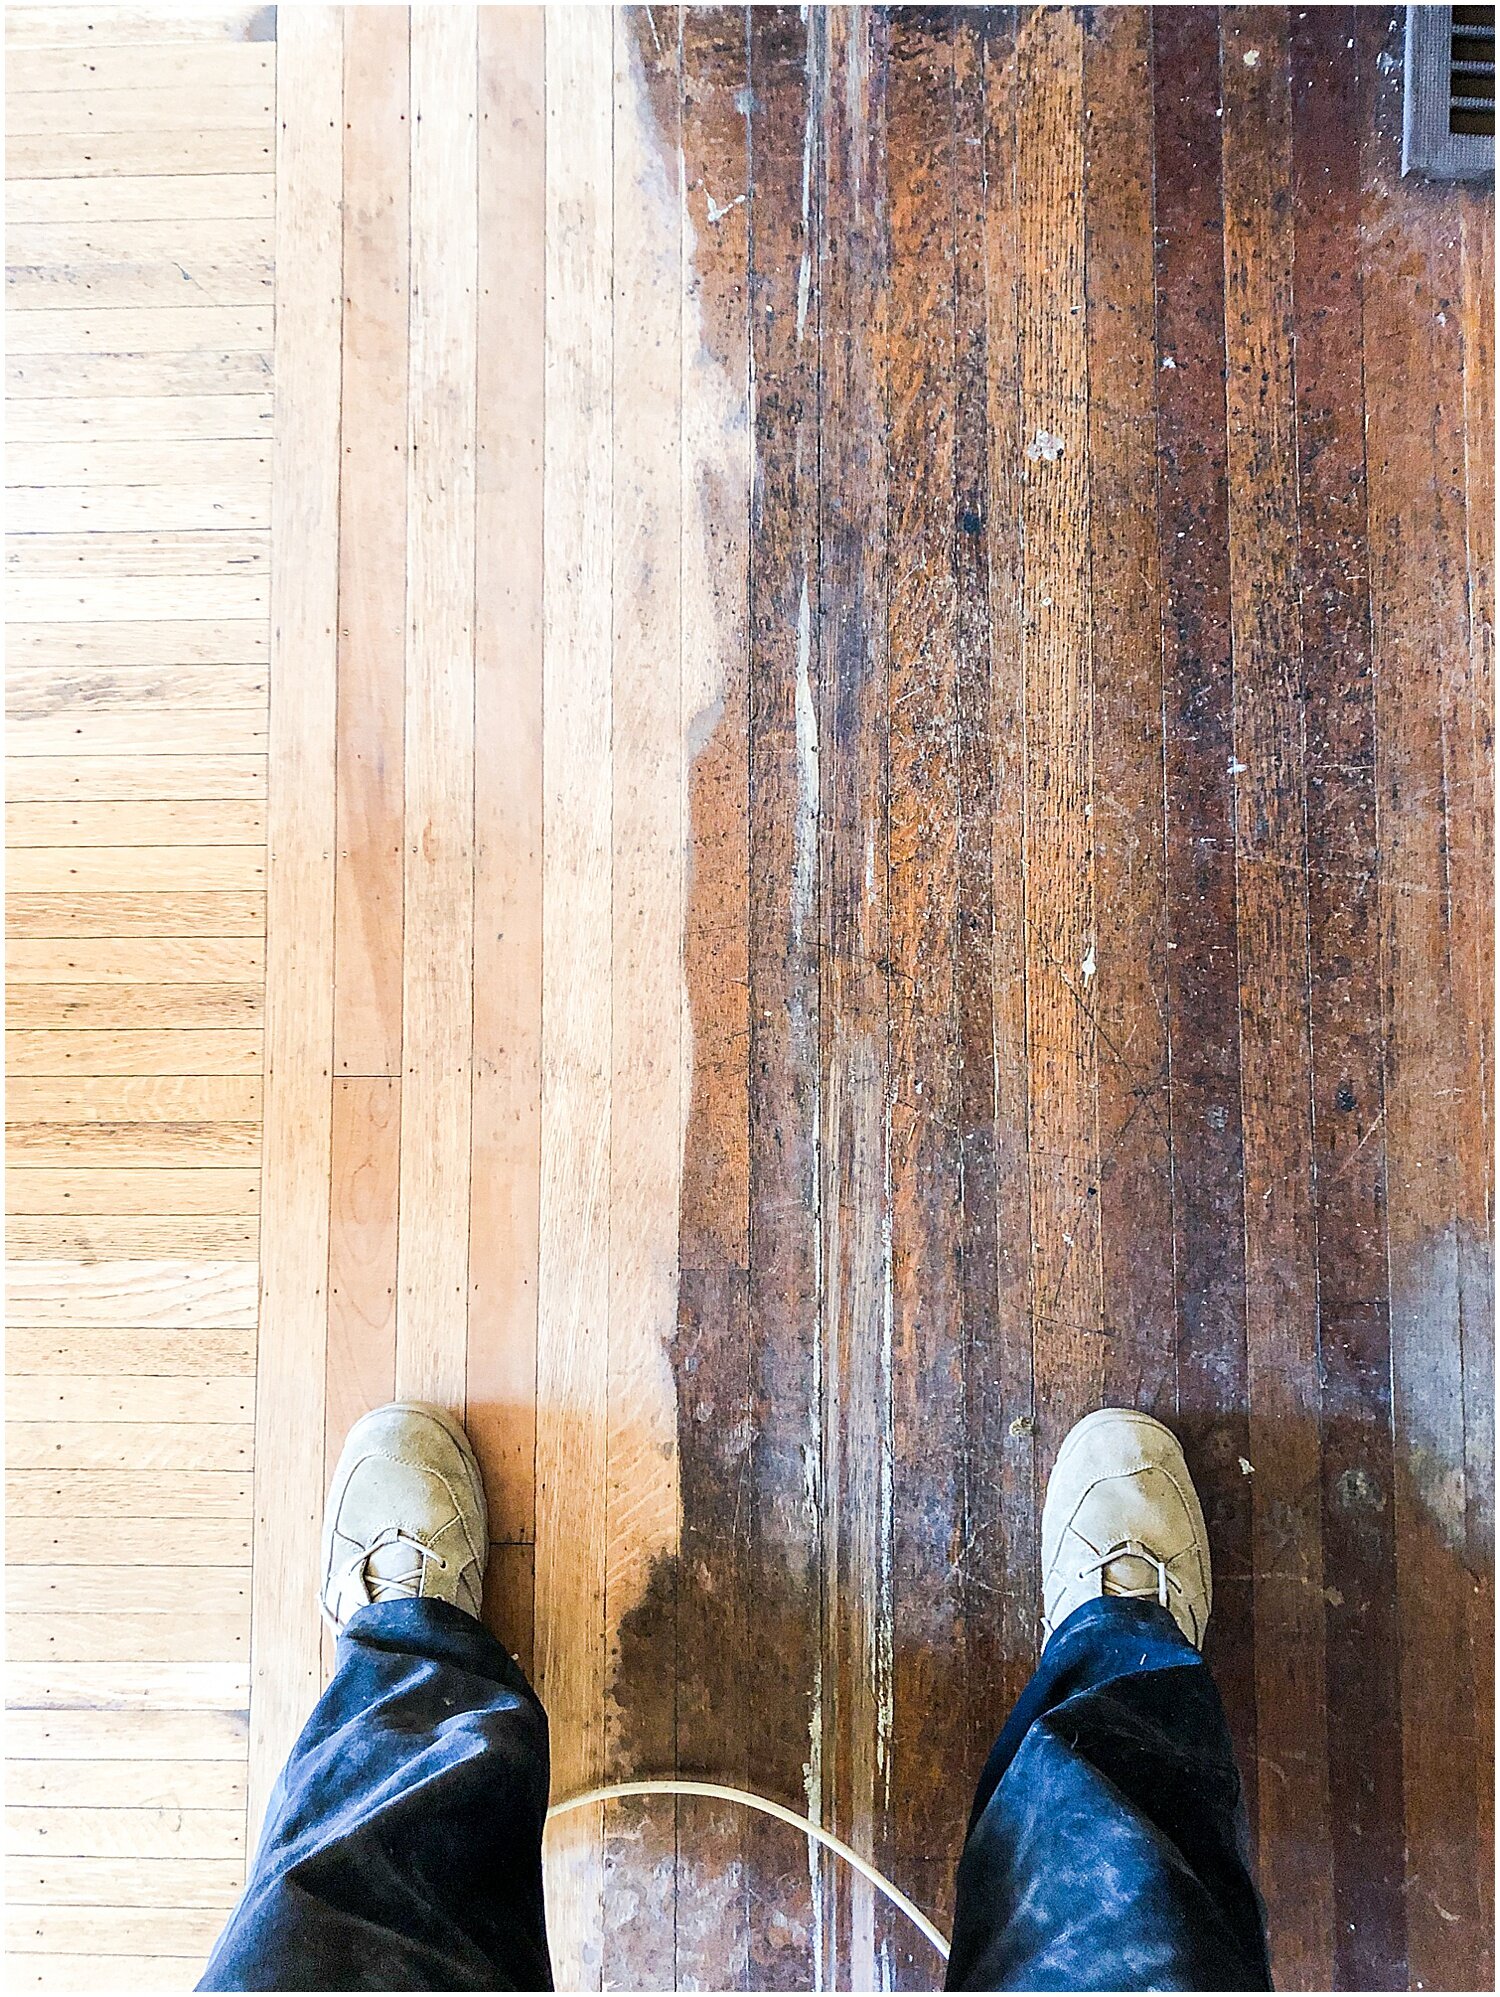
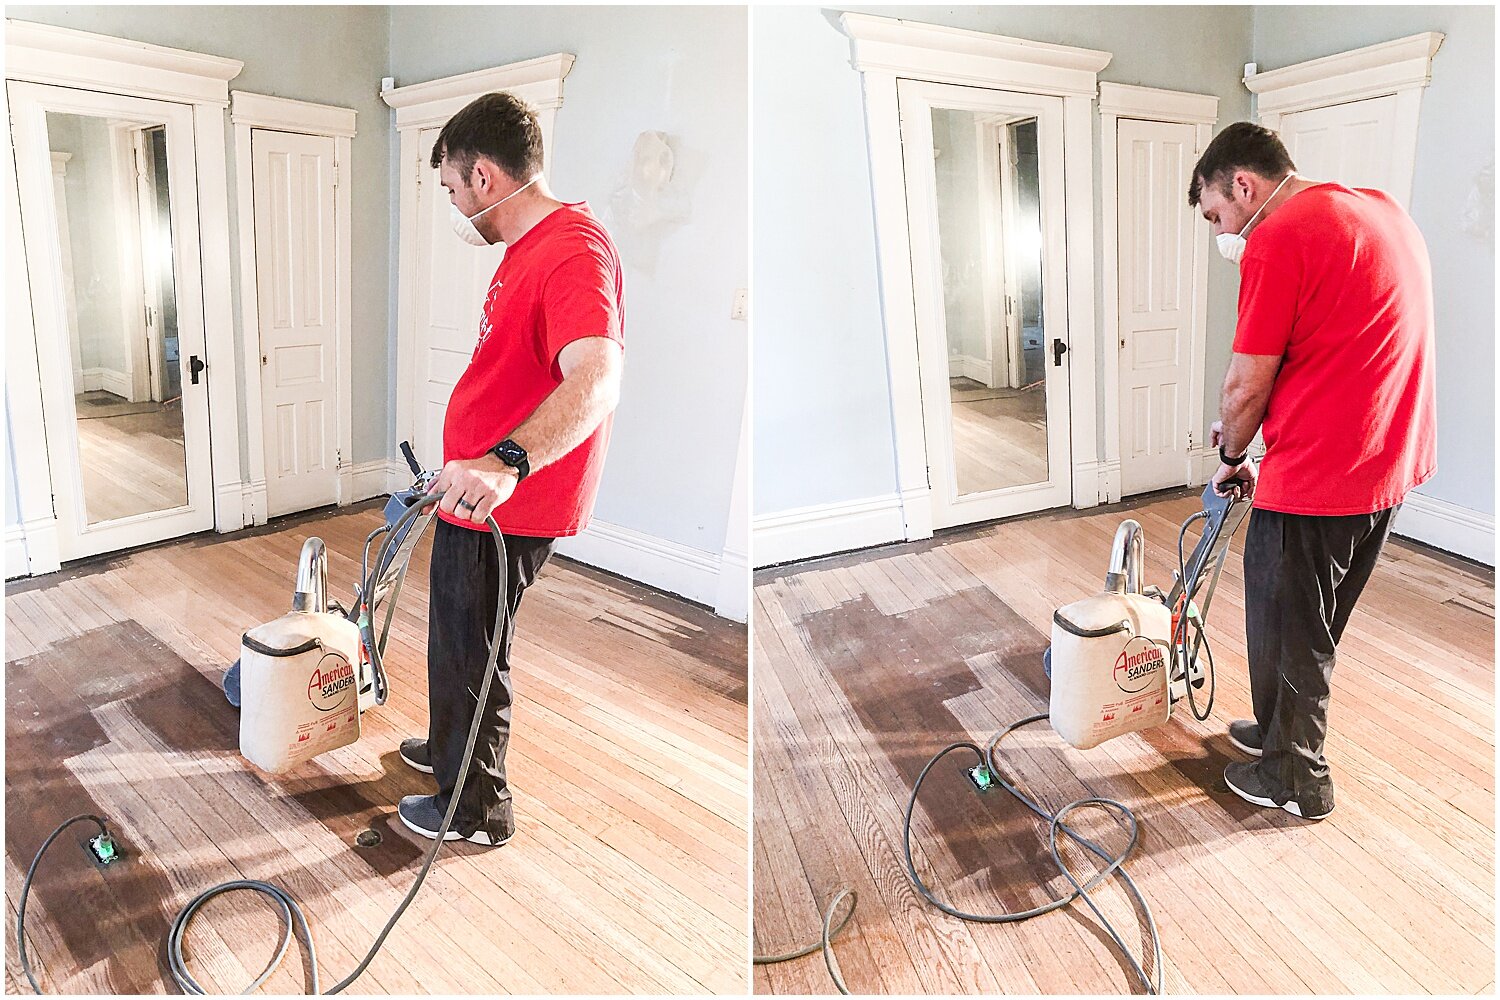
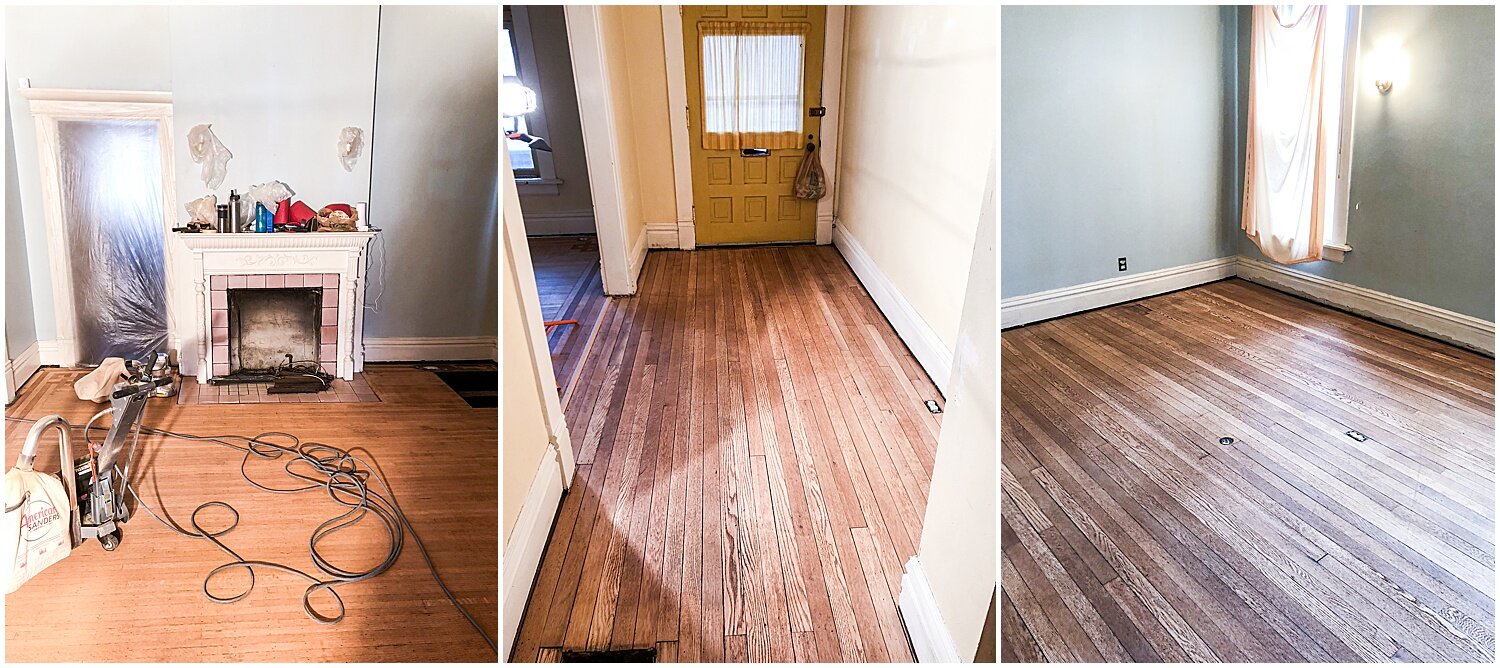
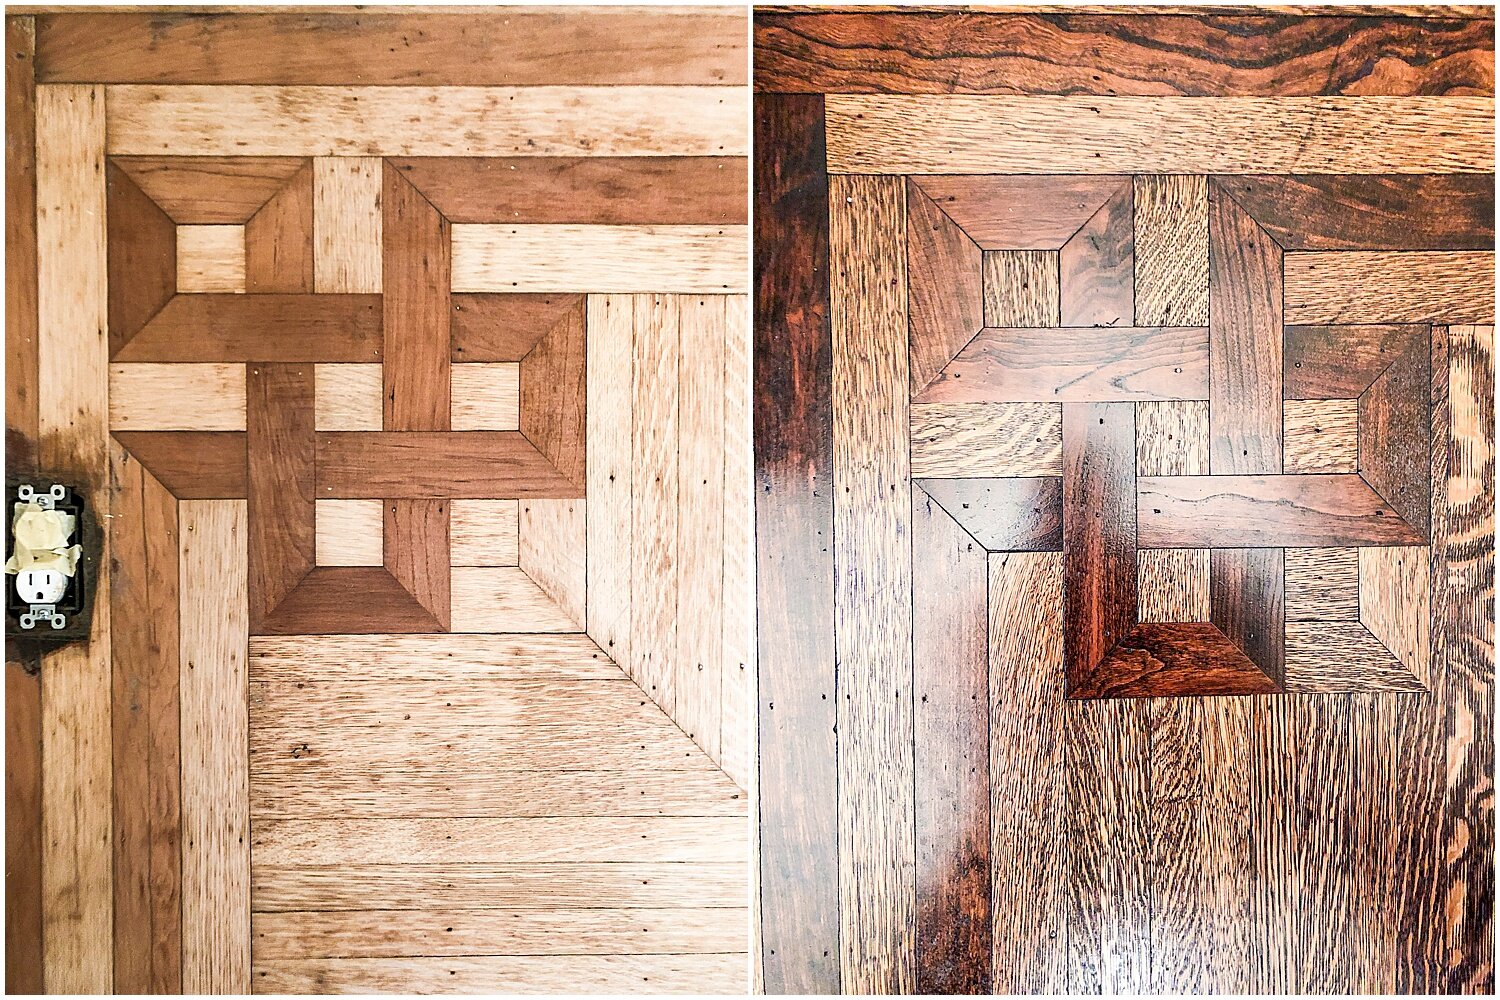
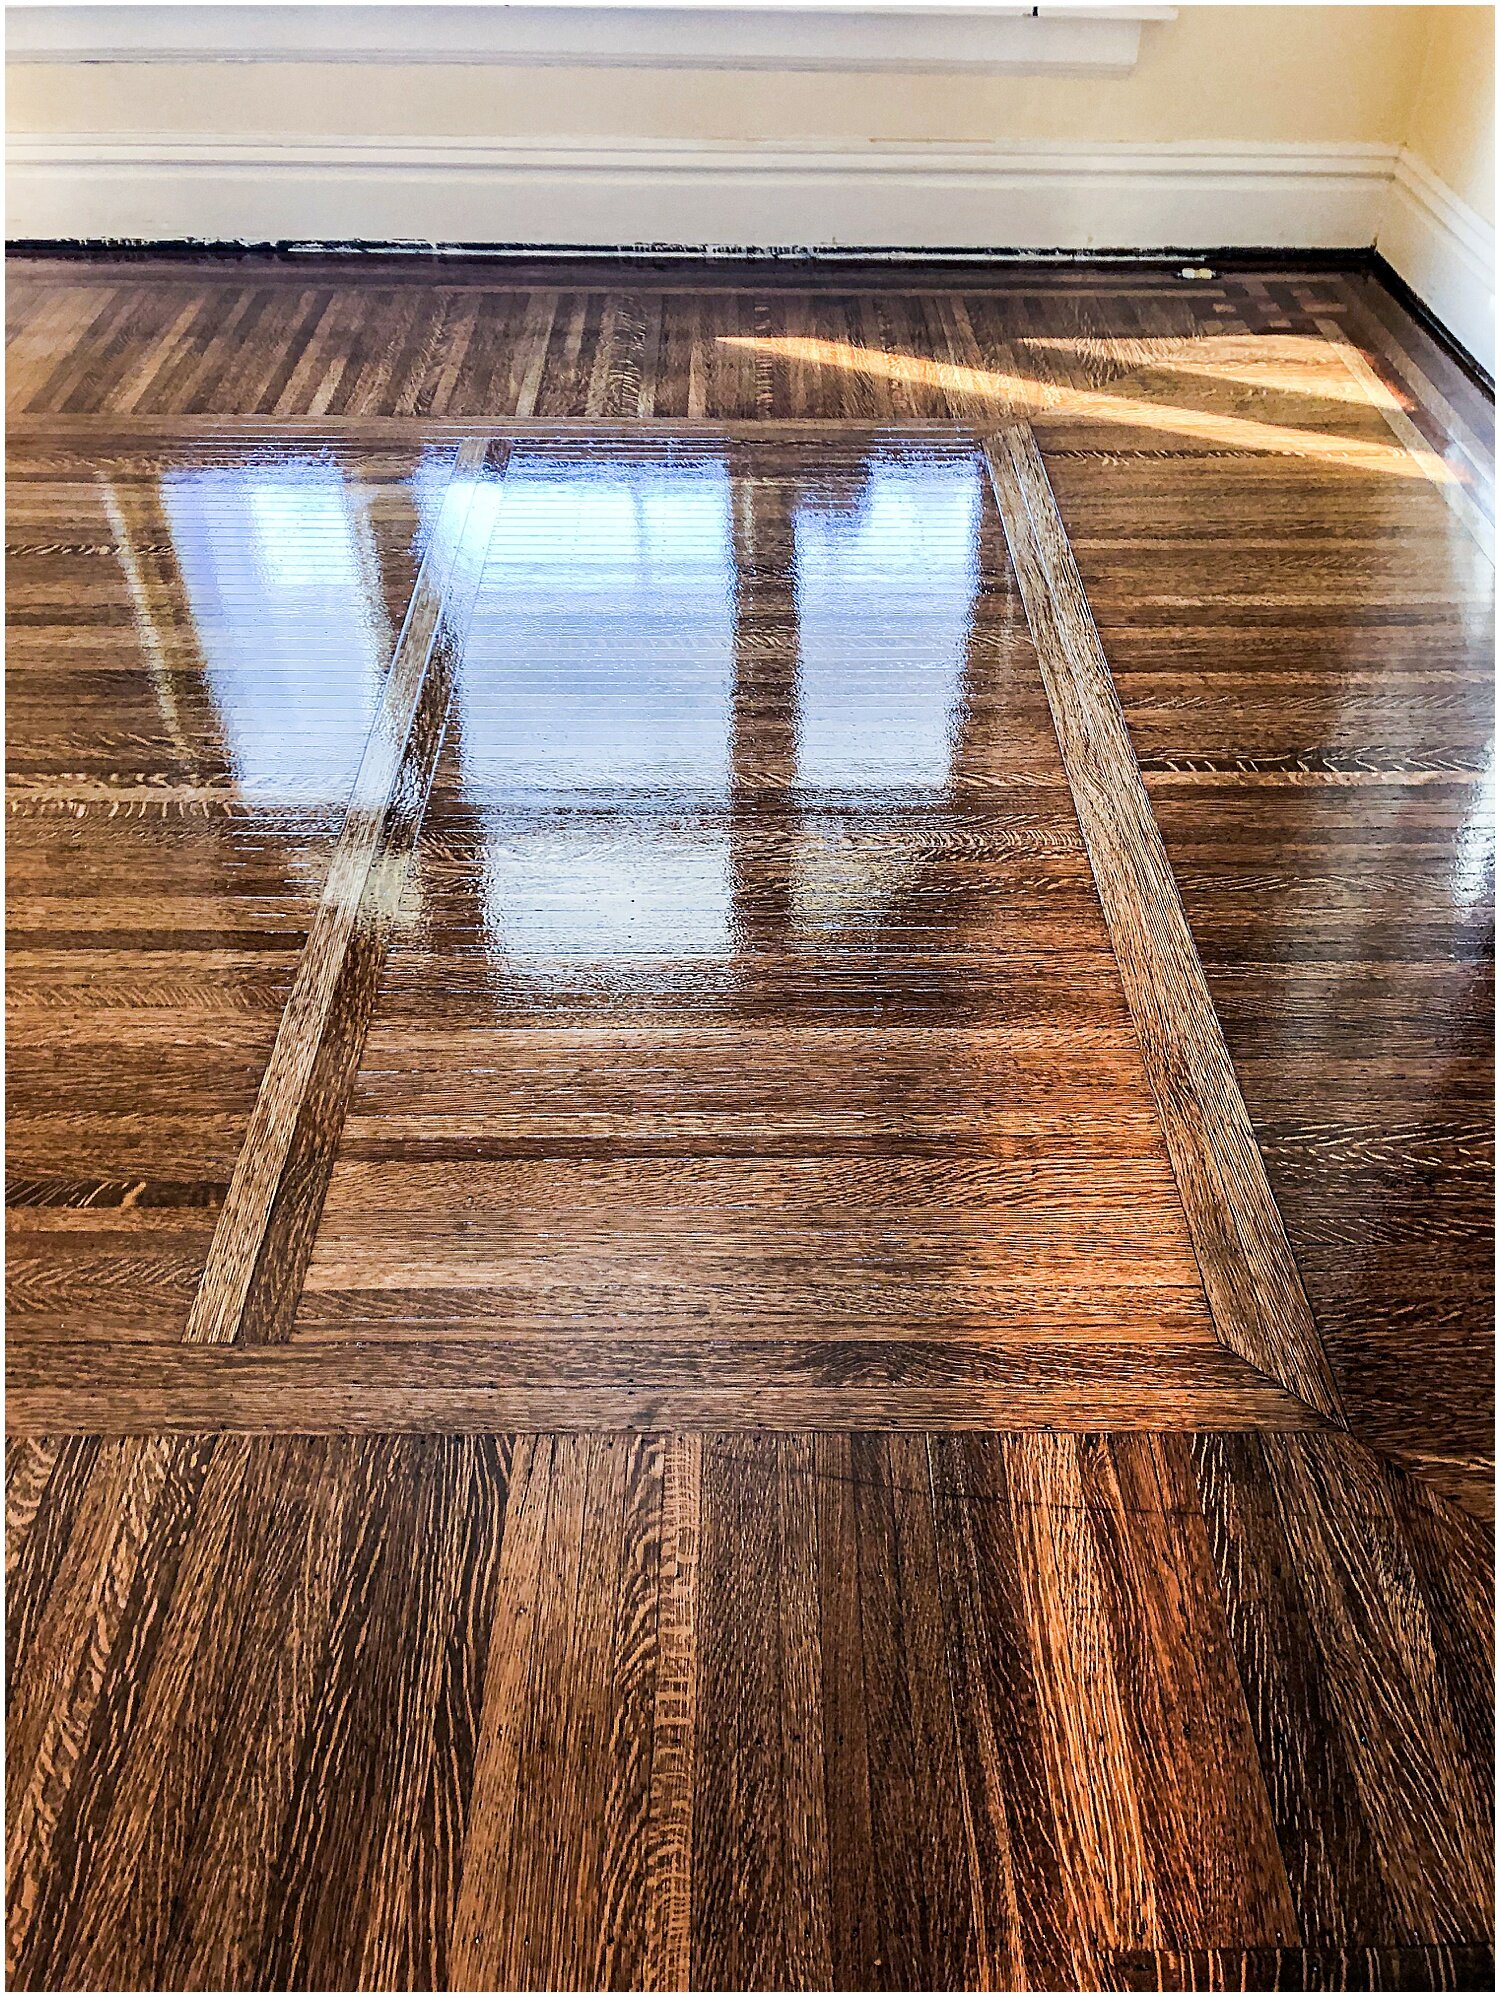
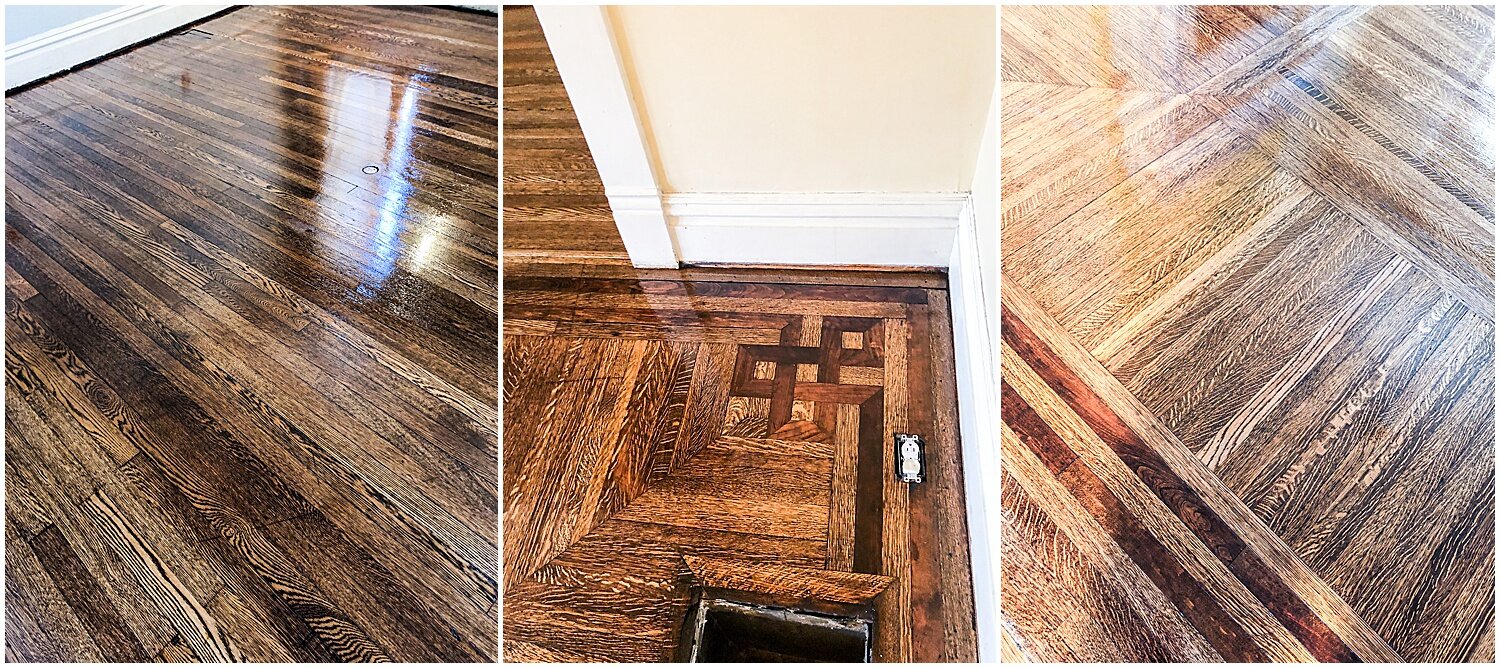
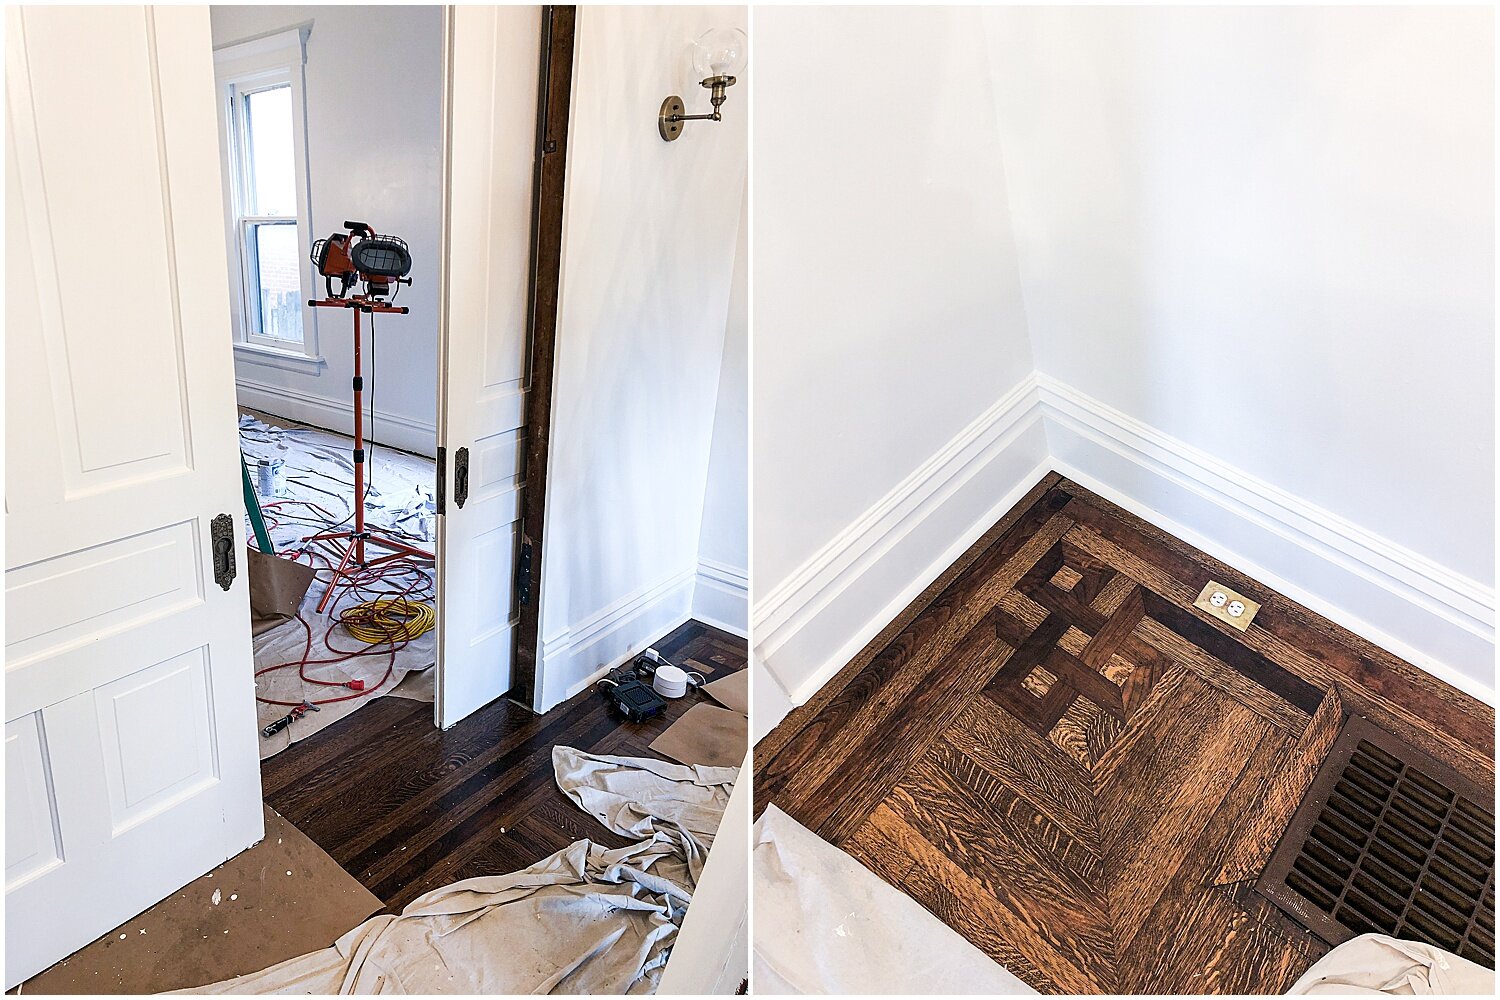
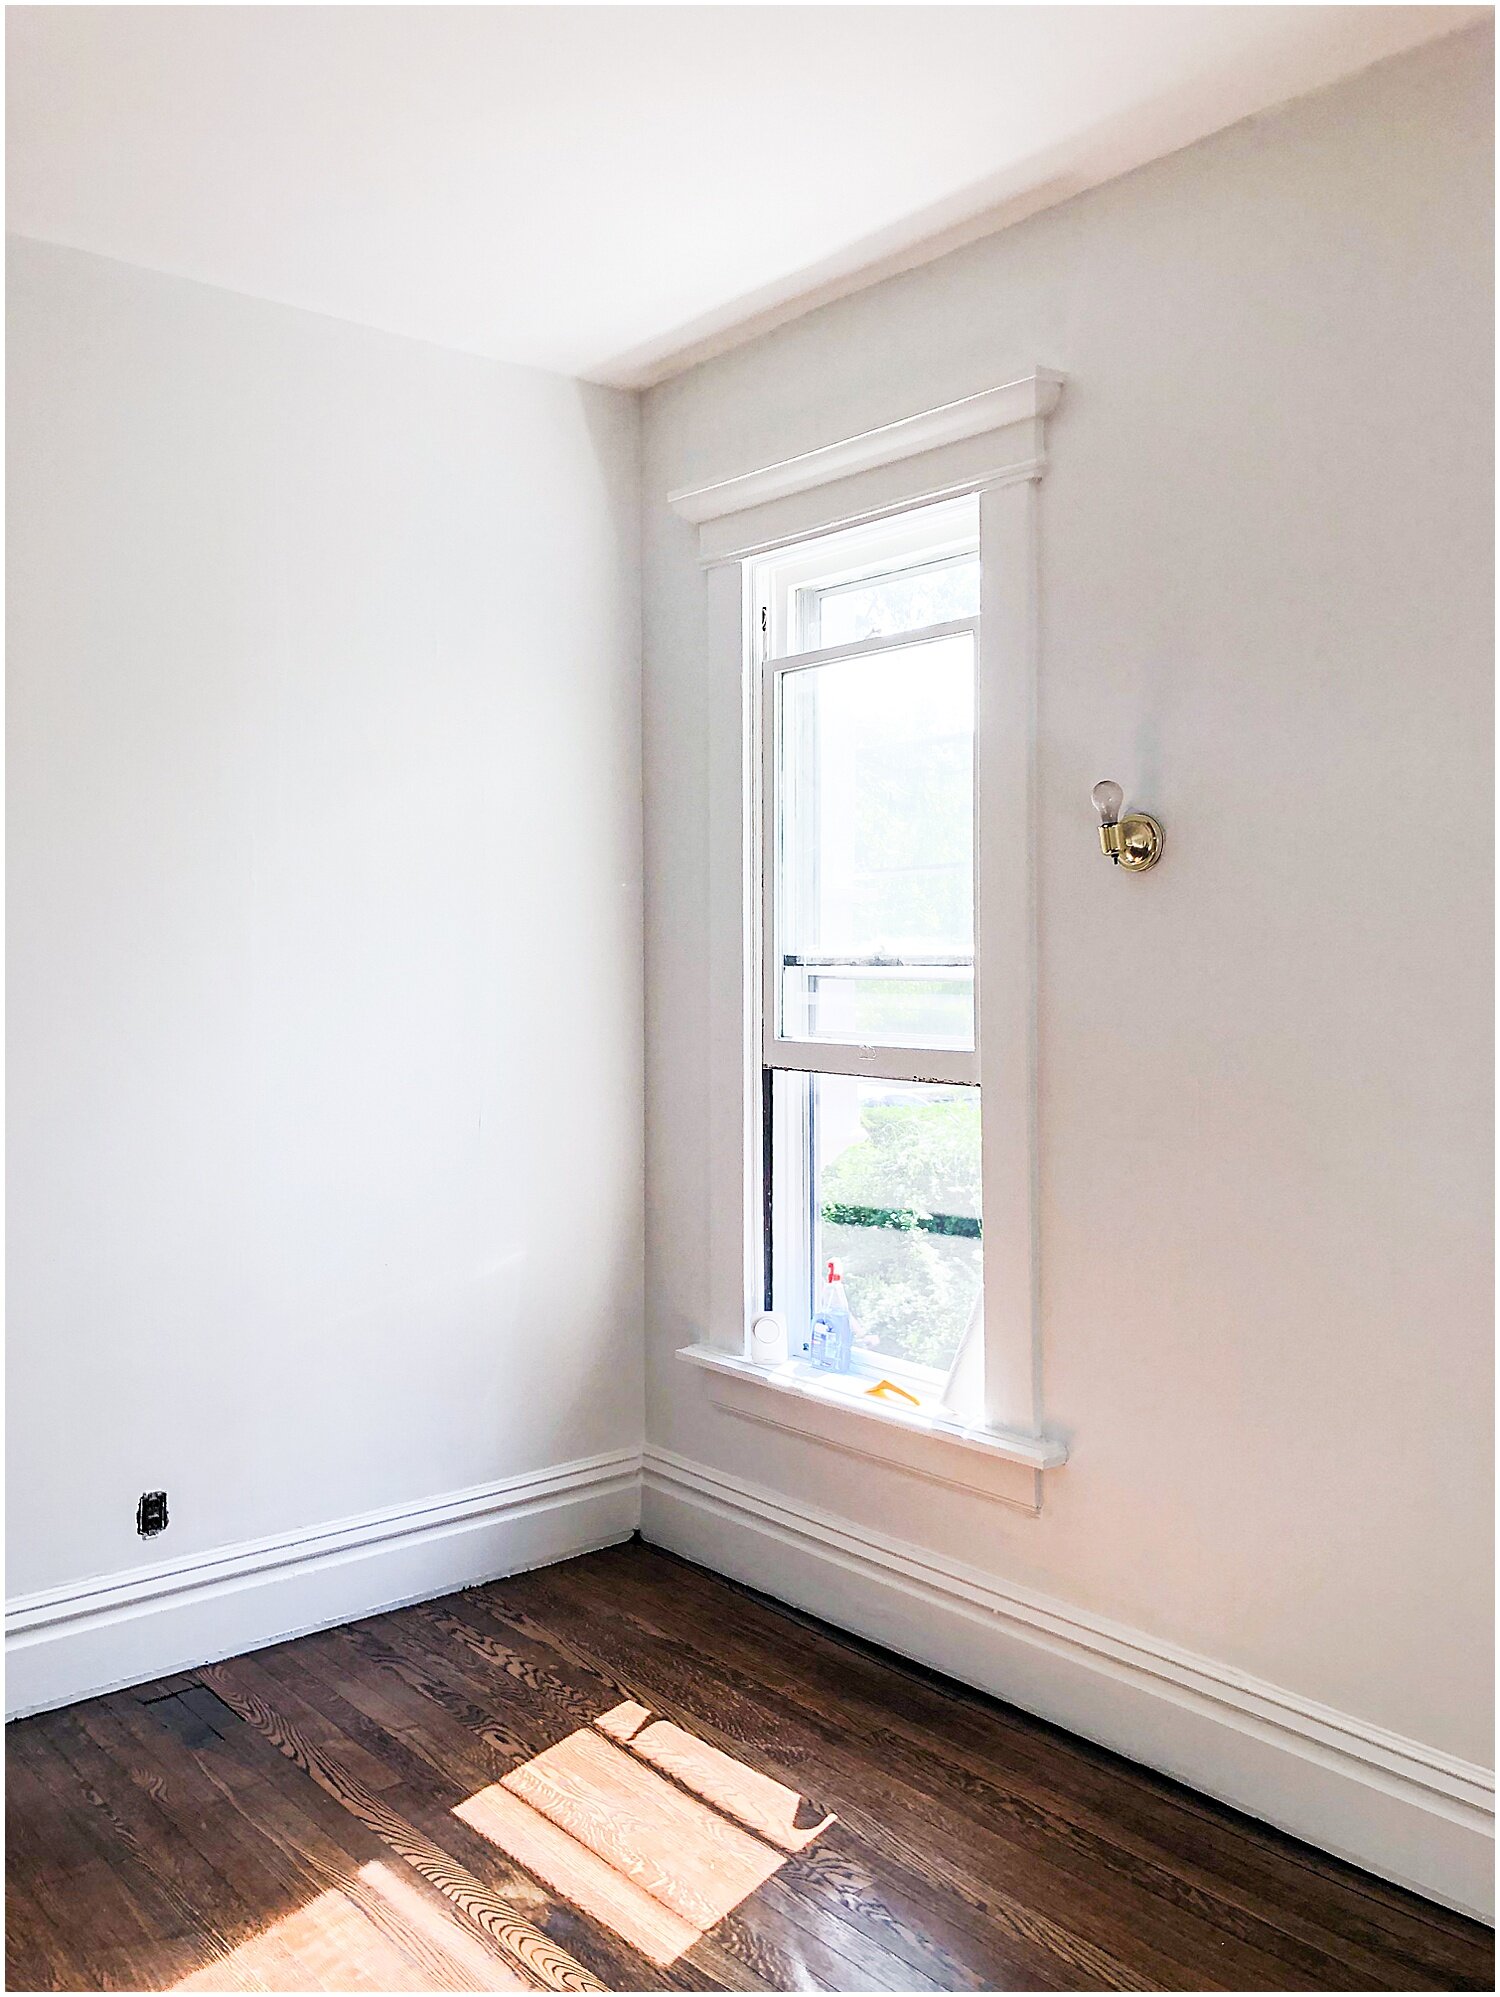
While we were waiting for our electrician and plumber to complete the rough-in work in the kitchen and the bathroom, we started the process of refinishing the hardwood floors in the rest of the house. We received some consulting from one of the top refinishers in town and crossed our fingers that we would not ruin the beautiful inlaid oak and mahogany and original ash sub floor.
We started with a drum sander and edger, using several passes over the entire floor with coarse to medium grit sandpaper. We finished restoration process with a fine grit screen using a floor buffer. It was amazing to see what a difference the sanding did to bring life back to the original floors. We then applied a walnut stain over the entire floor and finished with three coats of polyurethane, sanding with ultra fine screens in between each coat.
While these pictures do not show the hours of work that went into this, the frustrations at imperfections, and the arguments about how to do it without ruining the floors, the finished project was one of the most fulfilling moments of the renovation.
After our rough-in plumbing and electric was complete, we started the process of putting the bathroom and kitchen back together again. We knew we wanted a custom shower, so we framed the bathroom out to maximize the space in such a small area. By this point, we decided to replace the window in the bathroom before starting the next steps.
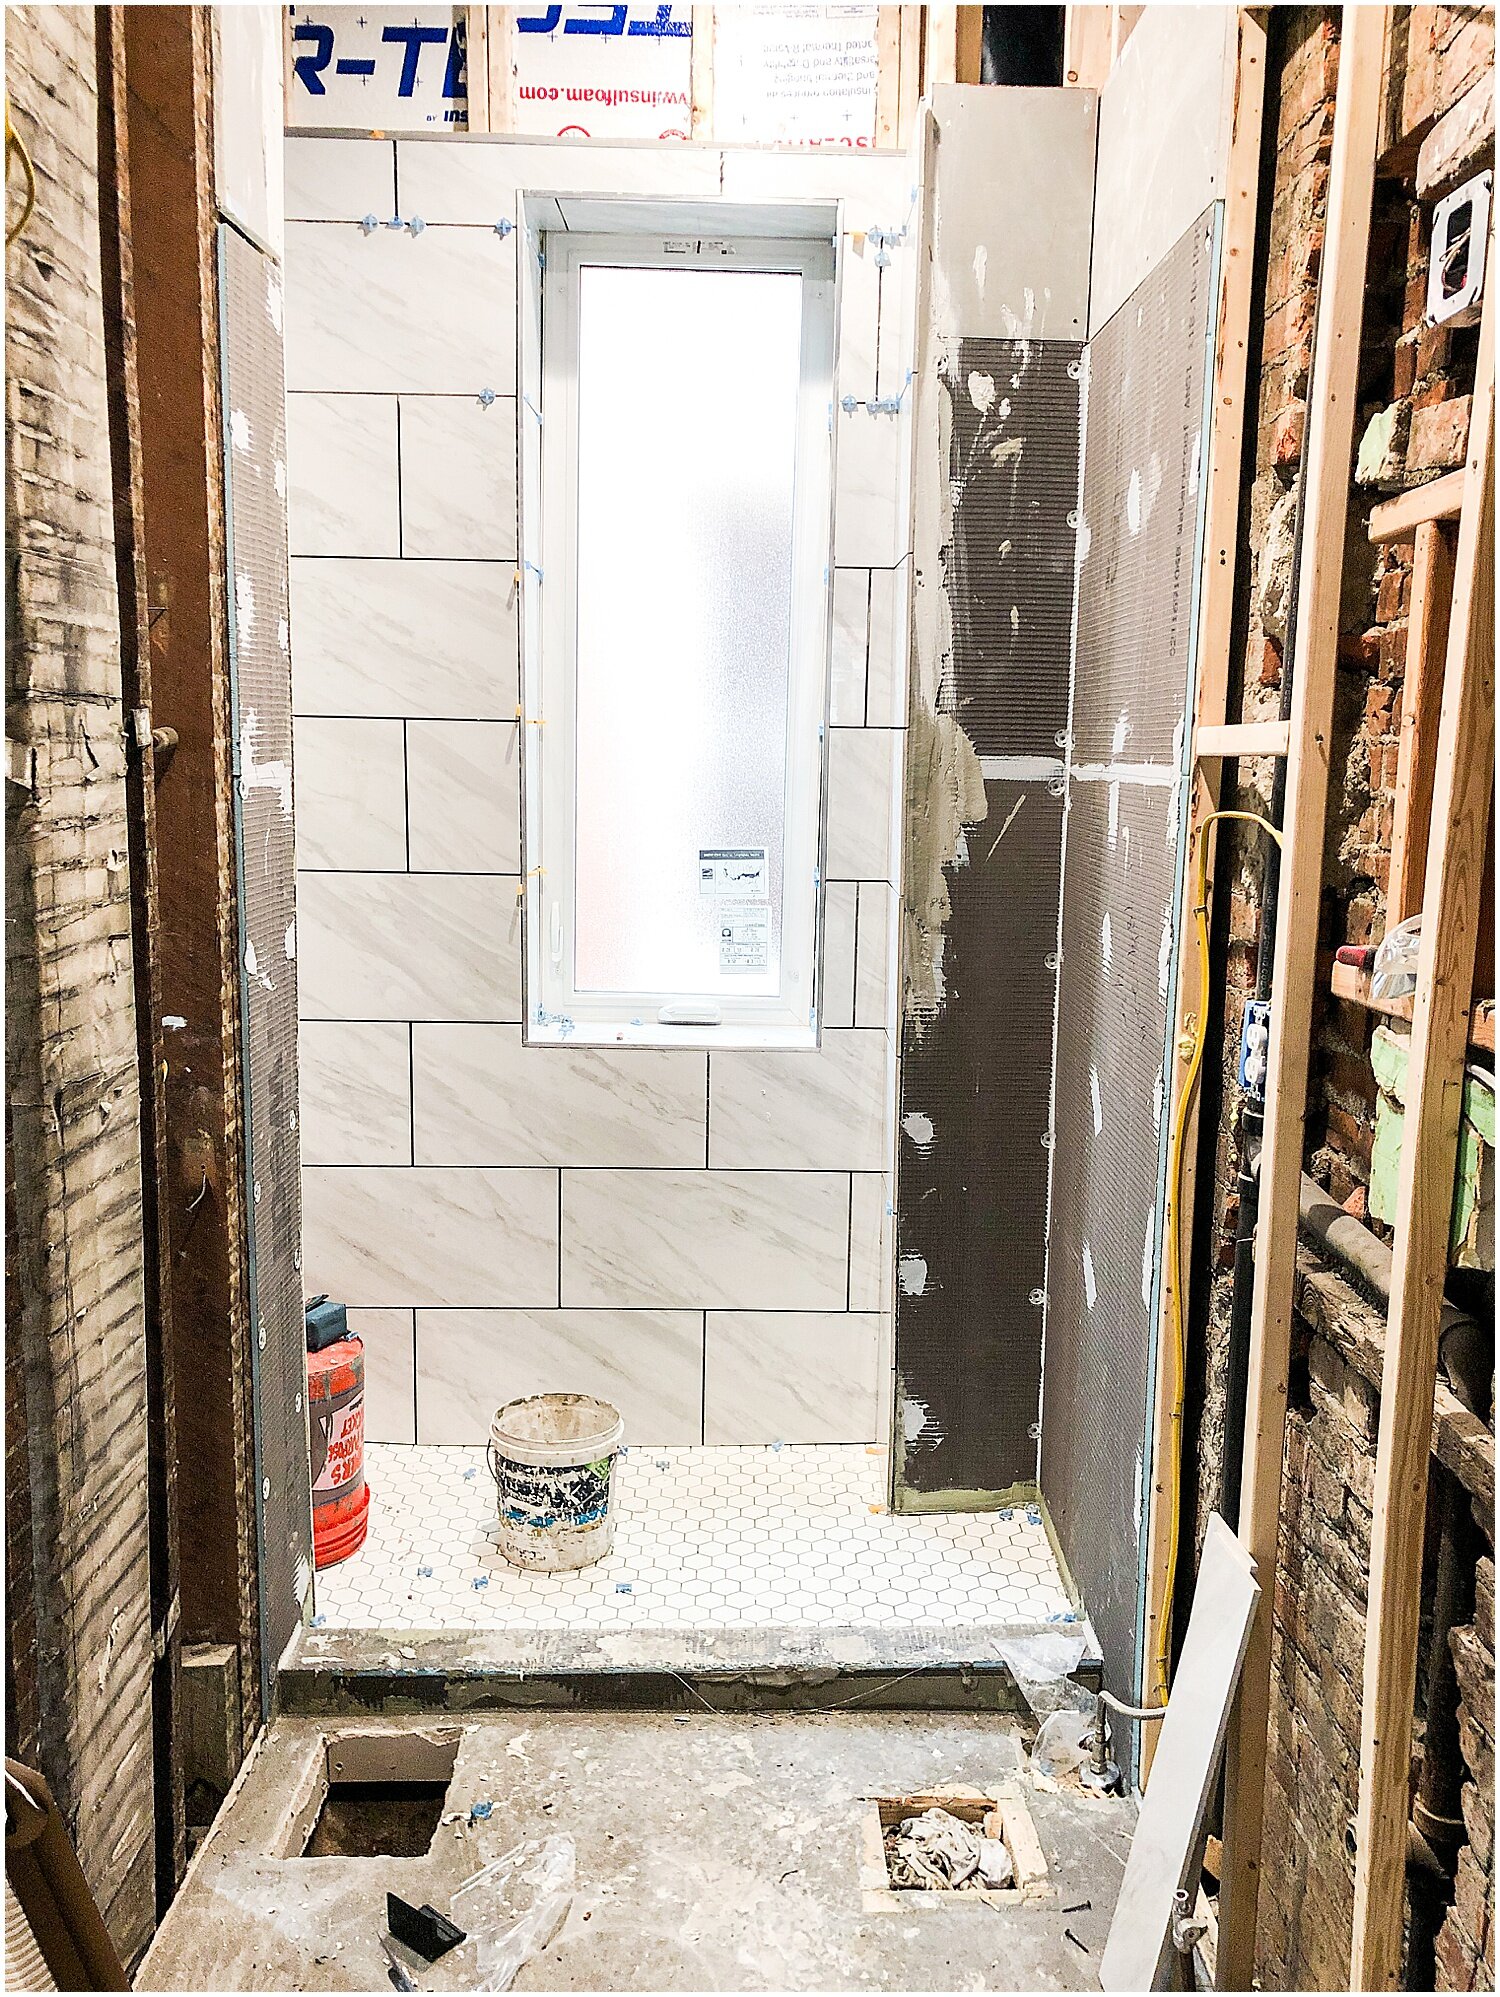
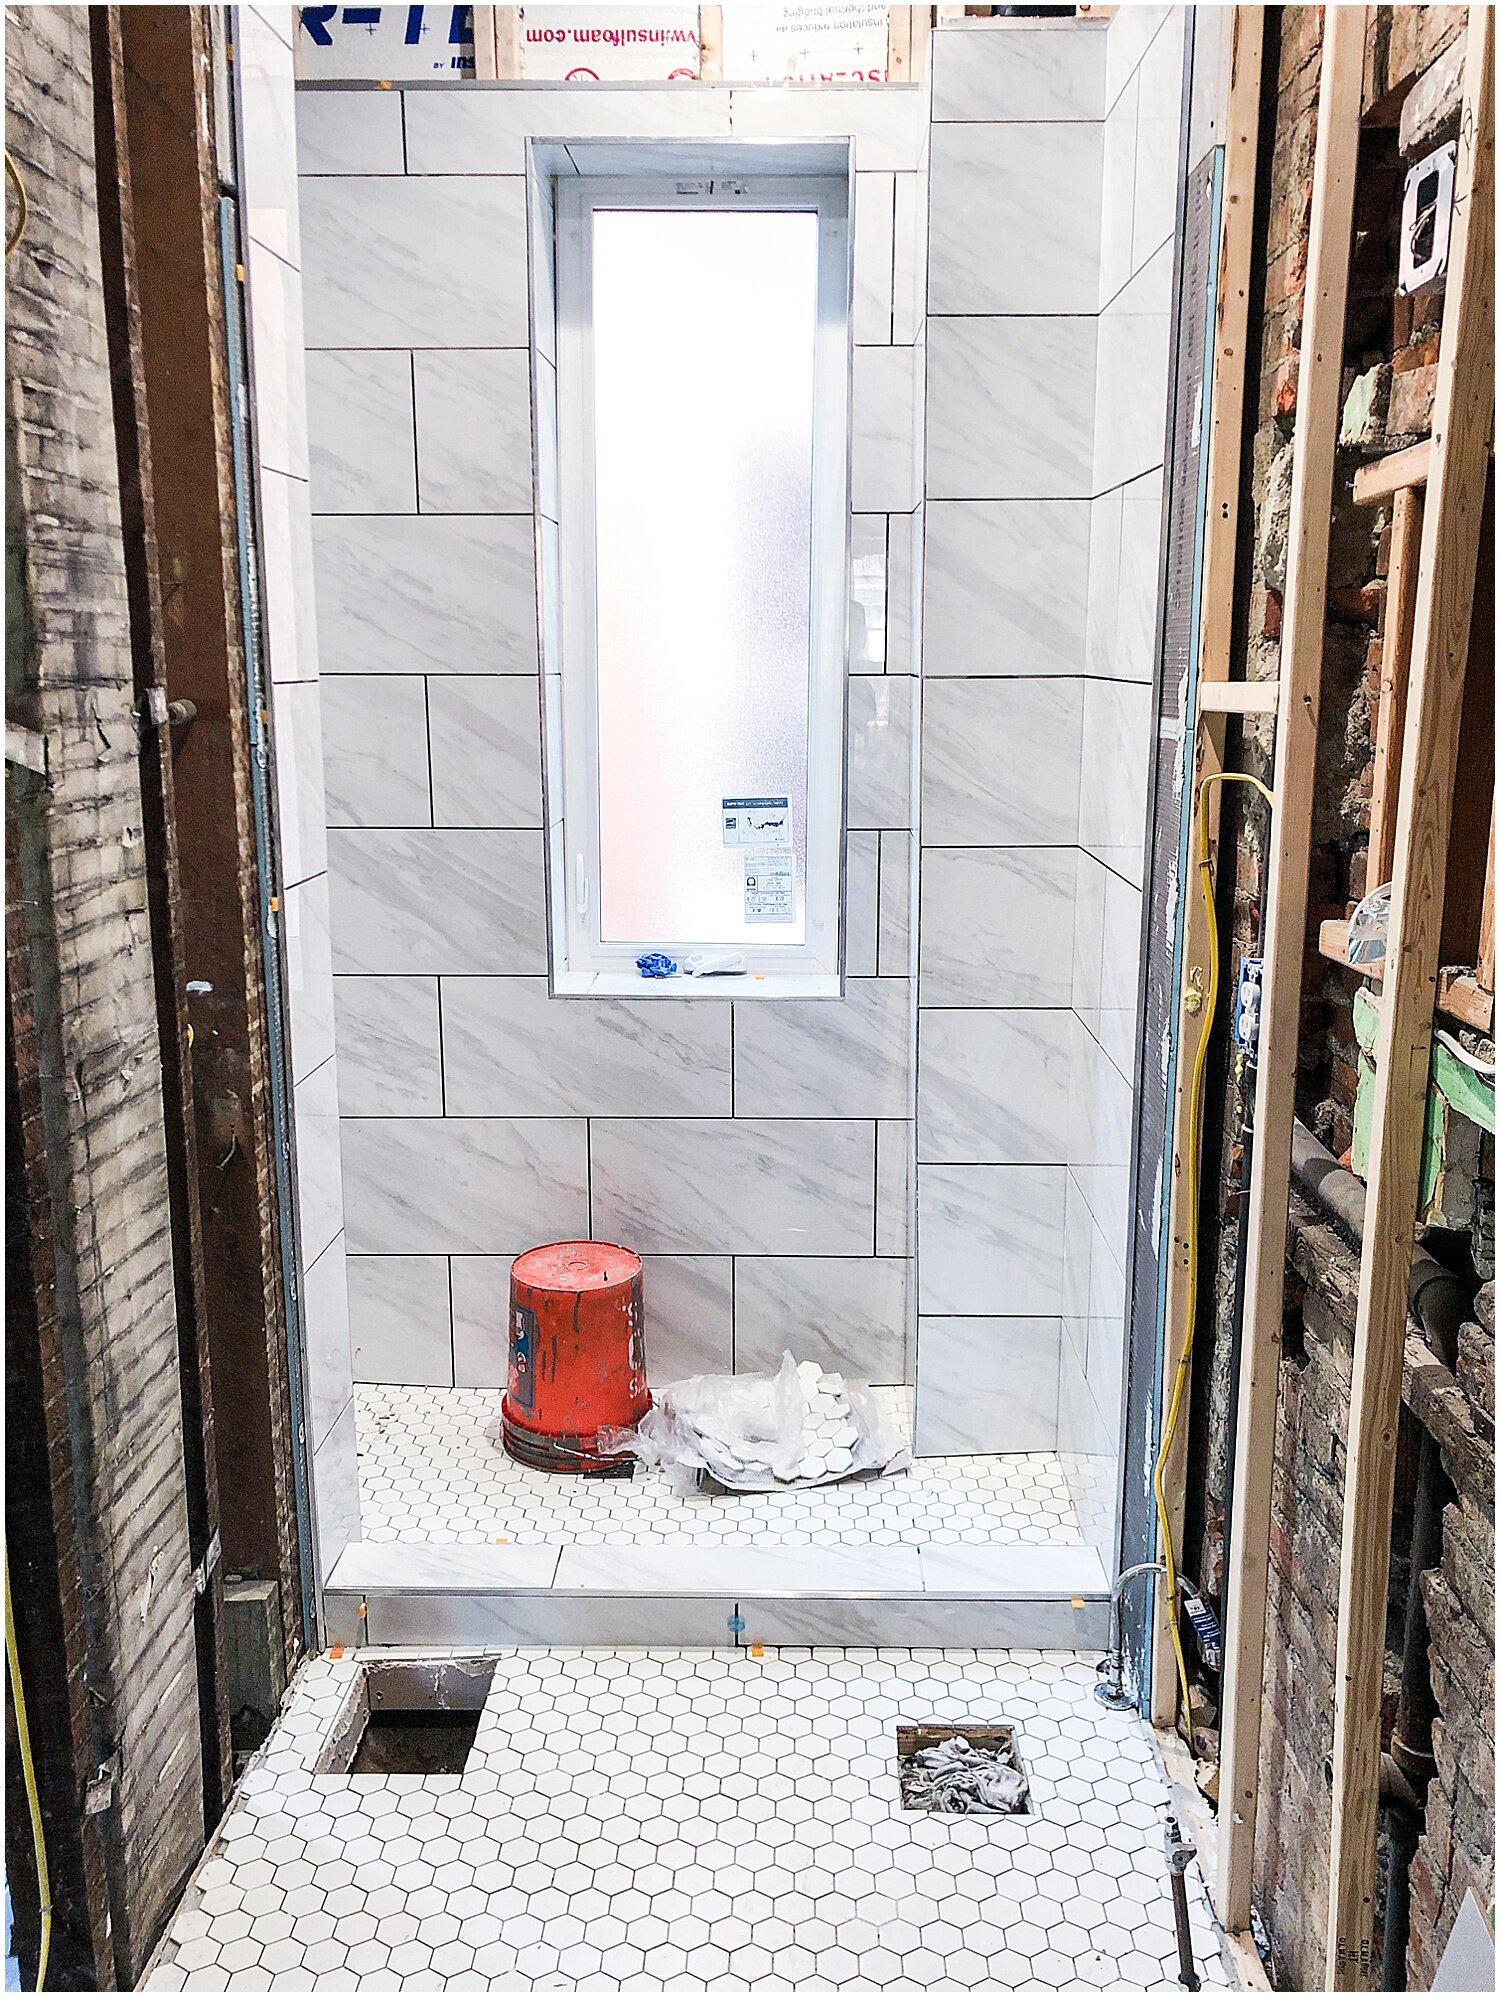
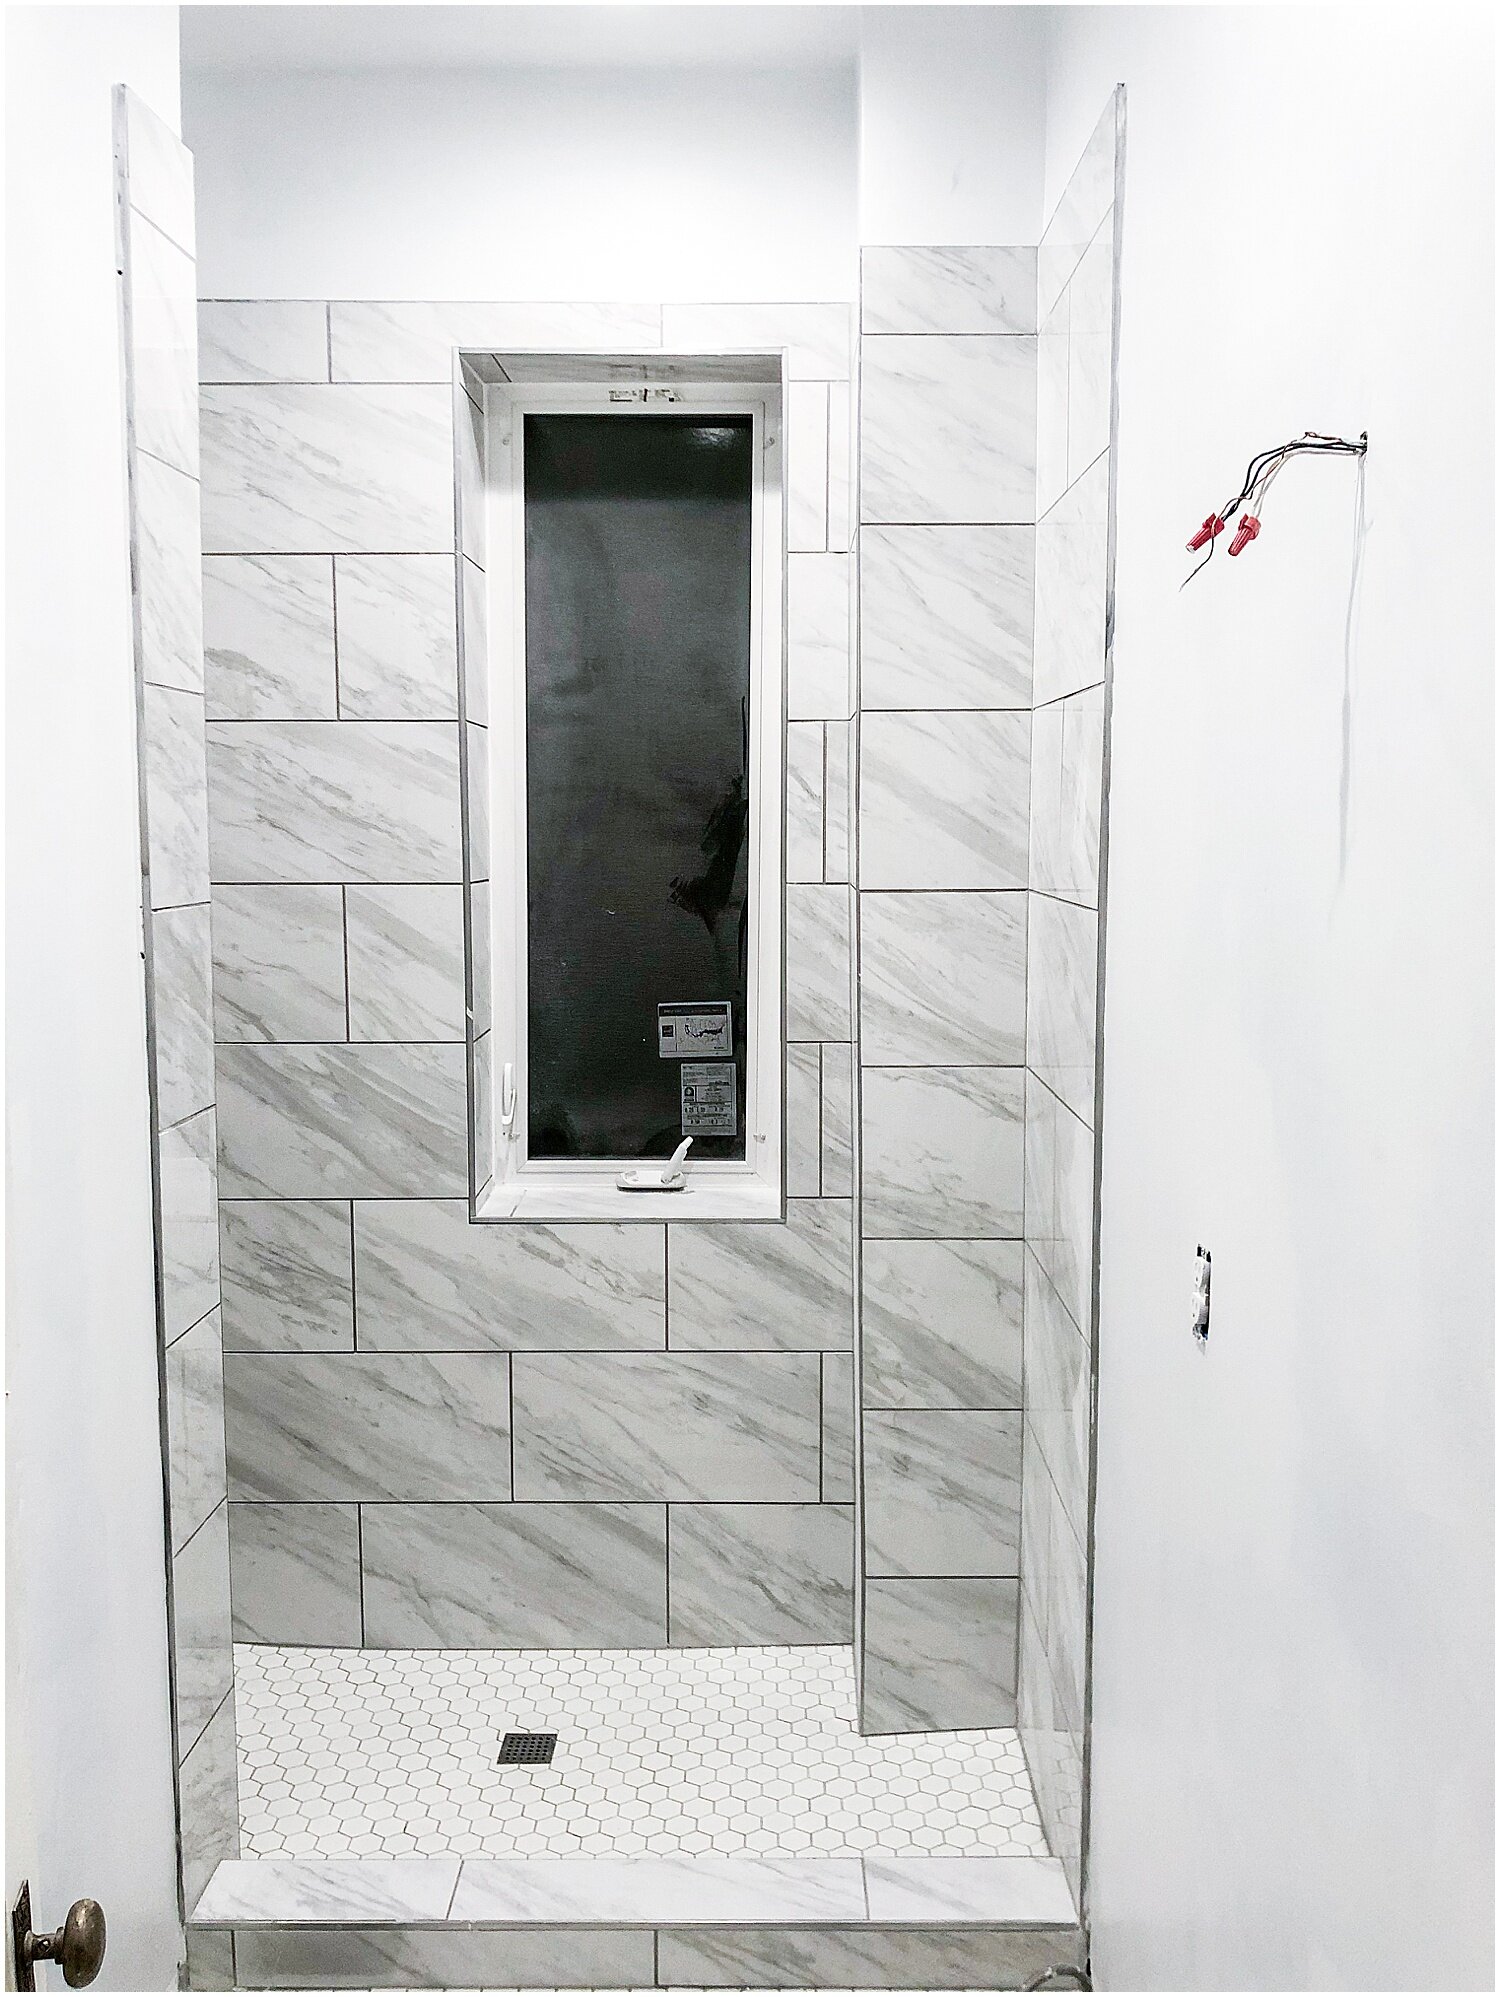
After much deliberation, we decided on porcelain hex tile for the bathroom and shower floor and faux marble porcelain tile for the shower itself. We used gray Italian tile in the rest of the area to match Holley’s vision for the kitchen design. As this project came closer to being finished, we continued to work on more detail work through the rest of the unit.
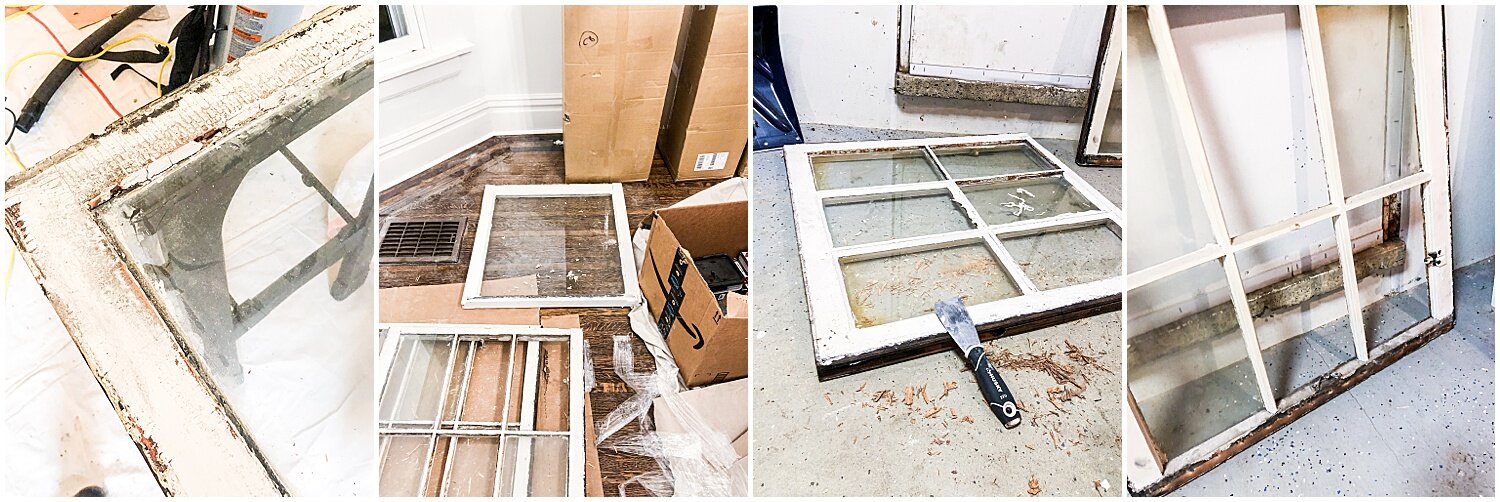
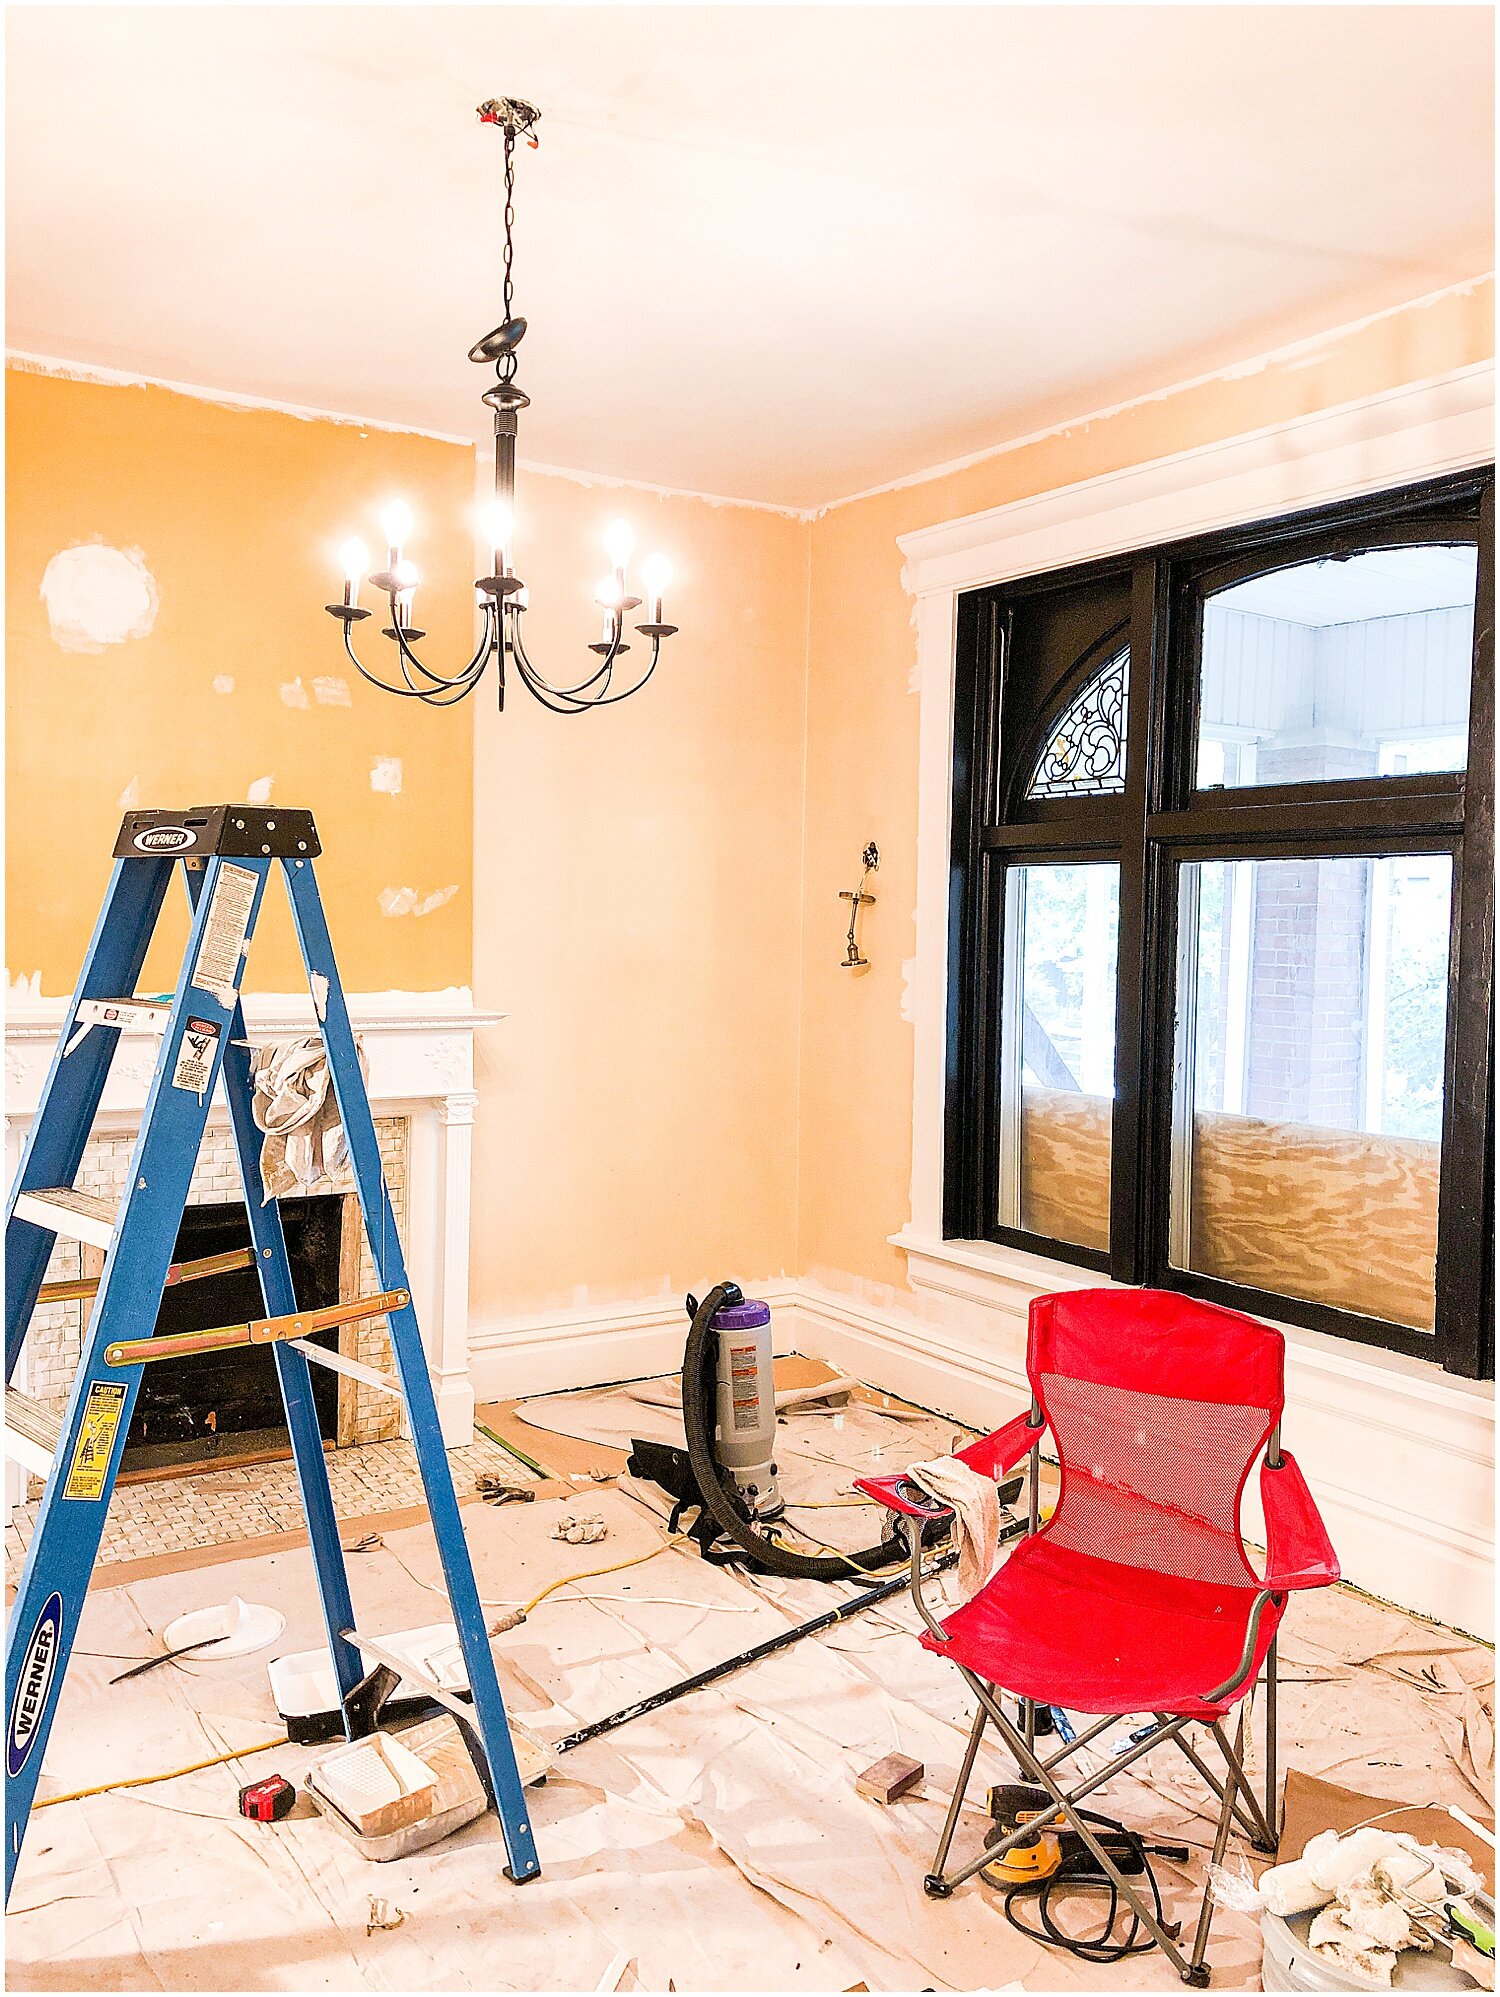
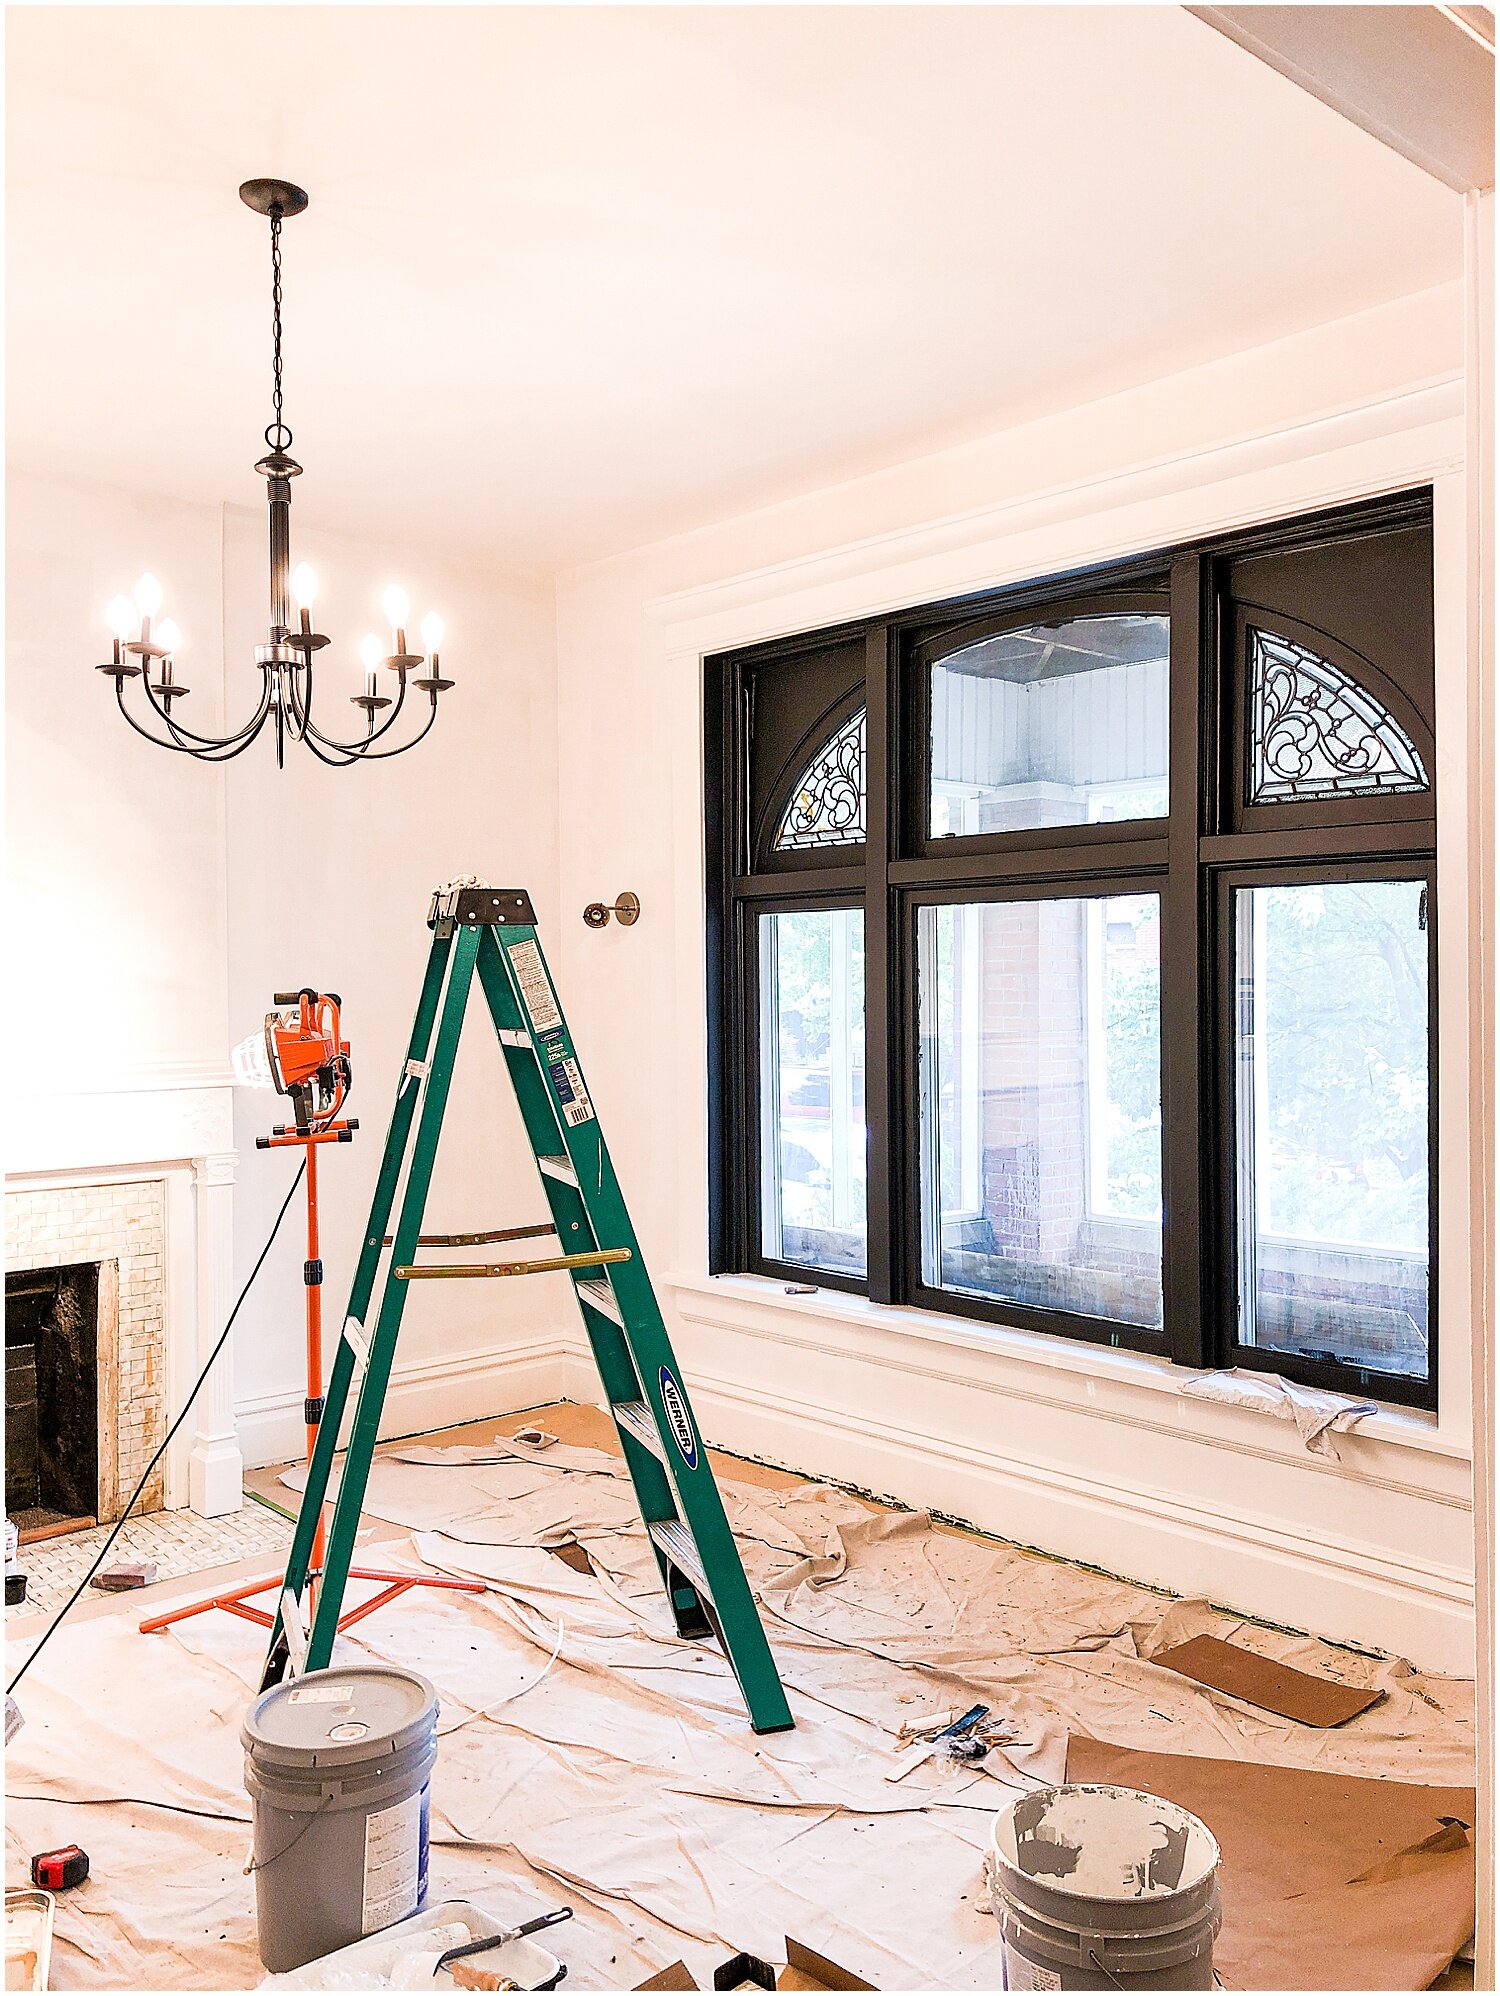
One of the reasons Matt loved this house was the original wood windows and door and window hardware. Almost all of it was intact throughout the house, just covered in paint and left to disrepair. On the first floor, Matt pulled each window apart, replaced all the ropes and re-attached all the weights, hand-restored each sash (sanded, repaired broken glass and wood, and re-glazed), and cleaned and polished the window hardware.
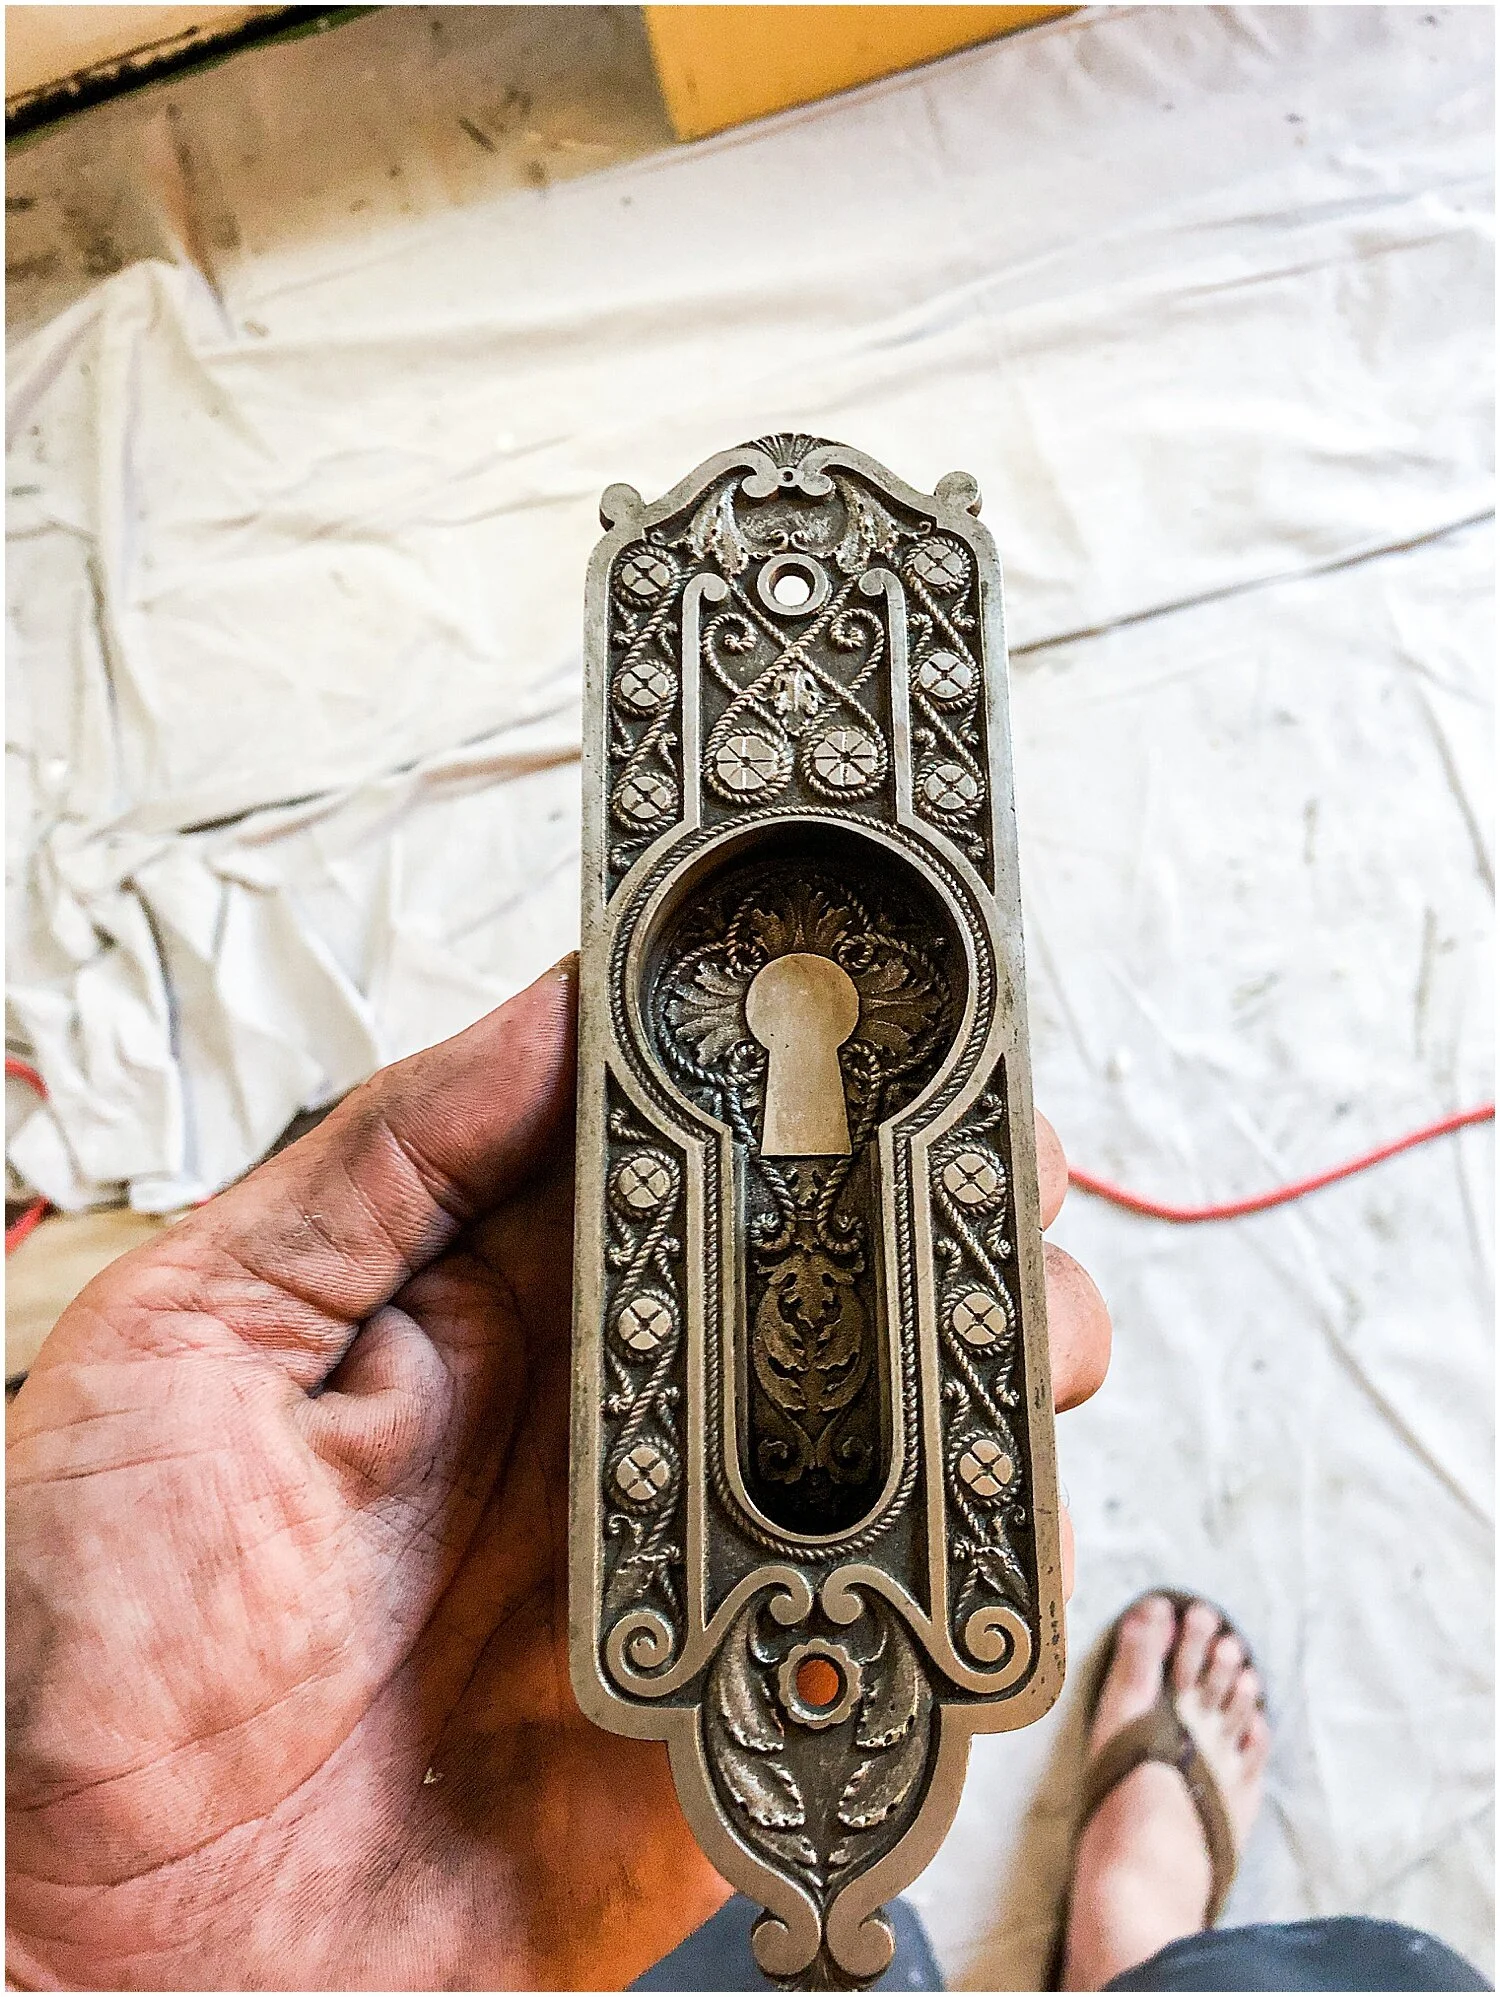
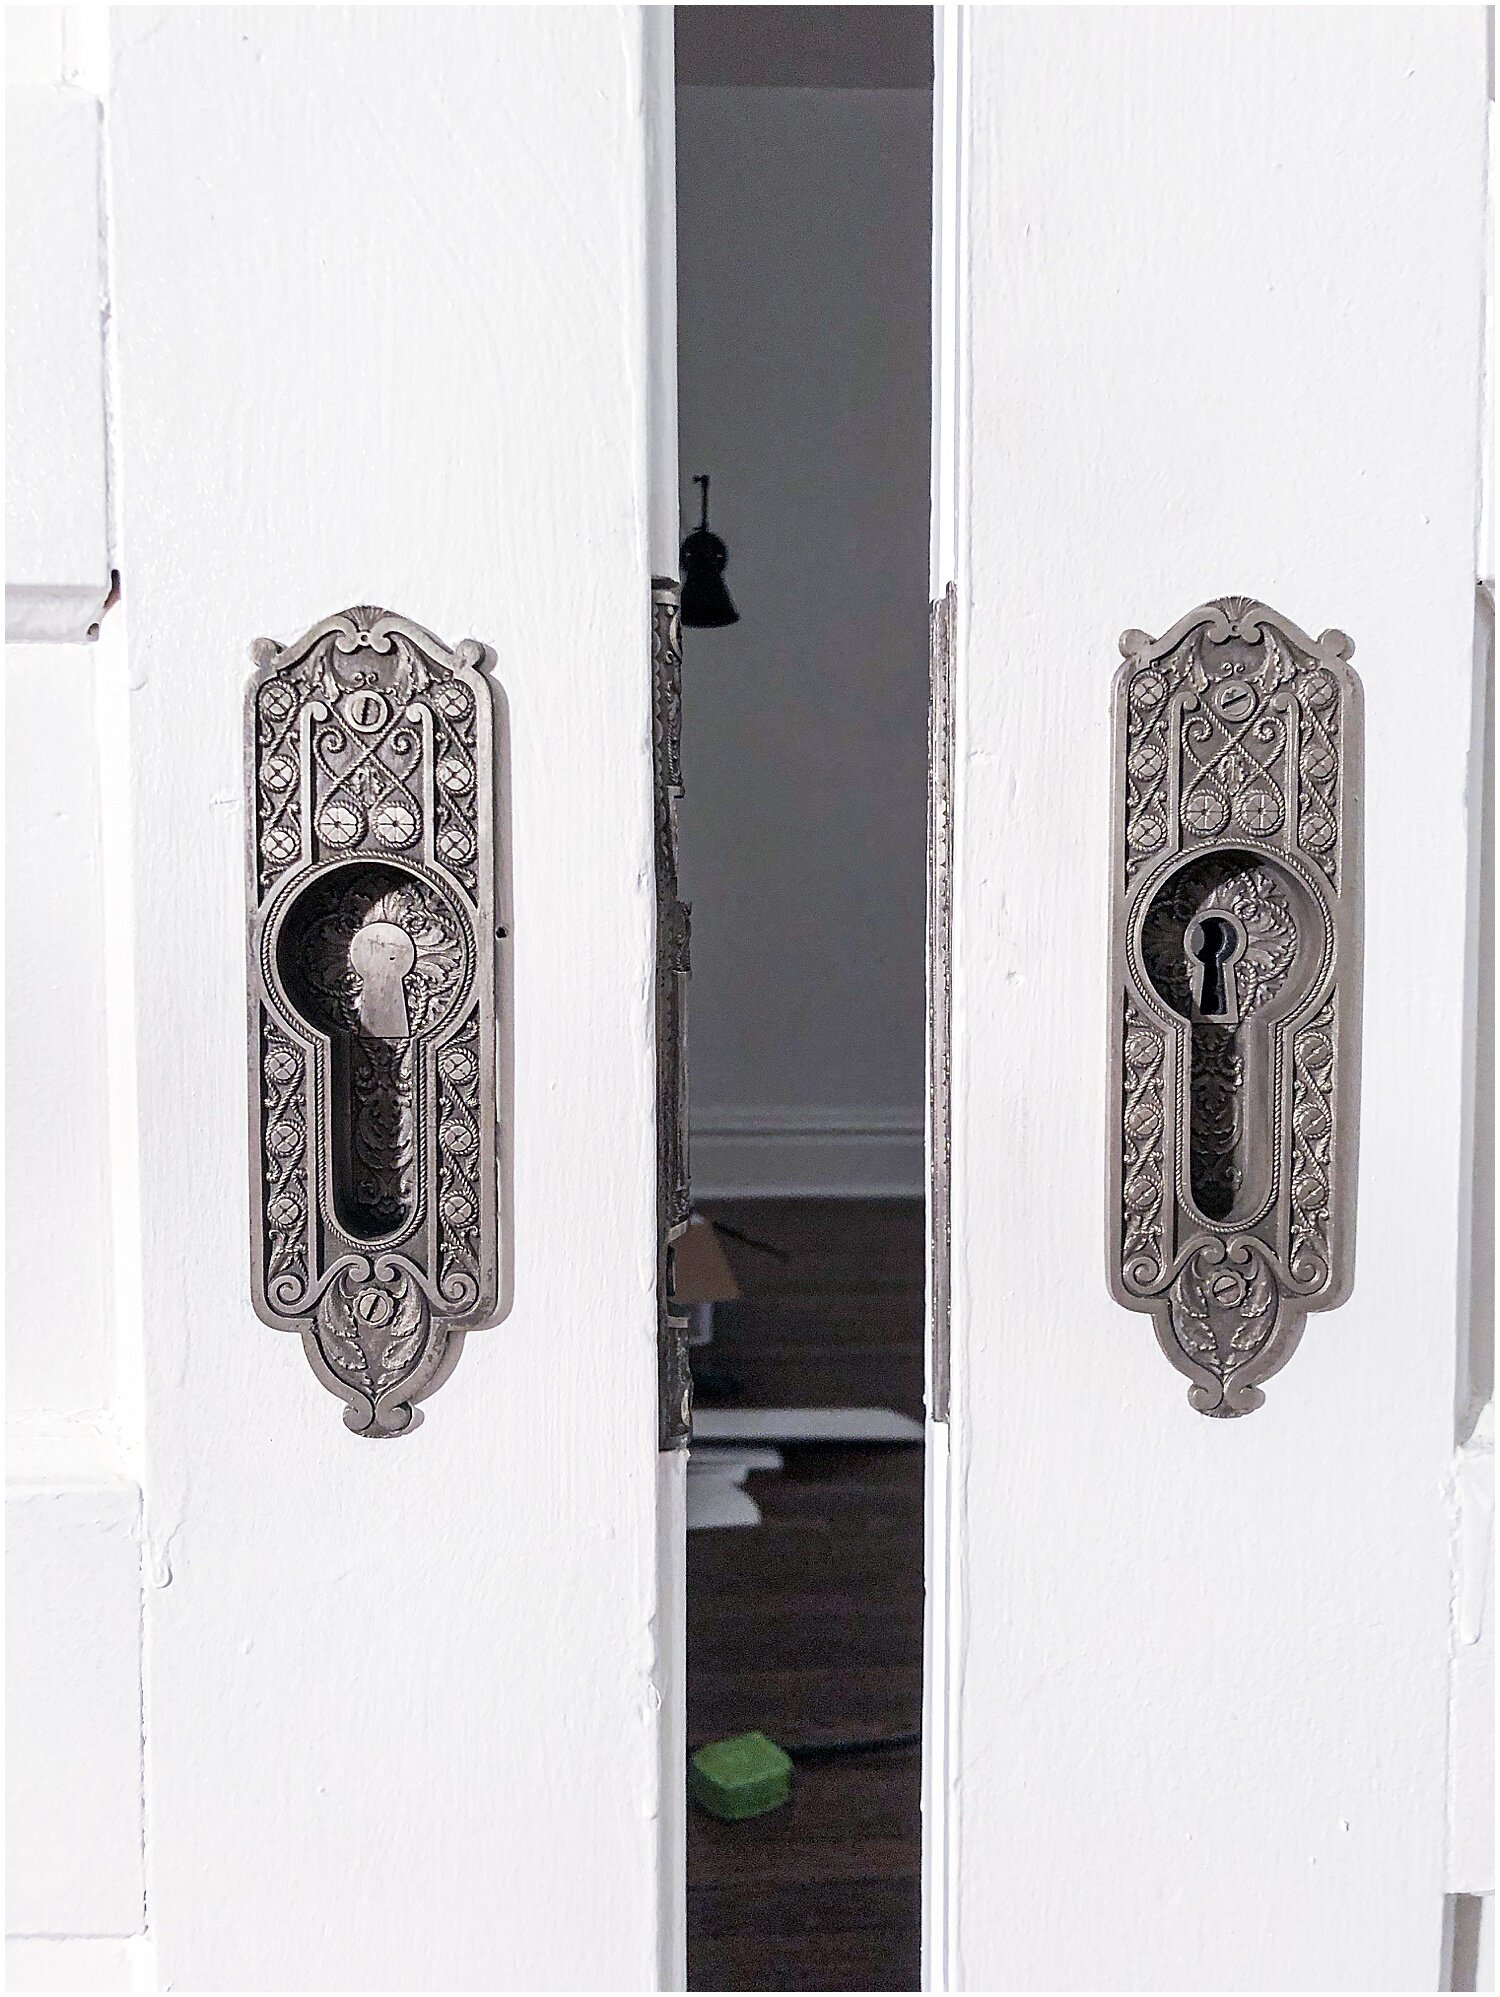
Cleaning the door hardware led to some unique discoveries as well. The pieces had so many layers of paint, that most of the pieces had little detail left. After stripping the paint, we uncovered stunning hardware with the original manufacturer’s initials and dates (1860). Each piece was unique in its own way and added to the character of the house.
One of the biggest projects was the front window, due to its size, disrepair, and scale of the work. Matt had to investigate the best ways to ensure he did not break any of the leaded prism glass, disassemble the entire unit, and diagnose some neglect issues. We had originally sought a quote to repair the window, but had been told it would cost more than we’d likely be willing to pay. After restoring all of the sashes and hardware, Matt got the whole unit back in working condition.

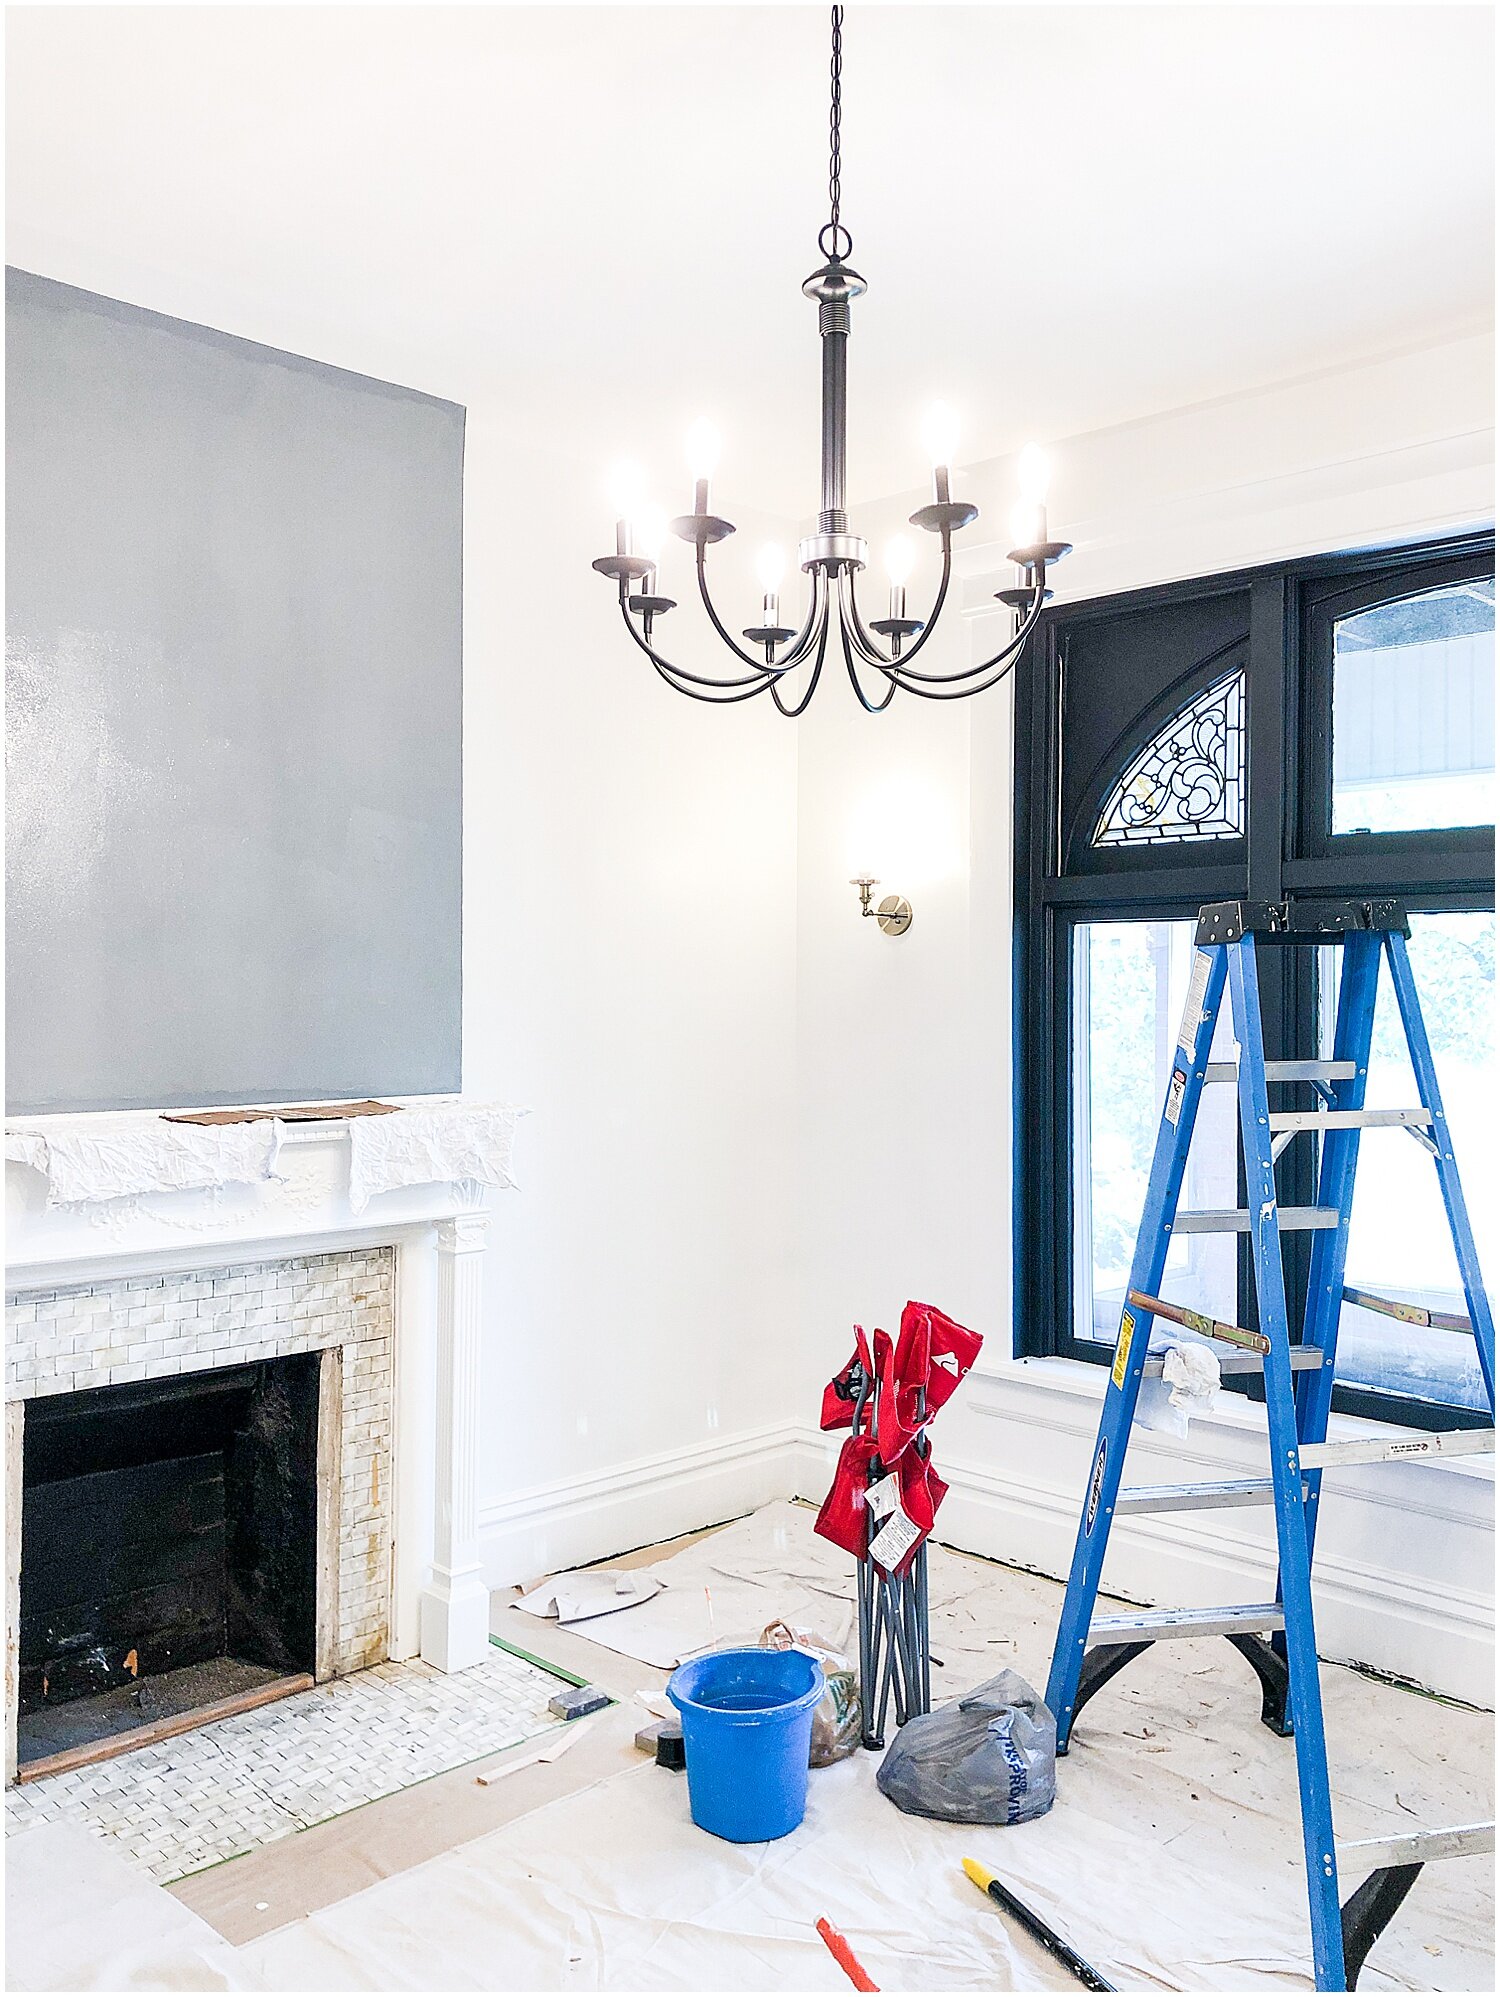
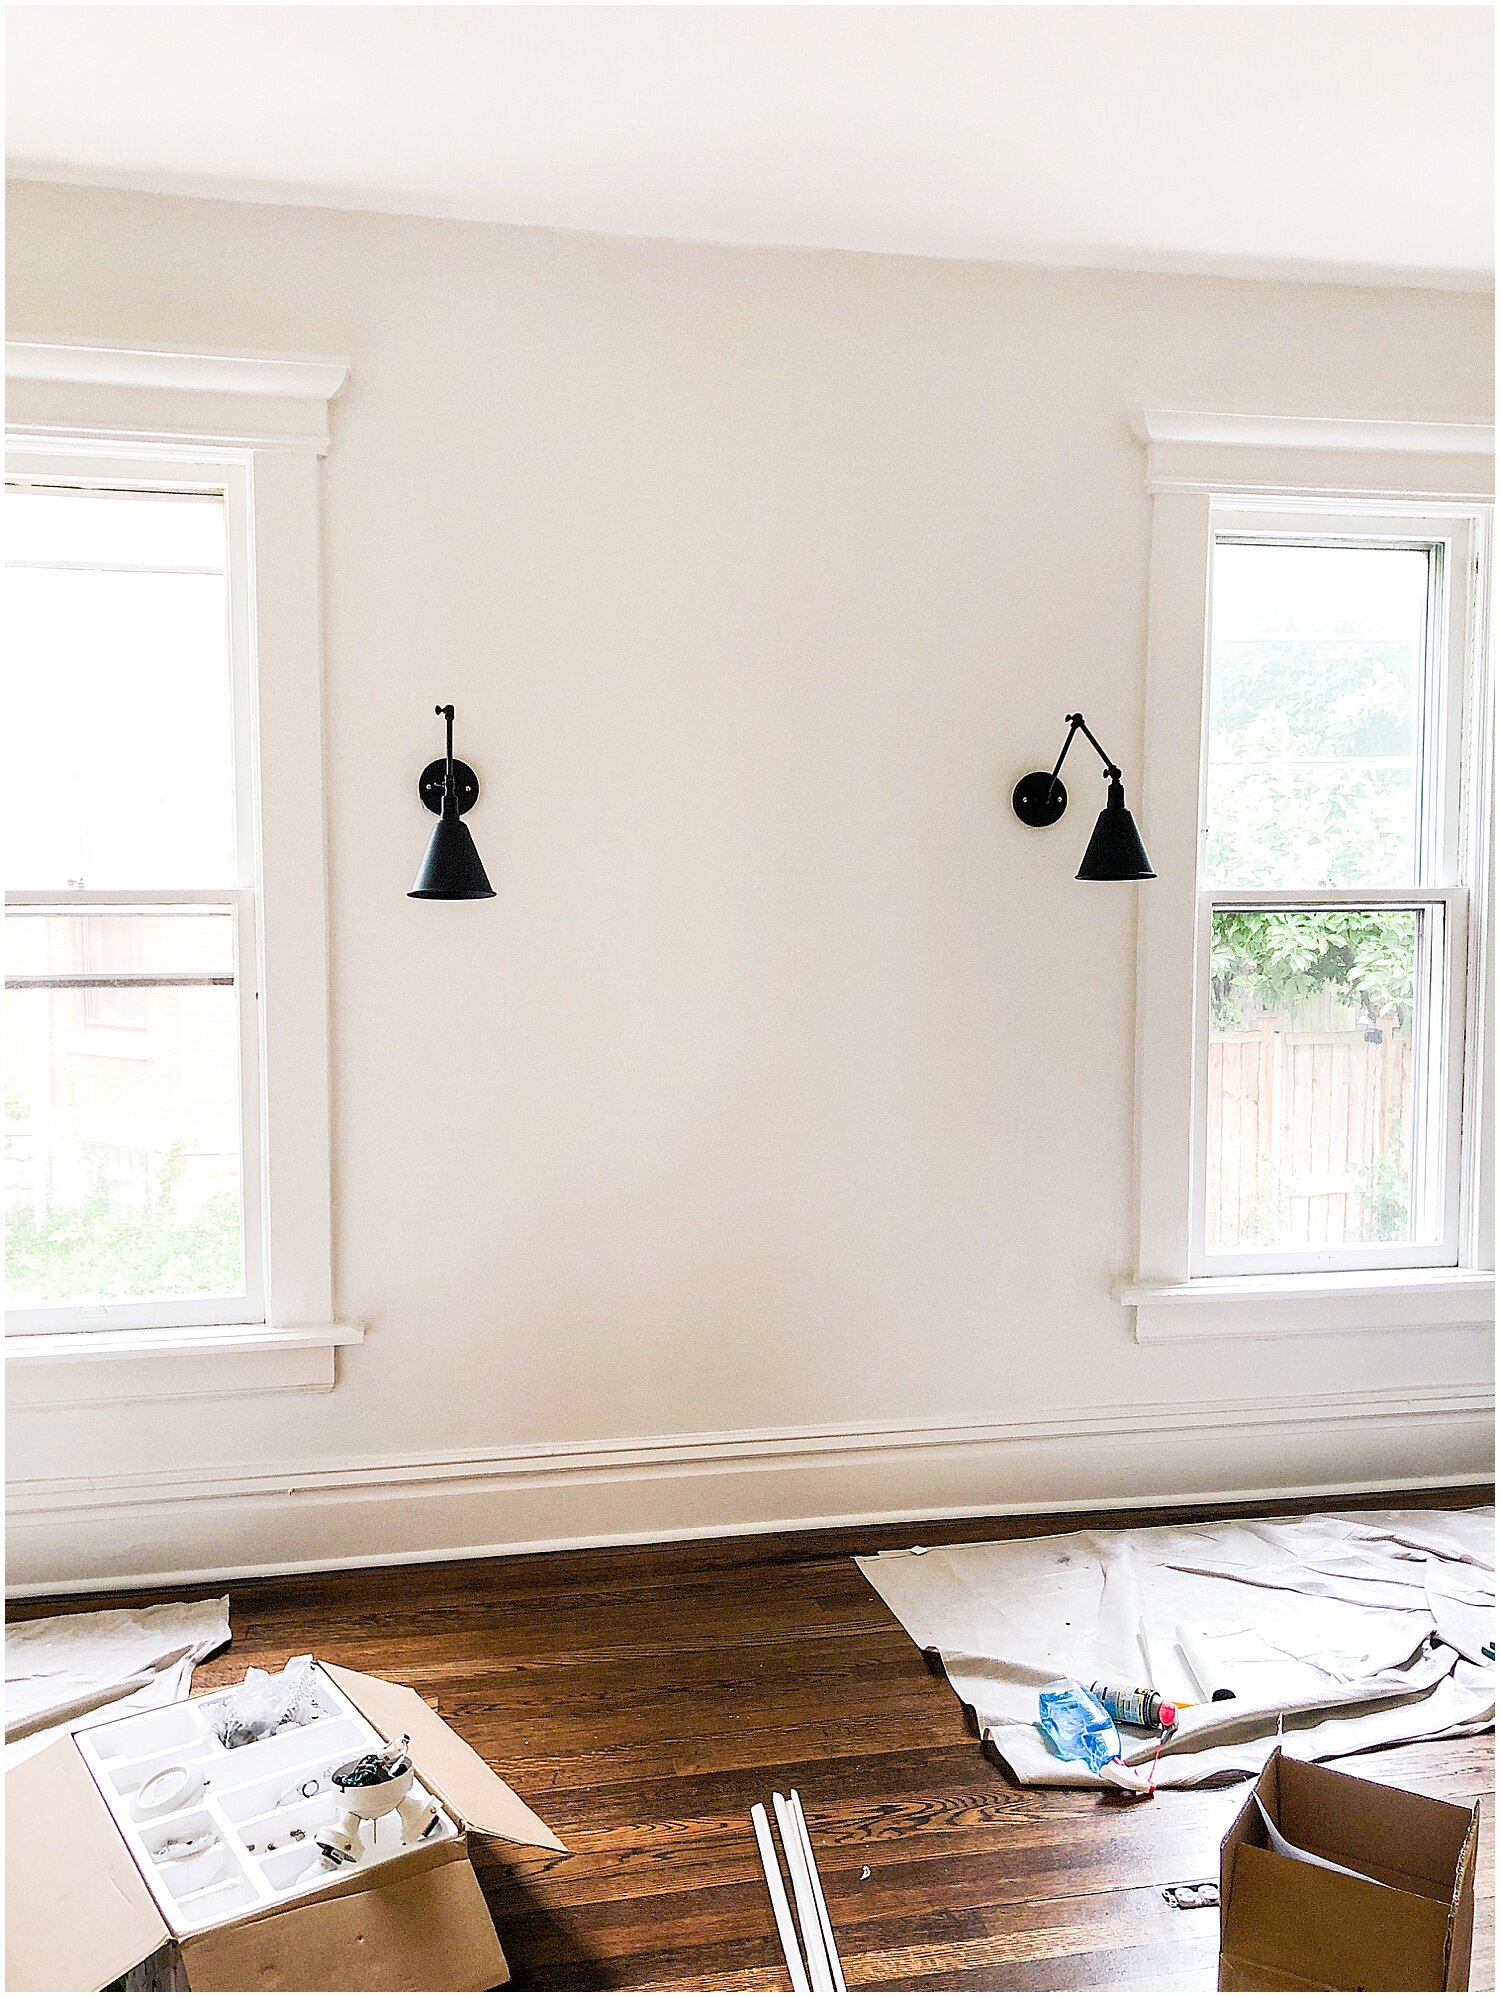
While we had the windows out and hardware removed, we started the long process of painting the front half of the house. We first hand washed all the walls with TSP to remove nicotine buildup and then painted the ceilings with with ceiling white. We painted the ornate trim with a semi-gloss pure white and finished the walls with a satin pure white. In each room, we decided to accent one detail with matte black to draw attention to a unique characteristic. The front door was solid oak, with beveled glass, and unique hardware. The front window in the living room was different than the rest of the first floor and had some intricate details. The fireplace in the dining room brought attention to the woodwork in the mantle. Though you cannot tell from the pictures, many, many coats of paint went into each room.
Along the way, Holley found some plaster that needed repair on some of the walls. After discovering that most people will not repair plaster, she started to research the best ways to restore old plaster walls, learning from British plaster craftsmen who still continue in the trade.
We also replaced all of the light fixtures in the house to bring life back into the rooms. Each room had several sconces, and we found some unique modern options that fit the character of the house, but were updated with a modern feel.


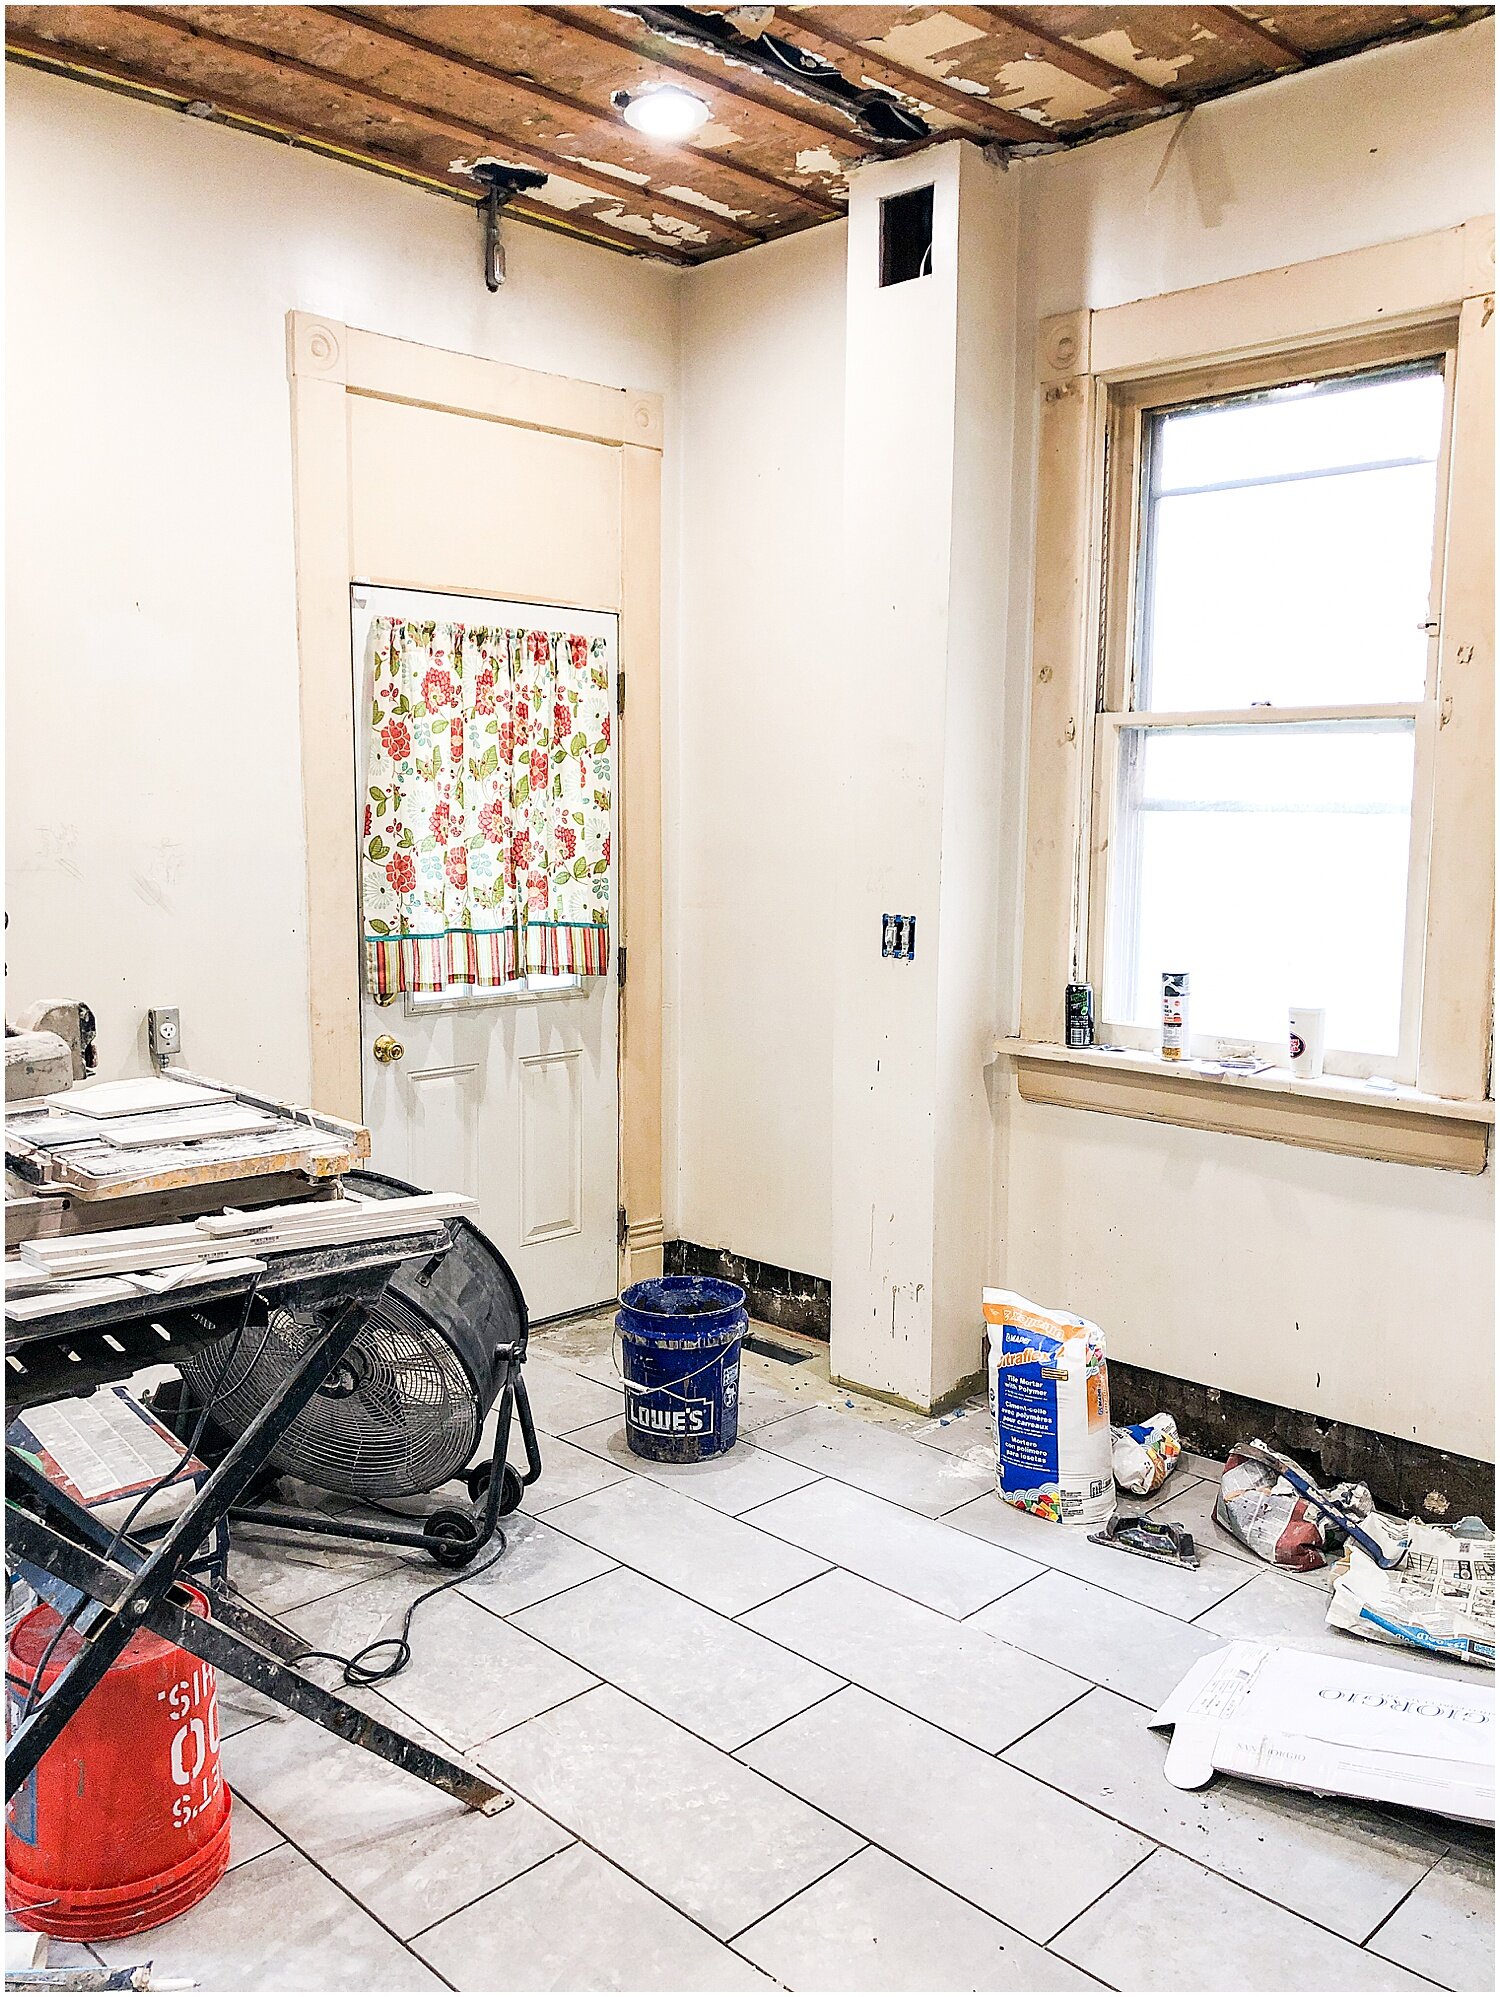
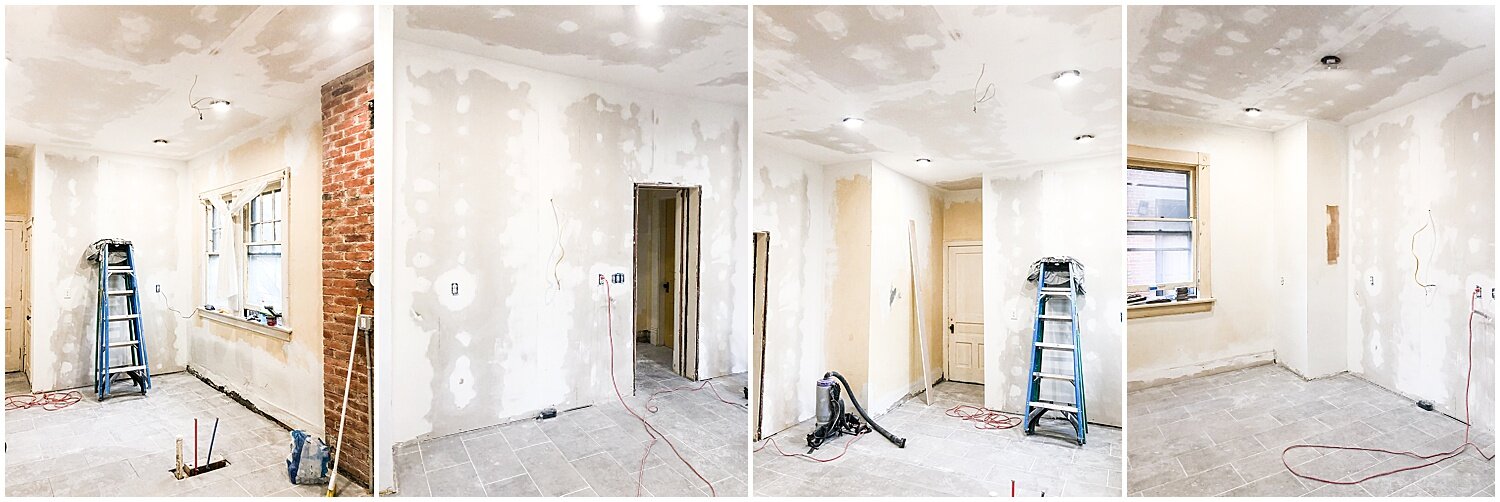
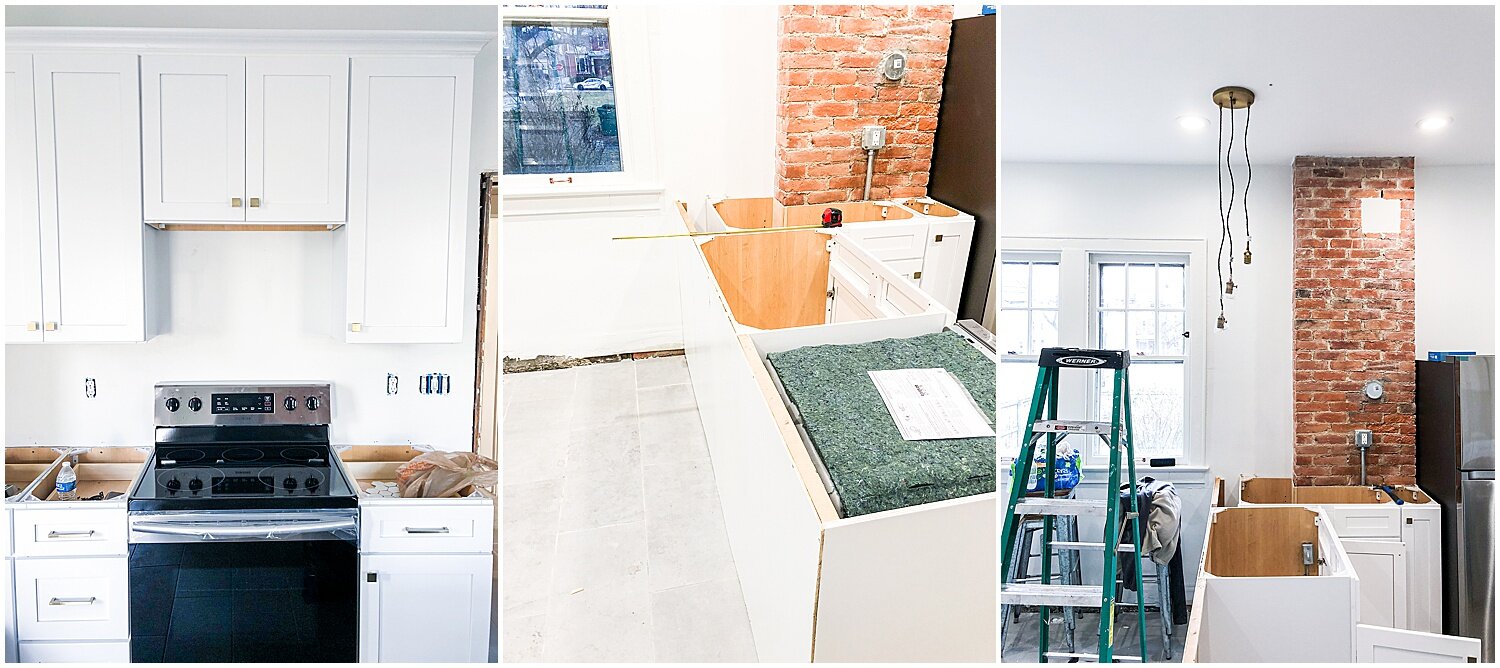
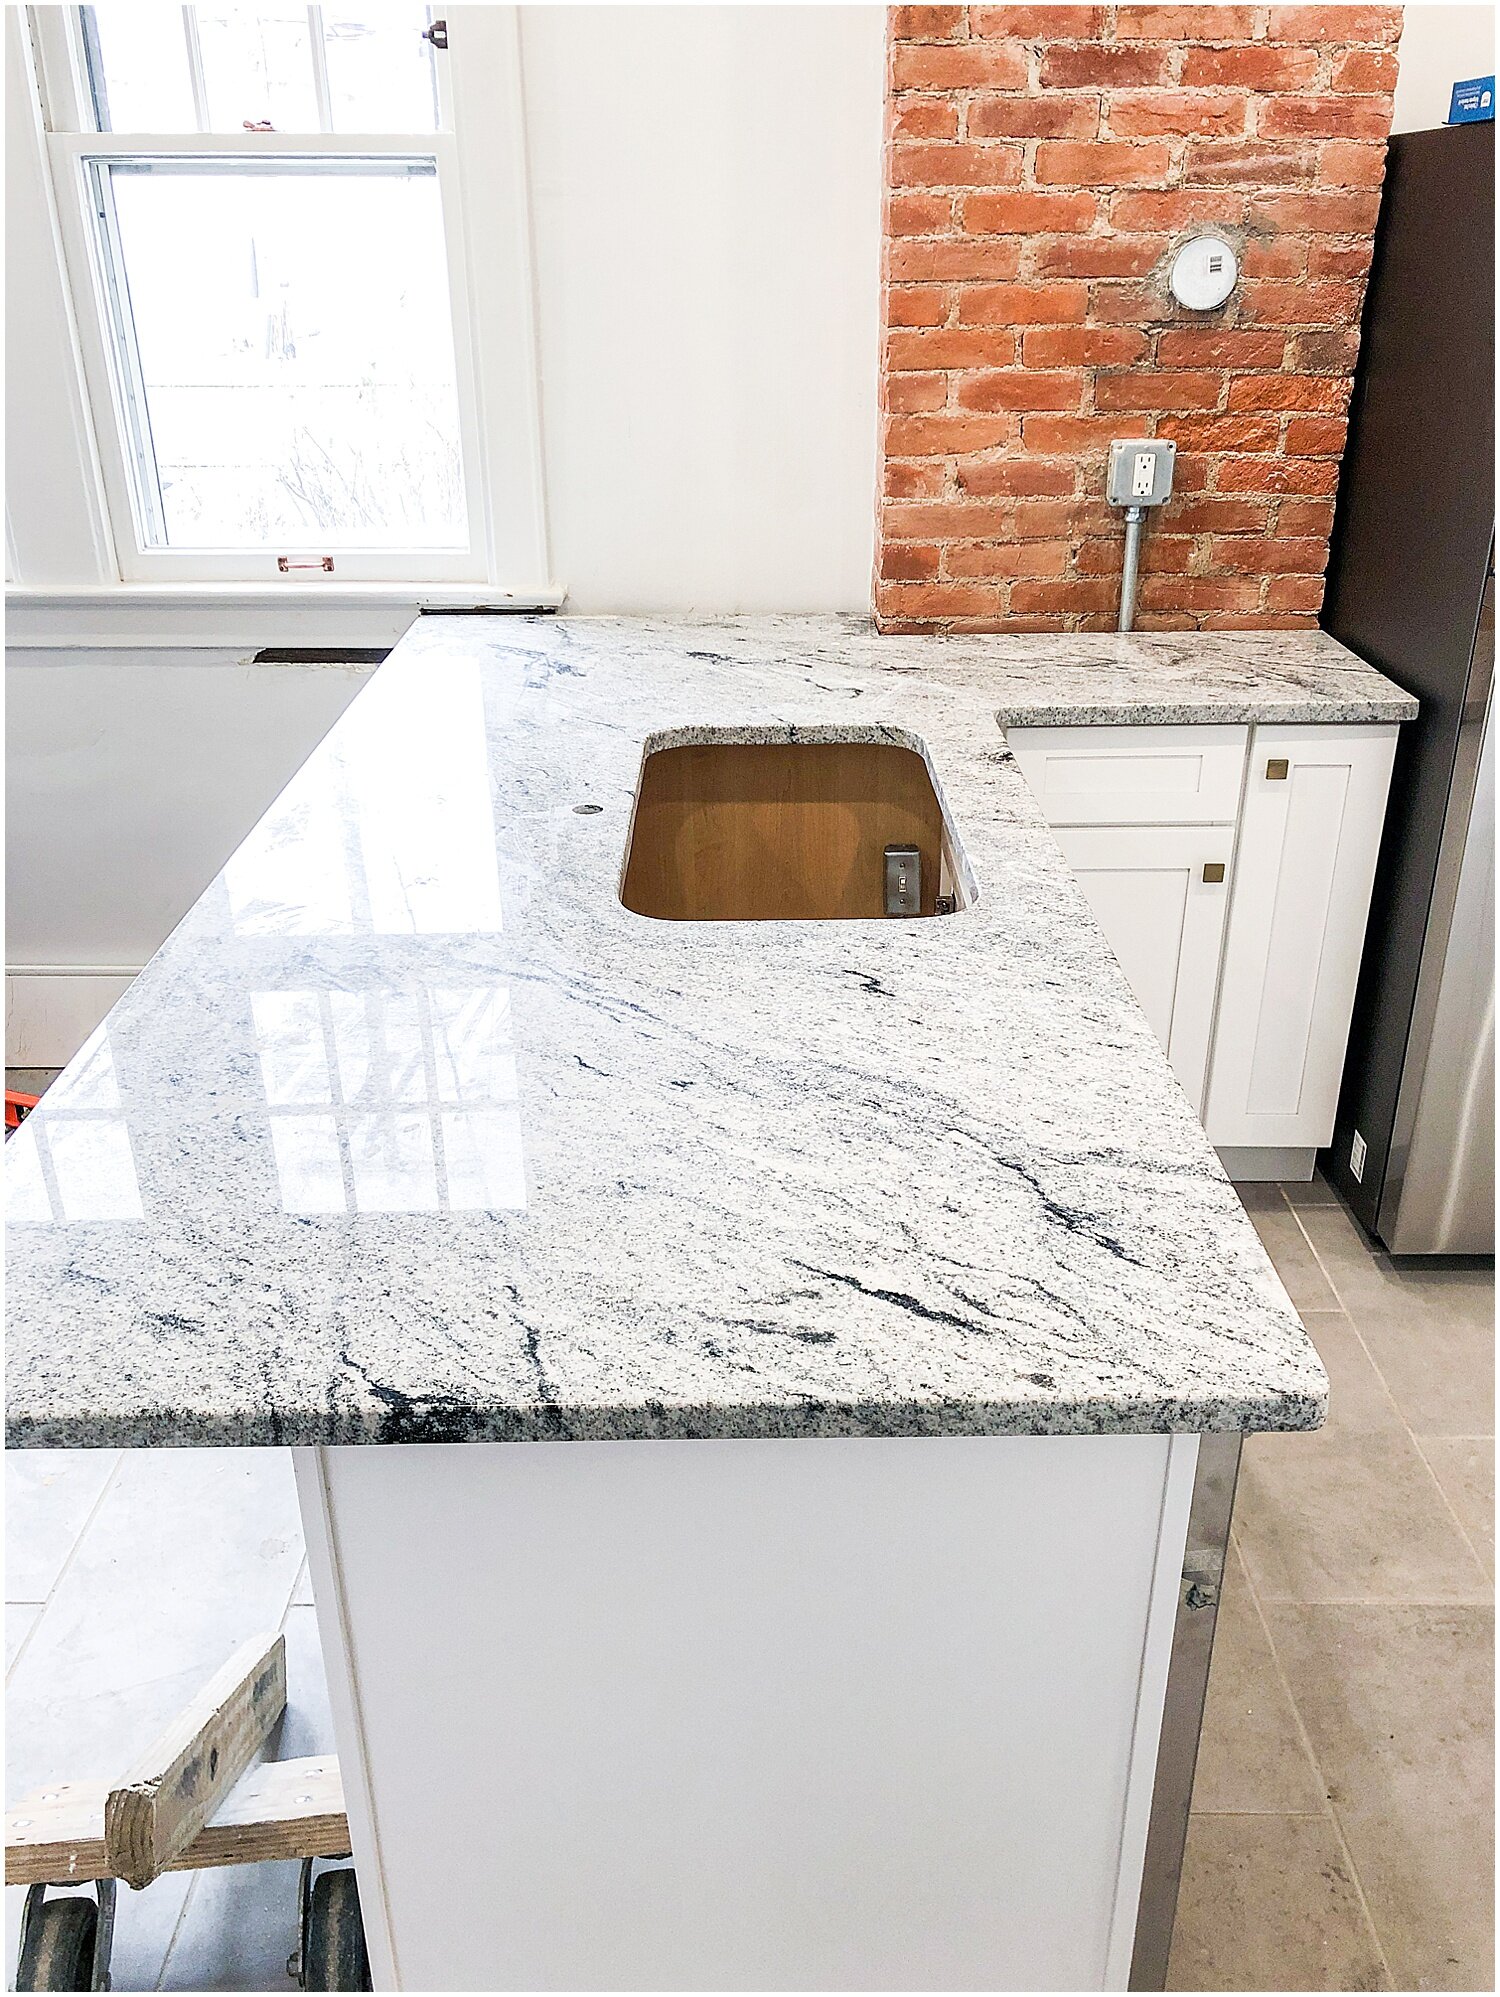
After the tile was complete in the kitchen and bathroom, we began the kitchen design and remodel process. Matt spent quite a few weekends at the house learning to master the art of mudding and sanding drywall, and it was a true learning experience. From the first wall to the finishing touches, he learned through experience how to get the job done right. We decided to leave the original wood burning stove chimney exposed to bring some character and history to the room.
Once the drywall was completed, we painted the kitchen in the same color scheme as the rest of the house. Matt restored all of the wood windows in here as well, replacing much of the glass in the 6-pane window sashes and adding a transom window from Architectural Salvage above the kitchen door to replace the plywood that had replaced it for many years. We installed the cabinets for the new kitchen design and decided on a Samsung suite of appliances for the unit. We decided on a gray and white granite countertop to match the rest cabinets and floors.
In the bathroom, we installed a new toilet and vanity and prepped everything for the plumbing and electric final installation. We decided on using gold accents through out the kitchen and bathroom and matched our cabinet hardware to champagne bronze Delta Trinsic sink faucets, shower hardware, and vanity mirror.
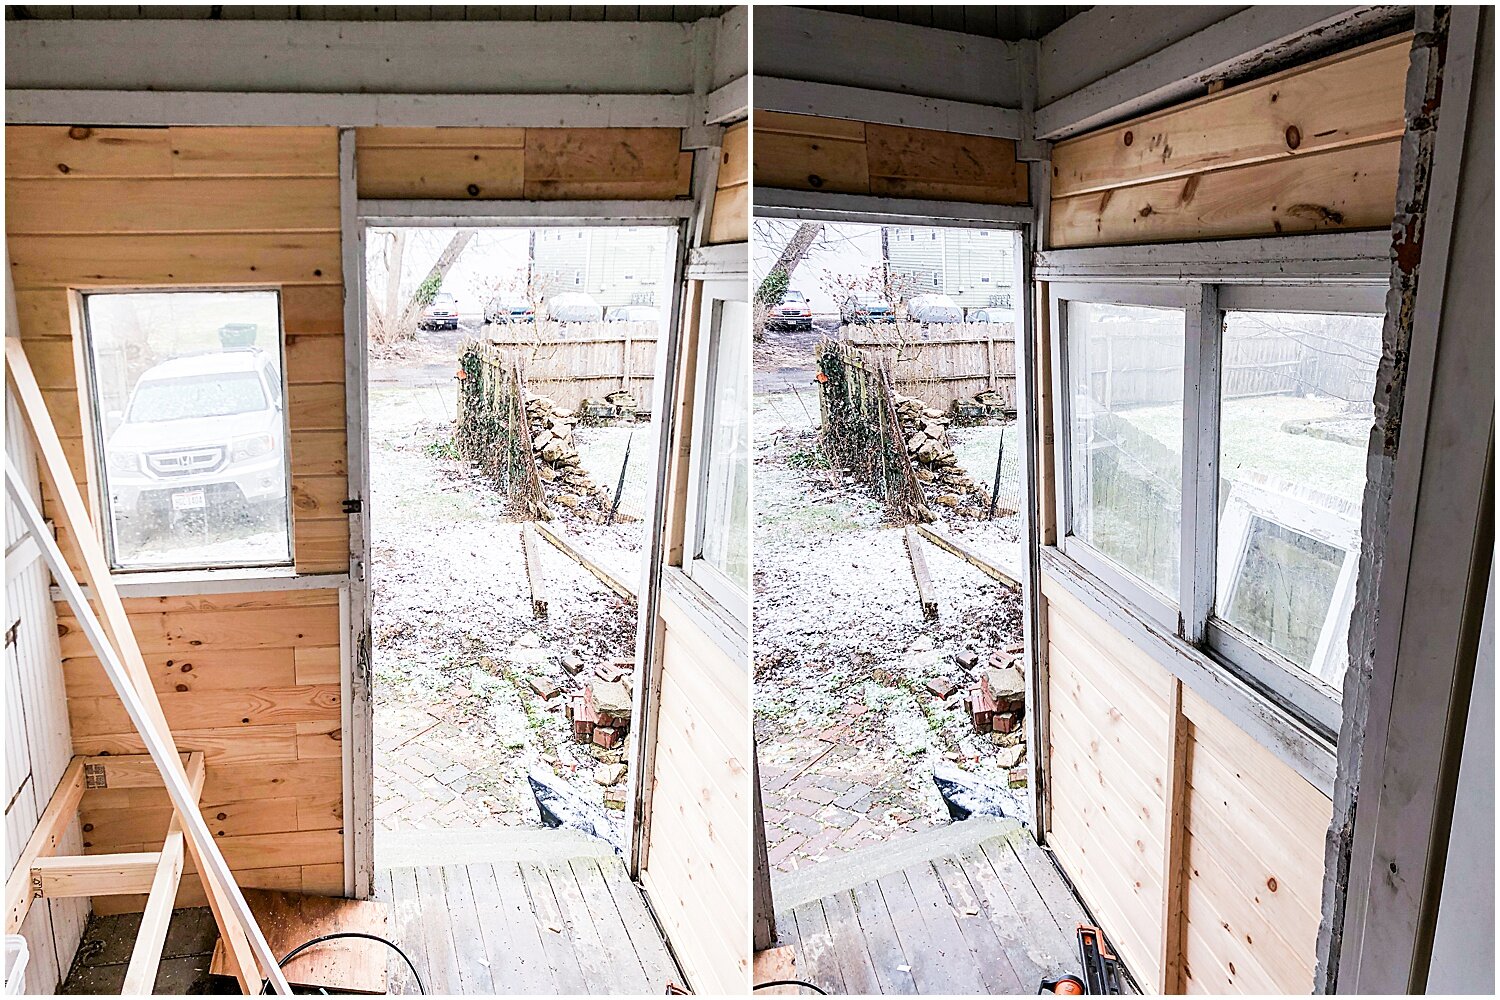
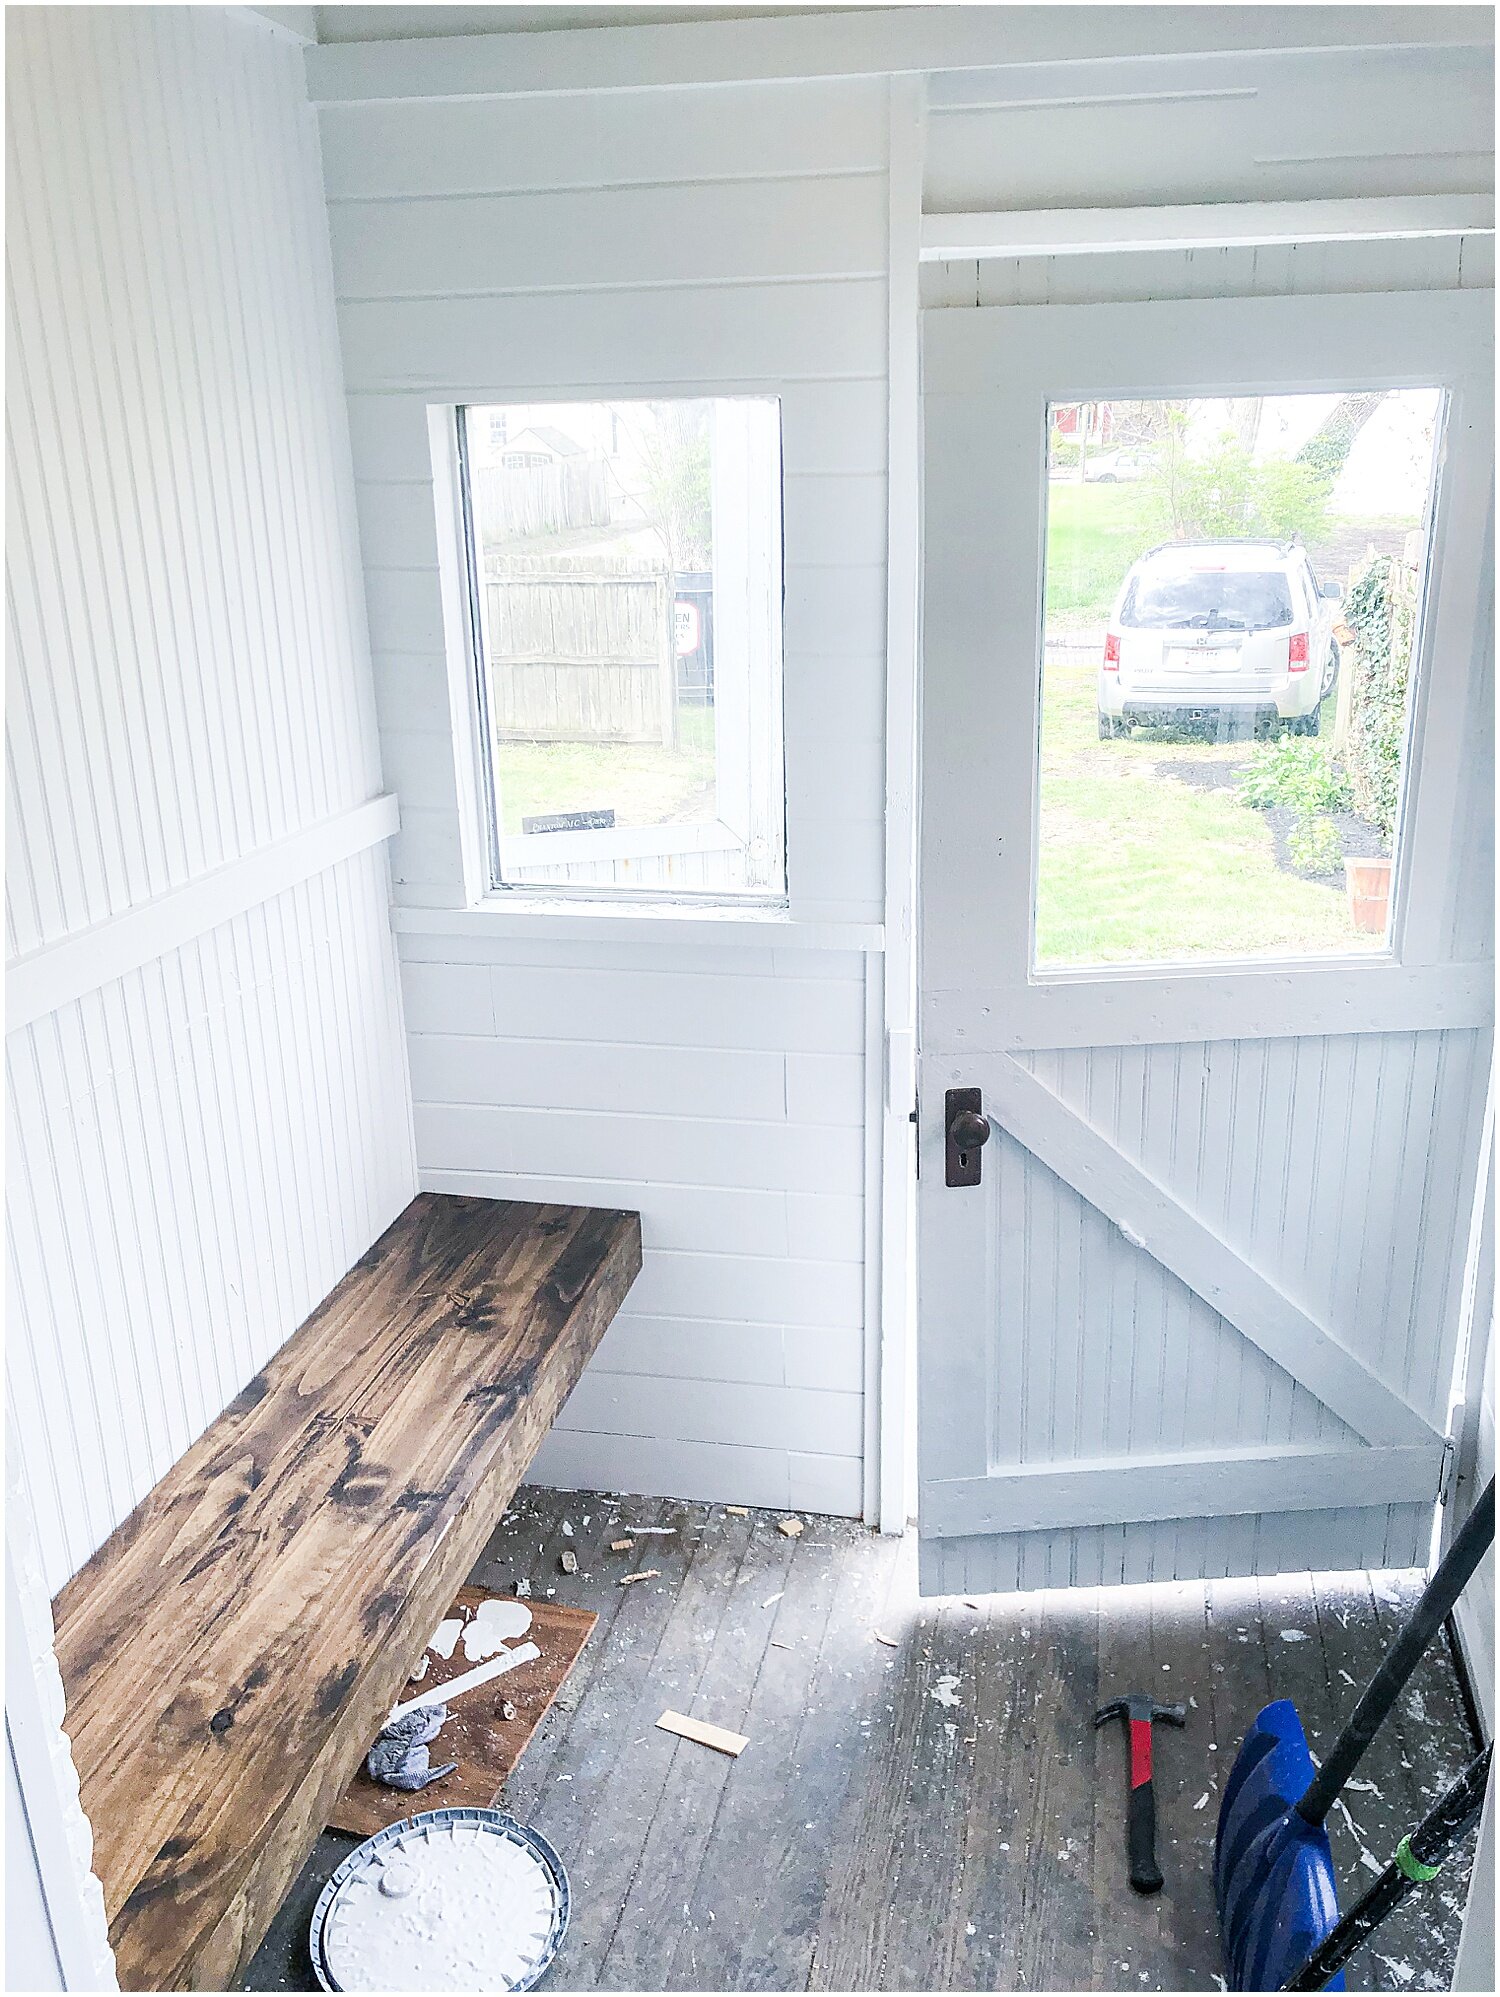
Lastly, we had a small mudroom off the back door of the kitchen that Matt reworked, adding tongue and groove siding, restoring the old door and windows, adding several coats of paint, and installing a floating bench to the side.


While this captures a few of the tasks that went into this renovation, hopefully it tells the story of how much work went into this project. In addition to the work above, we installed concrete piers, adjustable steel beams, and a new steal I-beam under the kitchen floor to prevent sagging in the joists. We updated the electric from Pushmatic and knob and tube to modern panels and wiring. We installed new high-high-efficiecny furnace and air-conditioning units for both units, as well as Nest smart thermostats. The front porch has some significant damage, so we re-framed the porch, replaced damaged boards, installed a new roof, and then replaced the rotting ceiling boards with new tongue and groove. We stripped the house of countless cable and phone wires hanging off of the exterior walls. We took down a dying ash tree in the backyard. We removed the screens on the porch that were depriving the front of the house with light and a breeze. We updated the landscaping as to not hide the beauty of the house.
Each of these projects were done in addition to everything you have seen above and were a part of why it took us so long to get this first unit done during our free time and on weekends. These were all of the tasks that look so simple on HGTV, but take what feels like a lifetime when you are doing it alone or trying to keep kids amused when the two of us tried to work on it together.
There were times we wanted to throw in the towel and quit, but those moments when we saw a small win kept us going. We tried to be intentional in finding those small wins and working to achieve them as much as possible. In the end, we learned a lot about what we liked to do and what we would be more efficient if we left it up to someone else. We learned why contractors charge the prices they do for some projects, and where we can save some money by doing it ourselves.
Coming up next, we will show some pictures of the completed project, so you can compare our first blog with the current state of the house!